


CiraSync Cloud Mobile Direct enables organizations to automatically synchronize corporate contacts from Microsoft 365 (Exchange Online) directly to managed iOS devices. By leveraging the CardDAV protocol and Workspace ONE MDM (formerly AirWatch), administrators can push a configuration profile to enrolled devices so that users see up-to-date company contacts in their native iOS Contacts app—without any end-user action required.
This guide walks you through two main phases: Part A — configuring CiraSync to generate the Workspace ONE configuration file, and Part B — deploying that configuration as an iOS profile in Workspace ONE MDM.
What You Need
- An active CiraSync subscription with Sync Tunnel access.
- Administrator access to the CiraSync dashboard.
- Administrator access to the Workspace ONE MDM console.
- iOS devices enrolled and managed via Workspace ONE.
- A Smart Group configured in Workspace ONE for the target users.
- A text editor such as Notepad (Windows) or TextEdit (macOS).
Part A: Configure CiraSync Mobile Direct
In this section, you will configure a Sync Tunnel in CiraSync, enable Mobile Direct, and download the configuration file that will be deployed to Workspace ONE.
Step 1: Open the Sync Tunnel Wizard
Log in to your CiraSync dashboard. Navigate to the Contacts section and select the Sync Tunnel you wish to configure. If you have not yet created a Sync Tunnel, create one by clicking the + icon next to Contacts in the left-hand navigation.
Step 2: Enable Mobile Direct
In the third step of the Sync Tunnel wizard, scroll down to the Mobile Direct section. Check the box to enable Mobile Direct. This activates seamless contact synchronization directly to mobile devices via your MDM policy.
Step 3: Select Workspace ONE as Your MDM Provider
From the MDM Provider dropdown, select Workspace ONE. This tells CiraSync to generate a configuration file formatted specifically for Workspace ONE.
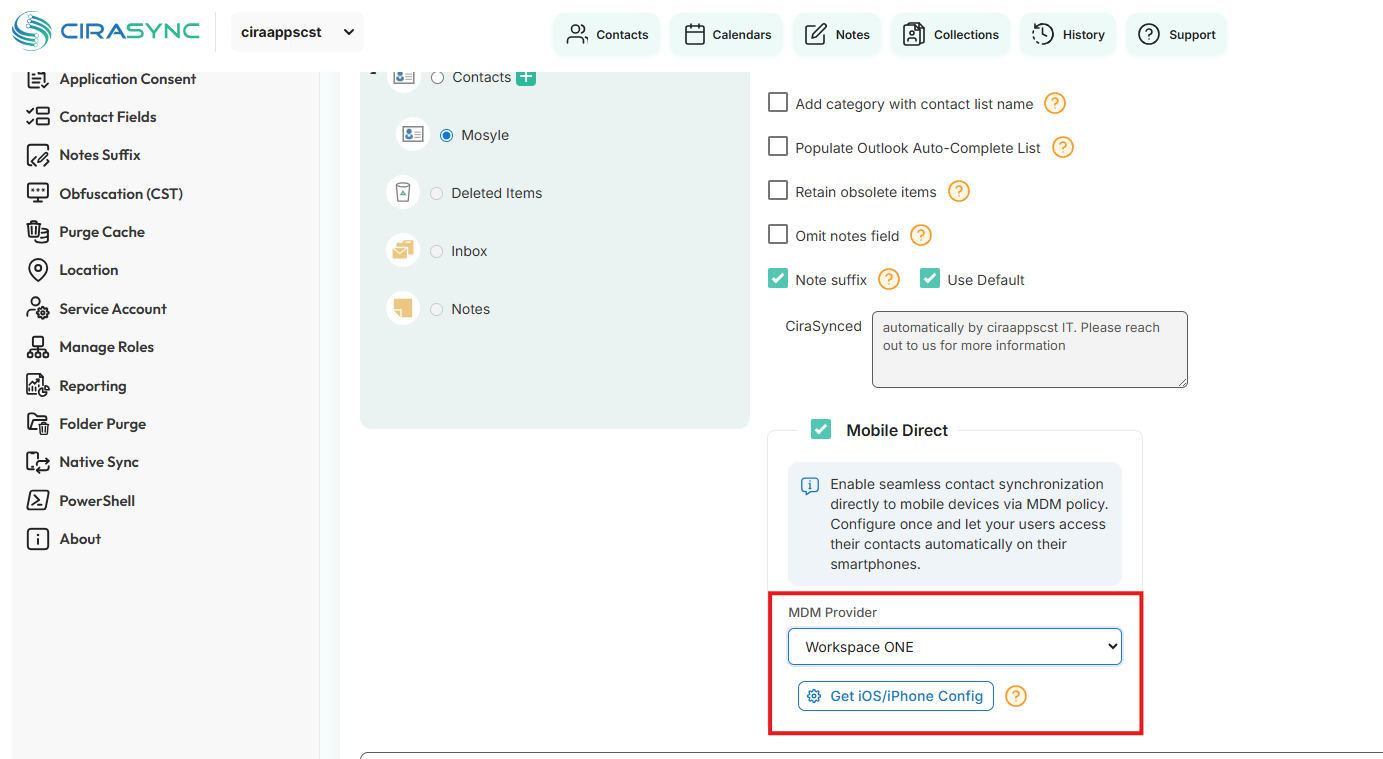
Figure 1: CiraSync Sync Tunnel wizard with Mobile Direct enabled and Workspace ONE selected.
Step 4: Download the Configuration File
Click the Get iOS/iPhone Config button to download the XML configuration file. Save this file to a known location on your computer.
| TipThe downloaded file contains CardDAV account settings pre-configured for your CiraSync Sync Tunnel. You will paste the contents of this file into Workspace ONE in Part B. |
Step 5: Edit the Configuration File
Open the downloaded configuration file in a text editor (such as Notepad on Windows). Select all the contents of the file and copy them to your clipboard. You will paste this into Workspace ONE in the next part.
| ⚠️ ImportantDo not modify the XML content. Copy it exactly as generated by CiraSync. Any changes may cause the CardDAV profile to fail on devices. |
Part B: Deploy the Profile in Workspace ONE MDM
In this section, you will create a new iOS device profile in Workspace ONE MDM and paste the CiraSync configuration into a Custom Settings payload.
Step 1: Navigate to Profiles
In the Workspace ONE console, go to Resources → Profiles & Baselines → Profiles. This is where all device configuration profiles are managed.
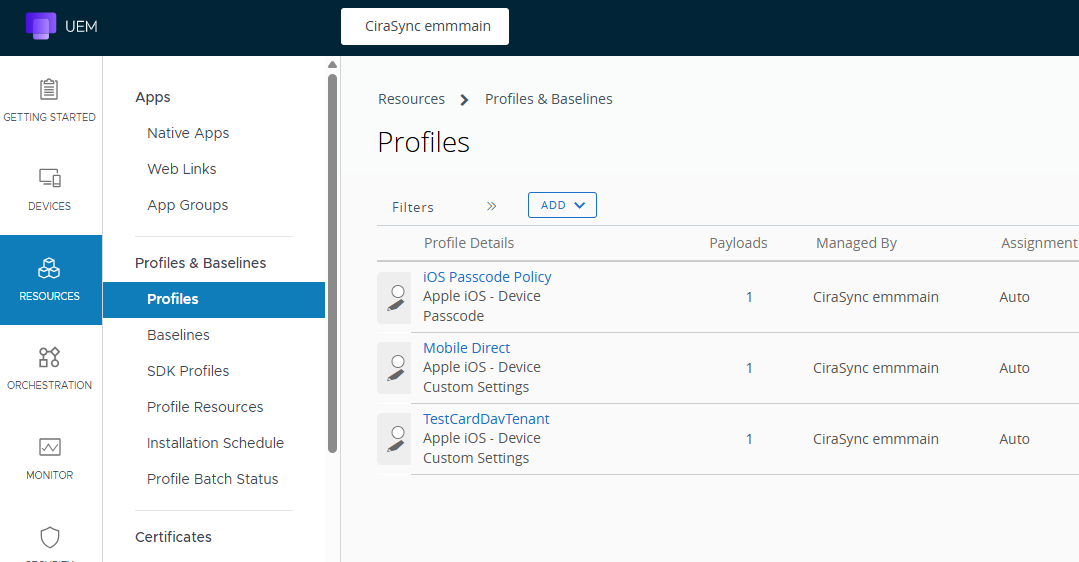
Figure 2: Workspace ONE UEM Profiles & Baselines page.
Step 2: Add a New Profile
Click the ADD dropdown button and select Add Profile.
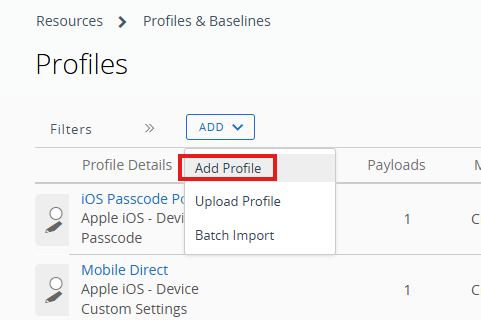
Figure 3: Add Profile dropdown menu.
Step 3: Select the iOS Platform
On the “Select a platform to start” screen, click Apple iOS. This will open the iOS profile configuration wizard.
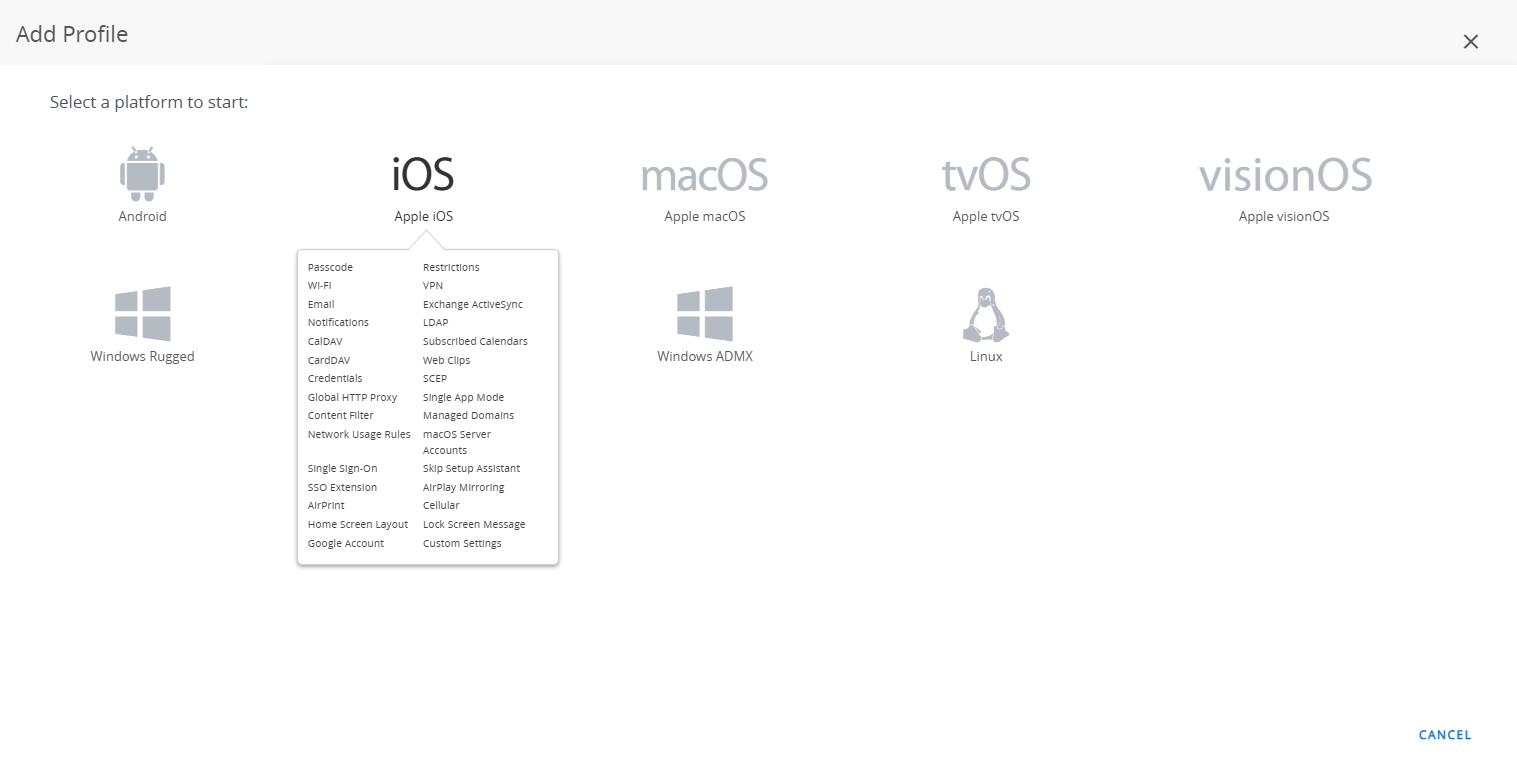
Figure 4: Select Apple iOS as the target platform.
Step 4: Configure General Settings
On the General settings page, configure the following:
- Name: Enter “Mobile Direct” as the profile name.
- Management Type: Leave as Imperative (the default).
- Context: Leave as Device.
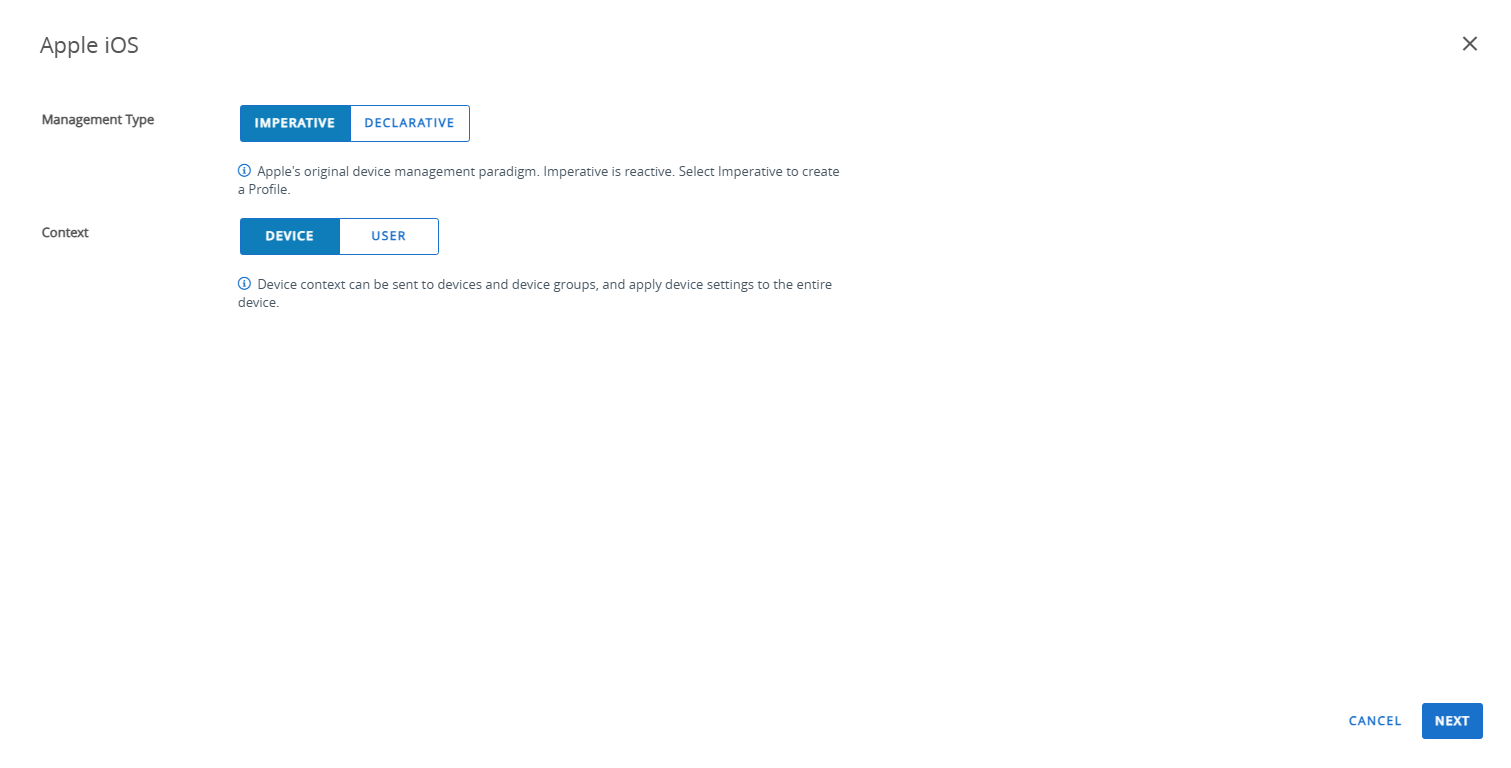
Figure 5: Profile general settings — Imperative management type and Device context.
Step 5: Search for Custom Settings
In the search bar, type custom and click SEARCH. Locate the Custom Settings in the filtered results and click ADD next to it.
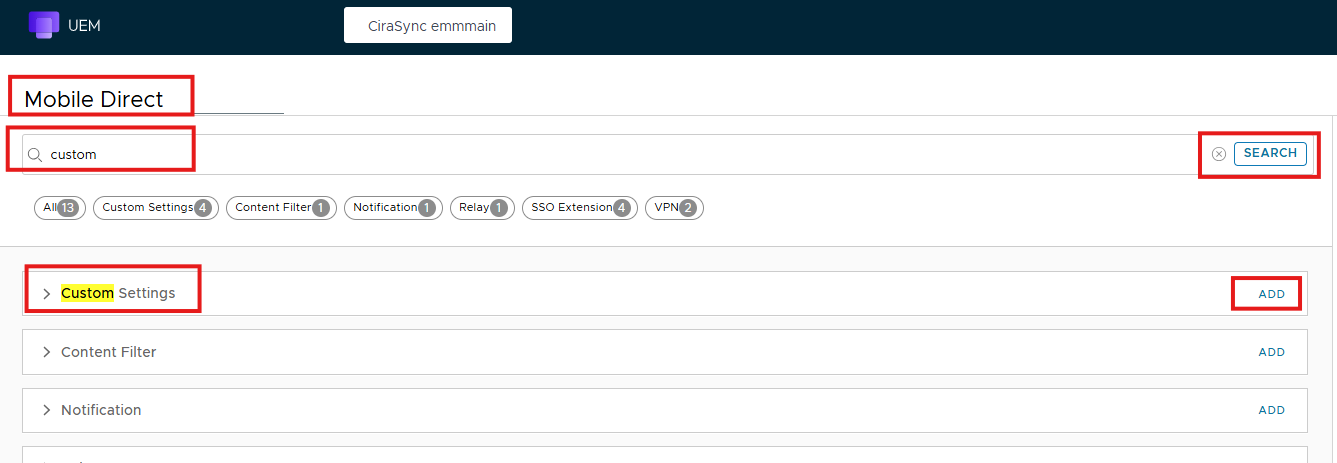
Figure 6: Search for “custom” and click ADD next to Custom Settings.
Step 6: Paste the Configuration and Enable Custom Lookup
After adding the Custom Settings:
- In the Custom Settings text area, paste the full XML content you copied from the CiraSync configuration file in Part A, Step 5.
- Toggle the Enable Custom Lookup Value switch to ON (green).
- Click NEXT to proceed to the Assignment page.
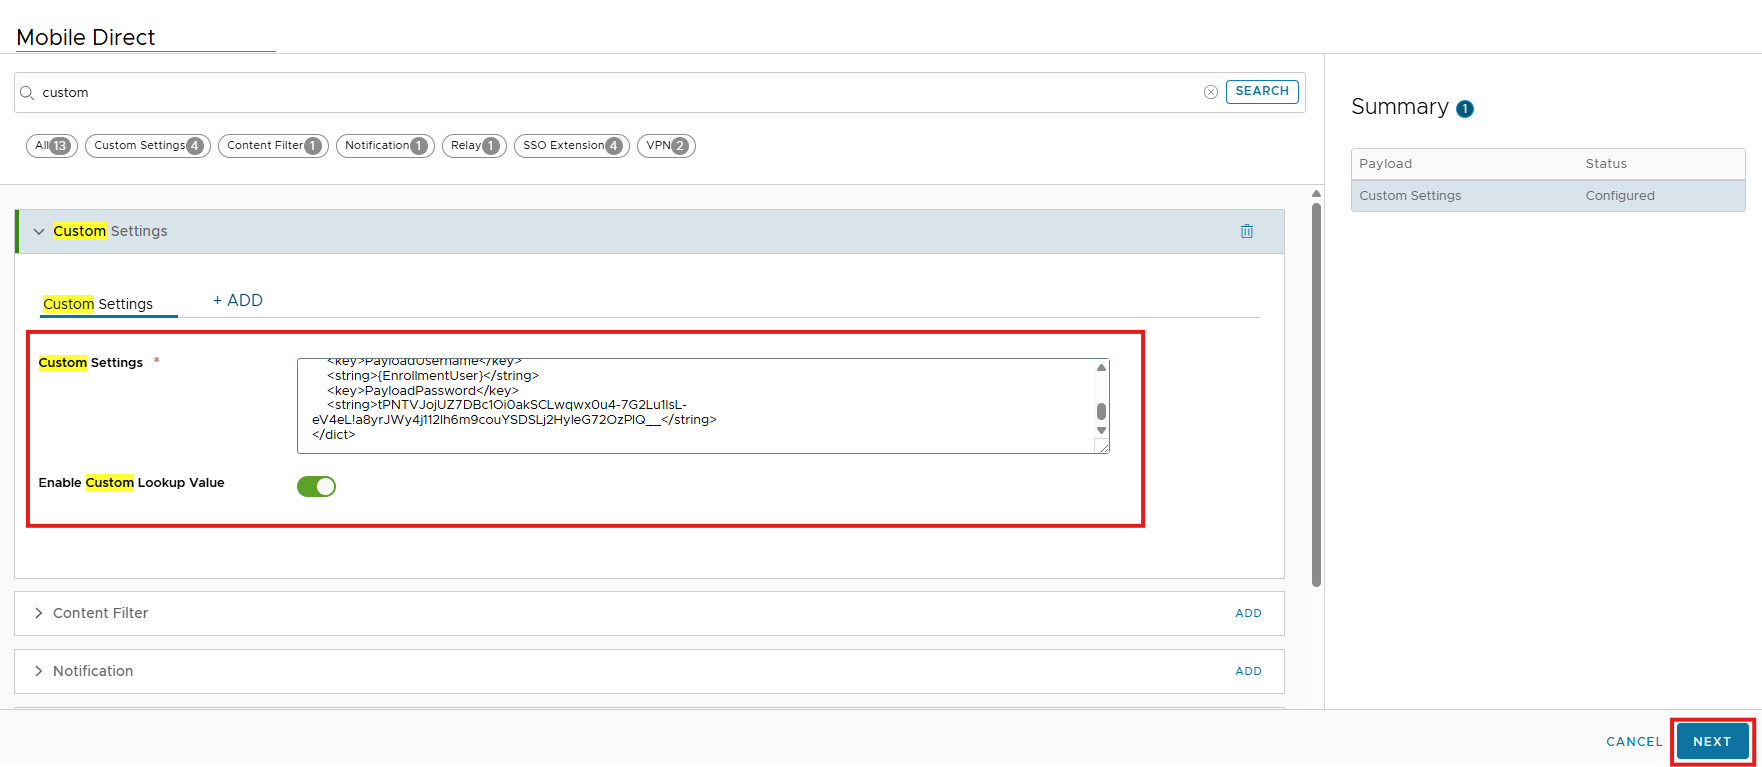
Figure 7: Paste the CiraSync XML configuration and enable Custom Lookup Value.
Step 7: Configure Assignment
On the Assignment page, configure the following settings:
- Smart Group: Select the Smart Group that contains the target users who should receive the contact sync profile.
- Assignment Type: Set to Auto. This ensures the profile is automatically pushed to devices in the selected Smart Group.
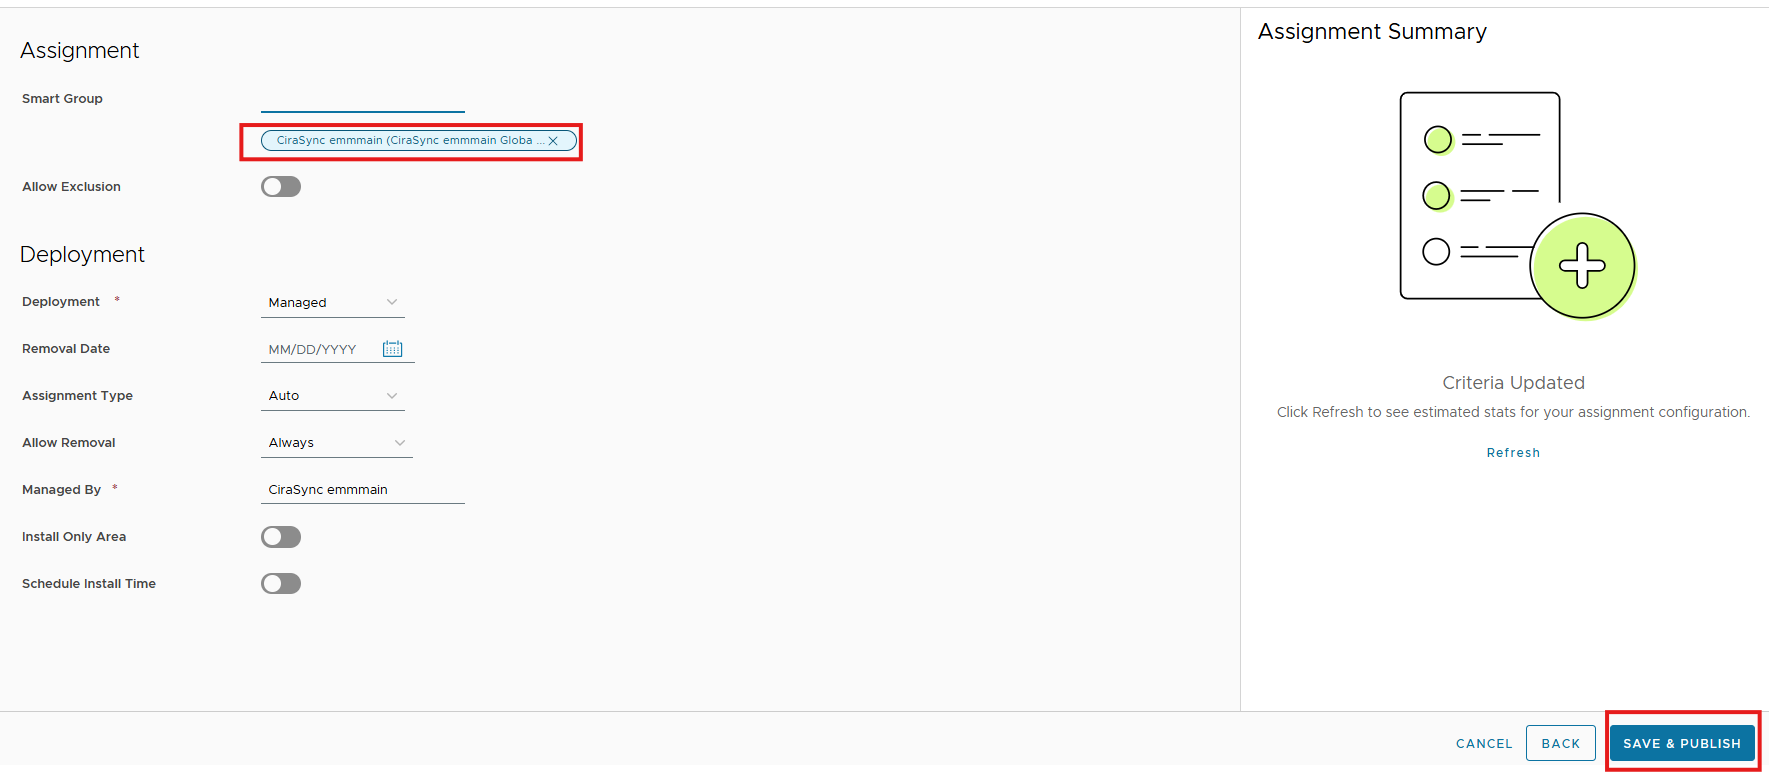
Figure 8: Configure the Smart Group assignment and set Assignment Type to Auto.
Step 8: Save & Publish
Review your settings, then click SAVE & PUBLISH at the bottom-right of the page. Workspace ONE will begin deploying the Mobile Direct profile to all iOS devices in the assigned Smart Group.

Figure 9: The Mobile Direct profile now appears in the Profiles list with a green status indicator.
| ✅ VerificationAfter publishing, you can verify the deployment by checking the Installed Status column in the Profiles list. A green checkmark indicates the profile has been successfully installed on target devices. Users will see corporate contacts appear automatically in their native iOS Contacts app. |
Troubleshooting
Contacts are not appearing on the device
- Confirm the device is enrolled in Workspace ONE and belongs to the assigned Smart Group.
- Verify the profile shows a green status in the Workspace ONE Profiles list.
- On the iOS device, go to Settings → Contacts → Accounts and verify a CardDAV account is present.
Profile fails to install
- Re-download the configuration file from CiraSync and ensure the XML was copied without modifications.
- Ensure Enable Custom Lookup Value is toggled ON in the Custom Settings payload.
- Check that the profile is assigned to the correct Smart Group with Assignment Type set to Auto.
Need further assistance?
Talk to a human at Help@CiraSync.com.

