This guide shows how to sync a subset of Contacts from the GAL to a smaller subset of targeted users.
Instructions
Creating Contact Collections to Categorize Users
- Log in to the CiraSync Dashboard.
- Click the + in the Contact Collections pane.
- Click the pen icon to name the Collection. Choose a specific name for each Collection (ex. Source_GALContacts or TargetedUsers).
- Add users to the Collection. NOTE: Users can be added individually to the Collection. However, we recommend using either a Group from Office 365 Exchange or a Dynamic Distribution Group so you can add multiple users with a single click. Furthermore, if you do not have many users that need to be synced, you can also add All Mailboxes to the Collection, expand the Collection, and then manually exclude undesired user mailboxes.
- Click SAVE.
- Repeat Steps 1–5 to create multiple Contact Collections.
Syncing Contact List Subsets to User Subsets
- Click the + in the Contact Lists pane.
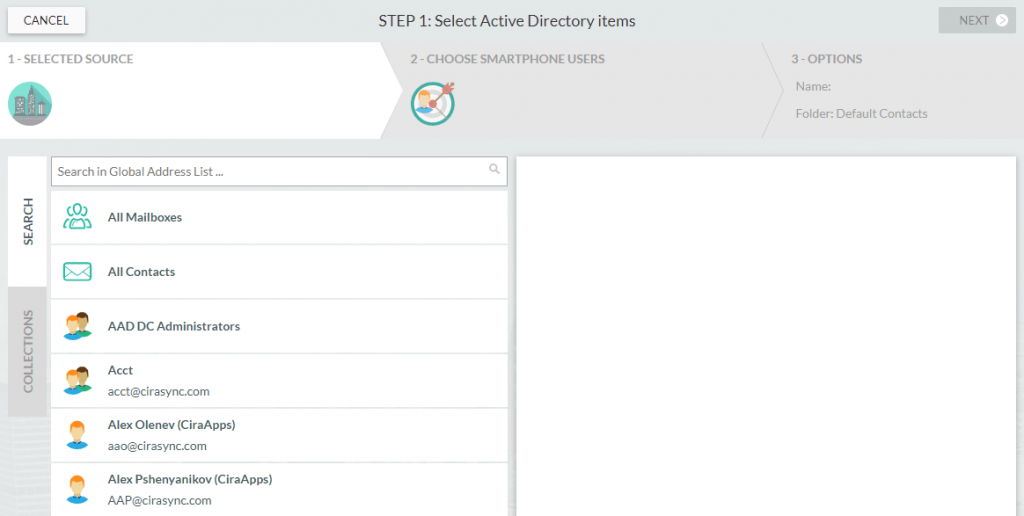
- Select the Global Address List as the Contact source type. You will be taken to STEP 1: Select Active Directory Items. (See figure below.)
- Select the desired Contact source. NOTE: To sync a subset of the GAL, select one of the Contact Collections created in the Creating Contact Collection to Categorize Users section of the guide.
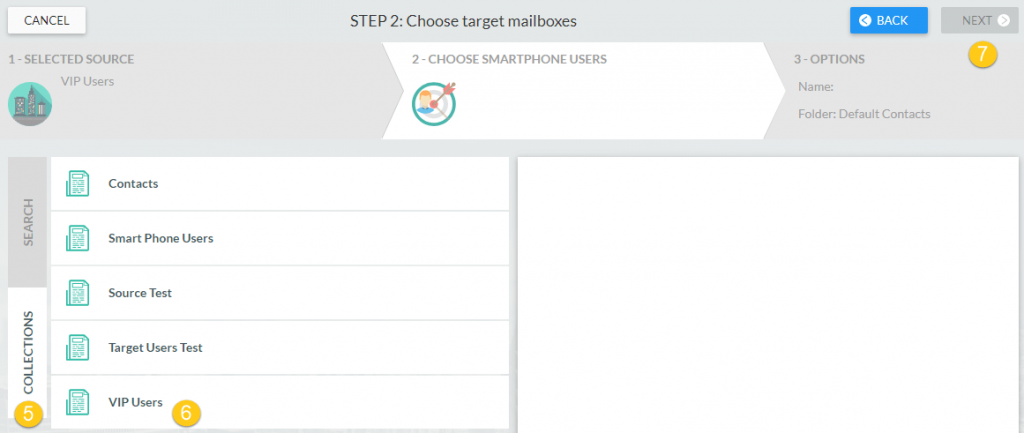
- Click NEXT. You will be taken to STEP 2: Choose target mailboxes. (See figure below.)
- Click the Collections tab to pull up a list of CiraSync Contact Collections.
- Select the targeted user’s Collection created previously in the Creating Contact Collections to Categorize Users section of this guide.
- Click NEXT. (See figure below.)You will be taken to STEP 3: Specify contact list options. (See figure below.)
- Name the Contact list in the box under Provide Contact List Name.
- Check Sync Contact Groups to sync groups that appear in the Contact List as a single contact. If you do not check this box, only members of the group will be synced as a Contact.
- If you keep the Add category with contact list name checked, all Contacts synced by CiraSync will have the name of the Contact List in the Category field. If the Category field is already filled, CiraSync will not delete the data in the field. Instead, CiraSync will add the name next to that data.
- Check Populate Outlook Auto-Complete List for the synced Contacts to appear in the Outlook Auto-Complete list.
- By default, CiraSync will remove a Contact from the targeted mailbox if it is removed from the Source. In case you would like to allow Users to keep these obsolete items, check Retain obsolete items.
- In case you would like to omit syncing the Notes field from the Source’s Contact to the targeted mailbox’s Contact, then check Omit notes field.
- Click the + next to Contacts to sync the Contact list as a subfolder. If you would like to sync to the main Contacts folder, skip to Step 9.
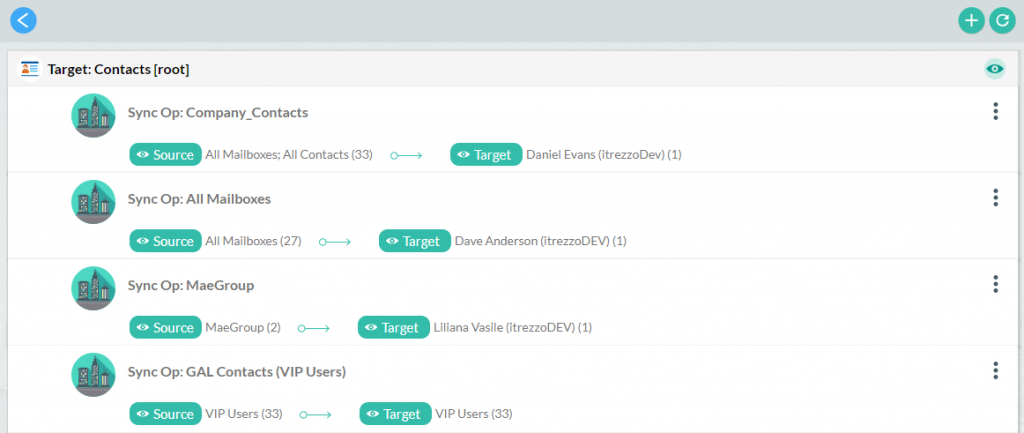
- Click SAVE. You will be taken to the Sync Summary Dashboard. (See figure below.)
- Click the blue back arrow to return to the Dashboard.
- Repeat Steps 1–10 to sync to sync other user subsets with other Contact List subsets.
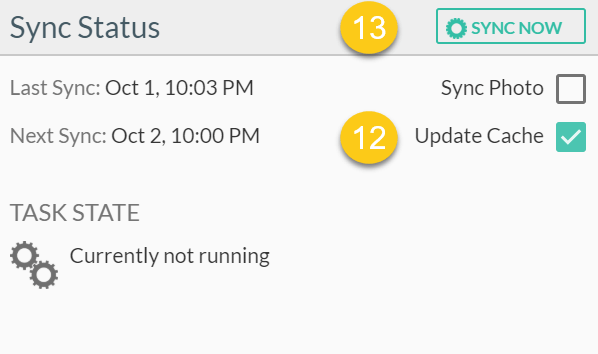
- Check the Update Cache box under the Sync Status pane.
- Click SYNC NOW to perform a manual sync. (See figure below.)NOTE: CiraSync will run this sync task during the next scheduled sync if you don’t want to do a manual sync.


