Being a complete email and calendar app, Outlook also allows you to back up emails.
Outlook users can thus save Outlook emails in bulk and have a copy of important emails, which can be useful for data migration, archiving, or recovery. Let’s show you six ways to export or back up Outlook emails.
Key Takeaways:
- There are six popular ways to back up Outlook emails: 1) Export them through Outlook Data File (.pst), 2) Use drag and drop, 3) To another email account like Gmail, 4) Exporting them to Microsoft Excel, 5) To your Mac, 6) to Flash Drive/USB or Hard Drive, and 7. automatically
- To back up Outlook emails as Data File PST, go to File > Options > Advanced > Scroll down to the Export category > Export > Finish.
- To back up Outlook emails to Excel, go to File tab > Options > Advanced > Export > Export to a file > Microsoft Excel > Next > Choose a location to save your Excel file > Finish.
Method #1: Backup Outlook Emails (Outlook Data File PST)
Outlook provides an option to export your emails, calendar, and tasks to a .pst file. This file can then be imported to another email account or used as a backup.
The process involves selecting the desired email account in Outlook and exporting the items to a .pst file. When Outlook exports to a .pst, it creates a copy, ensuring nothing is removed from Outlook.
Use the following steps to back up Outlook emails to a .pst file:
1. Open Microsoft Outlook.
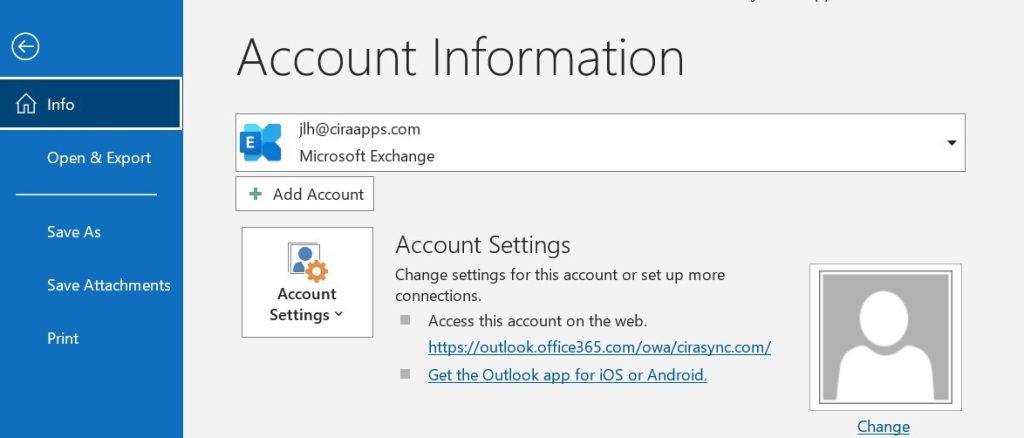
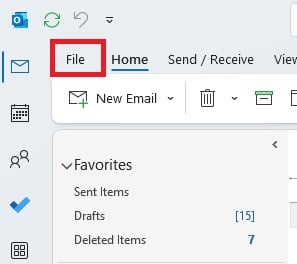
2. Go to the File tab in the top menu.
3. Click on Options > Advanced.
4. Scroll down to the Export category.
5. Click on Export.
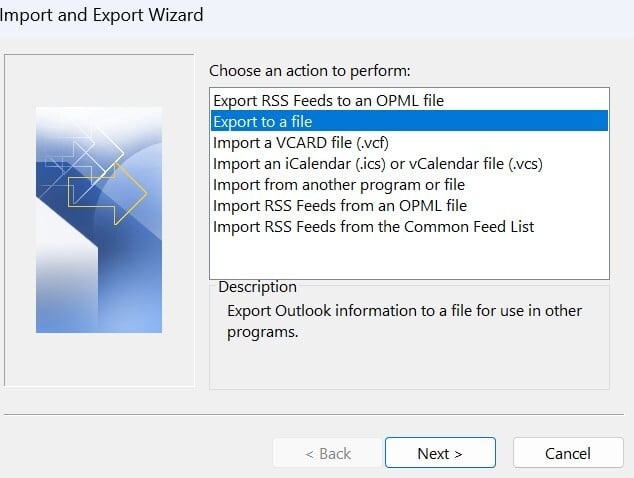
6. In the Import and Export Wizard, choose « Export to a file » and click Next.
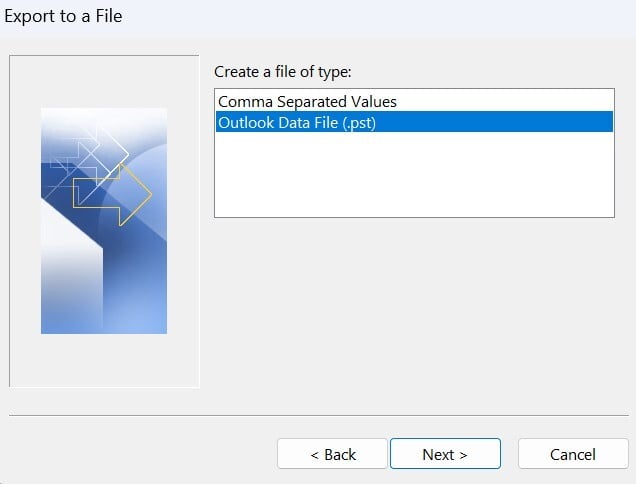
7. Select Outlook Data File (.pst) and click Next.
8. Choose the email folder you wish to back up. Select your email address at the top to back up your entire mailbox.
9. Click Next.
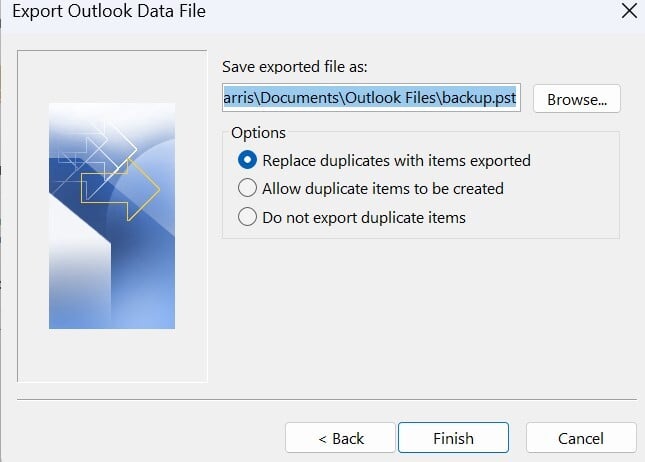
10. Choose a location to save your .pst file and provide a name.
11. Click Finish.
Recommended reading: How to Add an Email Account to Outlook?
Method #2: Backup Outlook 365 Emails Using Drag and Drop
One of the best ways to back up emails from Outlook is by using the drag-and-drop method.
You open the desired email folder in Outlook, select the emails, and simply drag the selected emails and drop them into a local folder on your computer, creating a backup.
1. Open Microsoft Outlook.
2. Navigate to the email folder you want to back up.


3. Select the emails you want to back up. Hold down the Ctrl key (or Command key on your Mac) while clicking on each email to select multiple emails.
4. Drag the selected emails to a folder on your computer.
Method #3: Backup Outlook Emails to Gmail
For people who want to back up their Outlook emails to another email service like Gmail, the process involves adding Outlook and Gmail accounts to the Outlook desktop app. Once both accounts are set up, users can use Outlook to export the emails from the Outlook account to a .pst file and then import this file to the Gmail account.
Export your Outlook emails to Gmail using the steps below:
1. Navigate to the File tab in Microsoft Outlook.
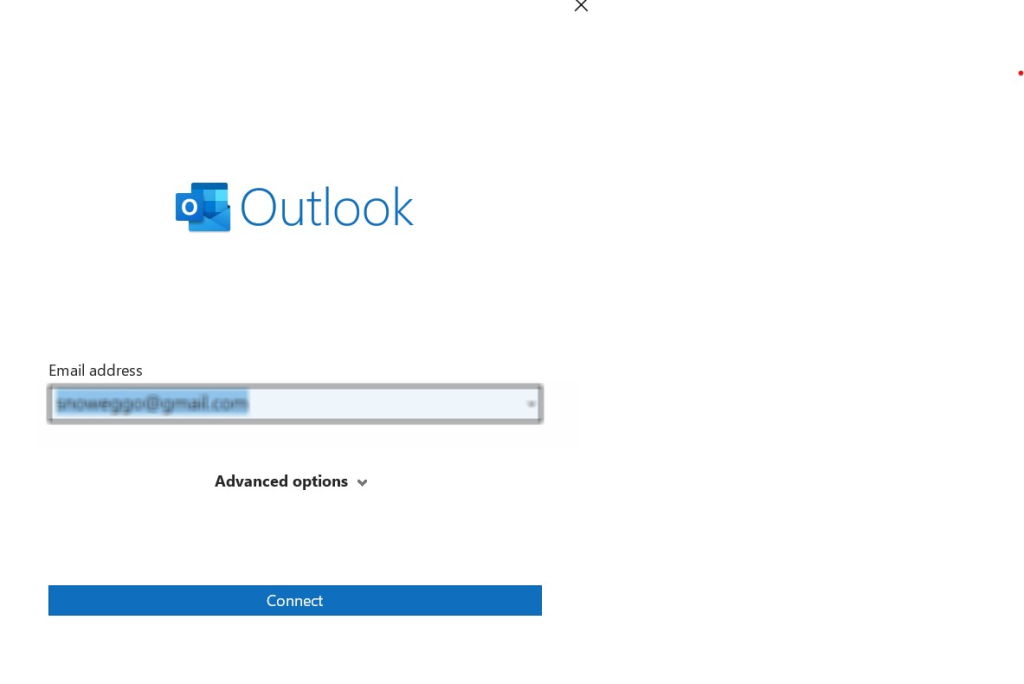
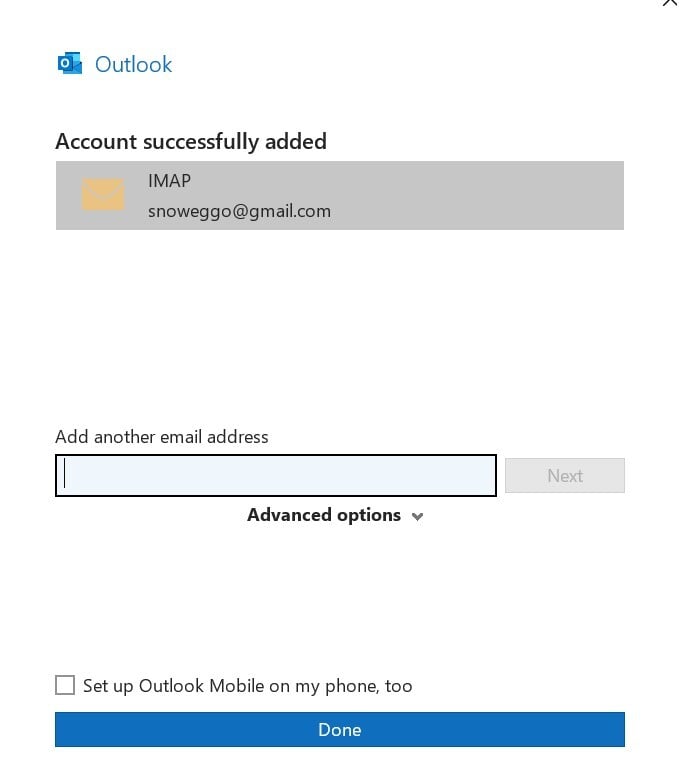
2. Click Add Account to add your Gmail account.
3. Follow the prompts to complete the Gmail setup.
4. Once both accounts (Outlook and Gmail) are added, right-click on the desired Outlook folder or individual emails.
5. Choose Move > Copy to Folder.
6. Select the corresponding folder in your Gmail account.
7. Click OK.
Recommended reading: How to Create a Contact Group in Outlook?
Method #4: Backup Outlook Emails to Microsoft Excel
Although Outlook is primarily an email client, it offers flexibility in exporting email data to other Microsoft products like Excel. This method is useful for users who wish to analyze their email data or maintain a structured record of their communications.
Use the following steps to back up your Outlook emails to Excel:
1. Open Microsoft Outlook.
2. Go to the File tab > Options > Advanced.
3. Click on Export.
4. Choose Export to a file and click Next.
5. Select Microsoft Excel and click Next.
6. Choose the email folder you wish to export.
7. Click Next.
8. Choose a location to save your Excel file and provide a name.
9. Click Finish.
Method #5: How to Backup Outlook Emails on Your Mac
Outlook for Mac allows users to back up their emails similarly to Windows, though the steps may slightly differ due to the platform difference. The backup will be a .olm file, which can contain emails, contacts, or calendar events.
You can backup your Outlook emails to your Mac computer in the following steps:
1. Launch the Outlook application on your Mac.
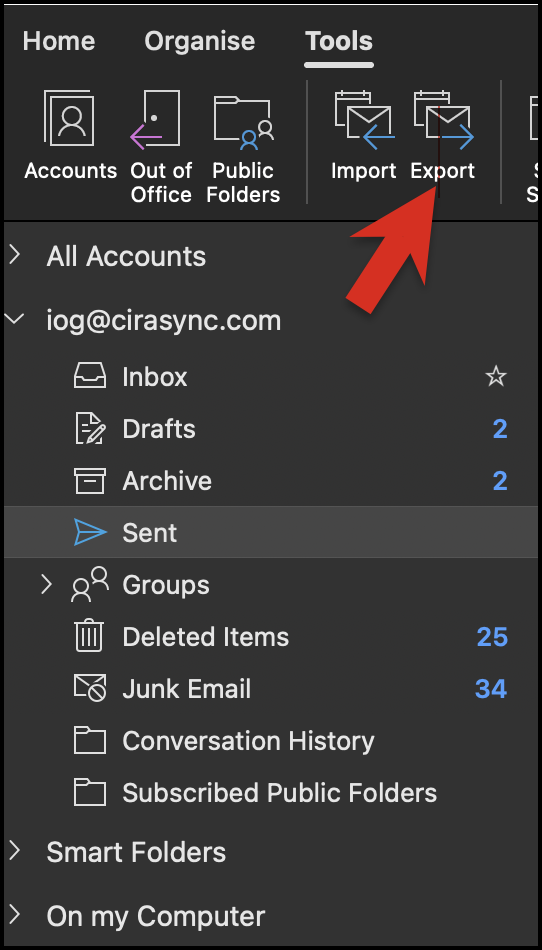
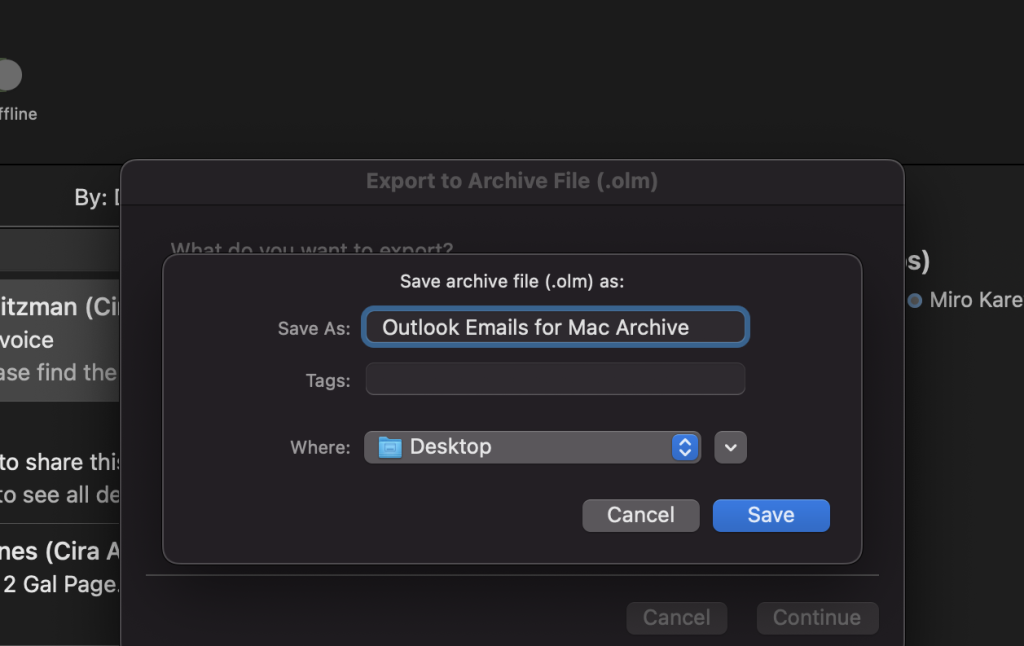
2. Navigate to the top menu bar and click “Tools”, then select « Export. »
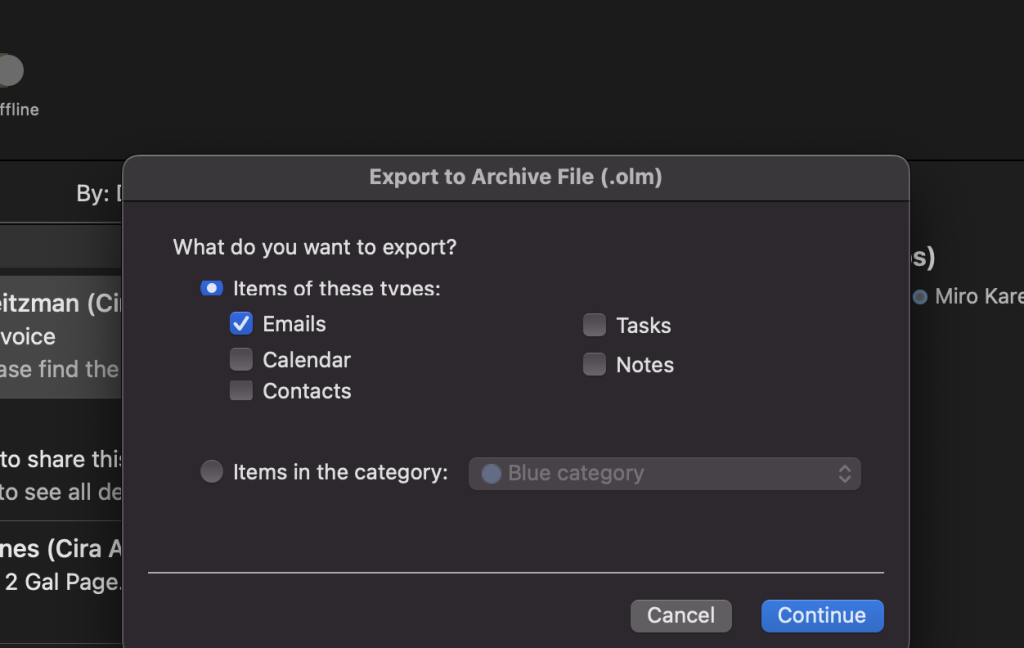
3. In the navigation pane « what do you want to export, » select « Emails » and click « Continue. »
Note: Outlook may prompt you to choose a format. For most backups, the .olm format is appropriate.
4. Select a location on your Mac where you want to save the backup file.
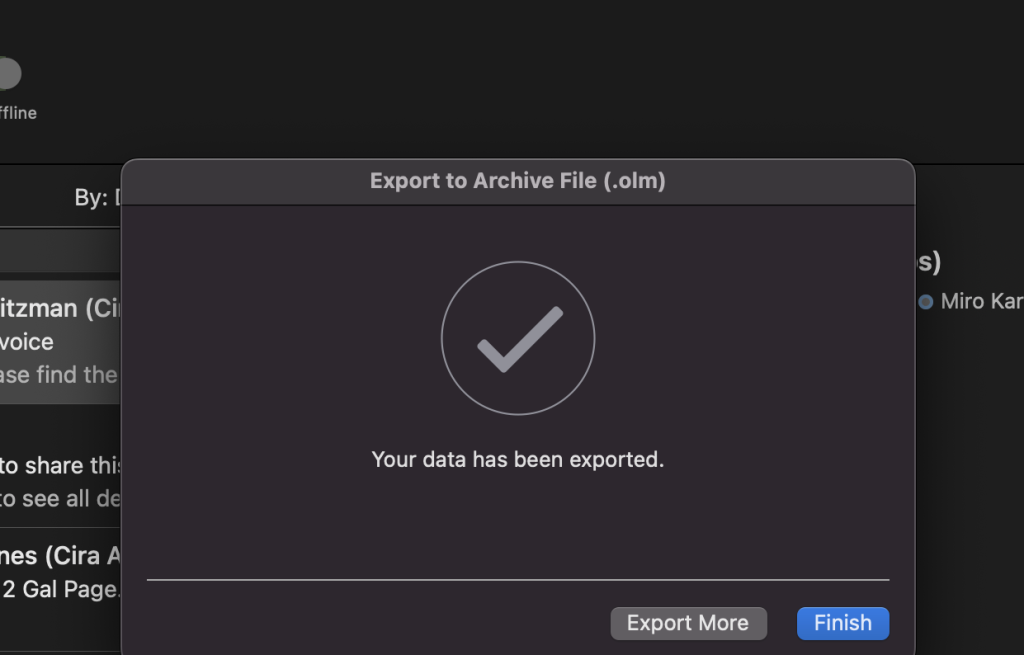
5. Click « Finish » to start the export/backup process.
Method #6: Backup Outlook Emails to a Flash Drive/USB (or Hard Drive)
Backing up your emails to a flash drive or an external hard drive is a convenient way to save an offline copy of all your emails.
This becomes especially useful when transitioning between computers or safeguarding against unforeseen issues. Backing up Outlook emails to a hard drive is essentially the same as backing up to a flash drive or USB.
To backup your Outlook emails to an external device, simply follow the steps in Backup Outlook Emails (Outlook Data File PST) for Windows users, or How to Backup Outlook Emails on Your Mac and copy the respective .pst or .olm files to your external device for safekeeping.
Method #7: Back Up Outlook Emails Automatically
Backing up your Outlook emails automatically is a practical way to ensure your data is safe. Here’s a straightforward guide on how to set up automatic backups in Outlook:
1. To create an Outlook Data File (PST), open Outlook, and navigate to the “File” menu.
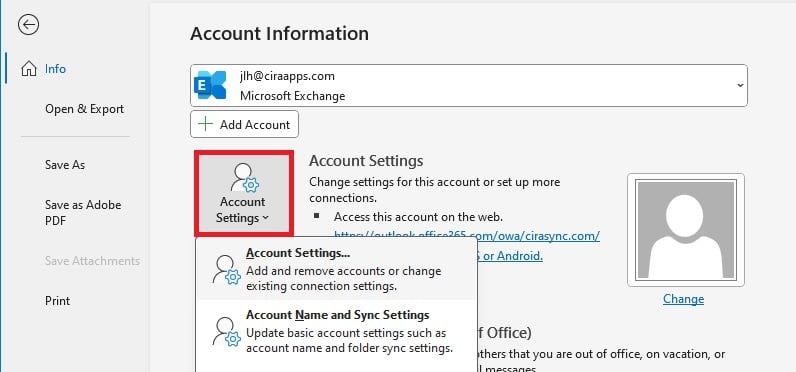
2. Choose “Account Settings” > “Account
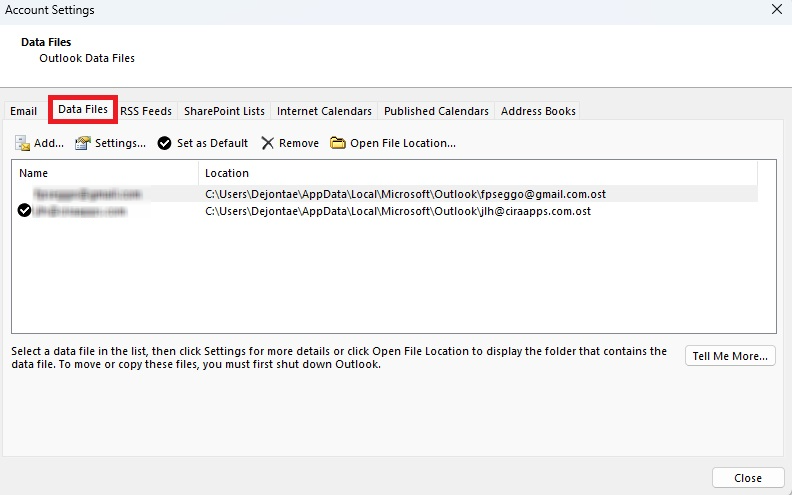
3. Click “Settings” again, then select the “Data Files” tab.
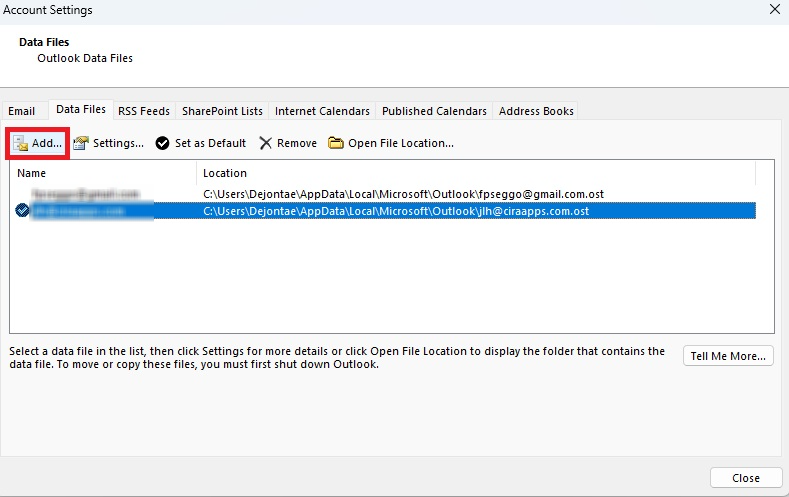
4. Click on “Add” to create a new PST file and follow the prompts to name and save the file.
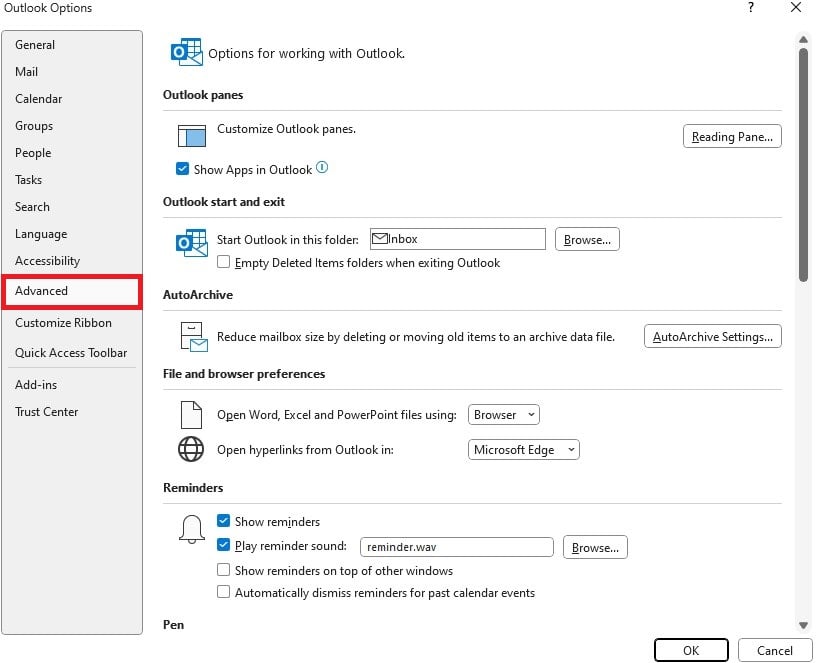
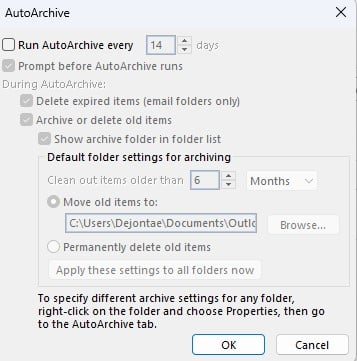
5. To set up AutoArchiving, remain in the “File” menu, select “Options,” and then choose “Advanced.”
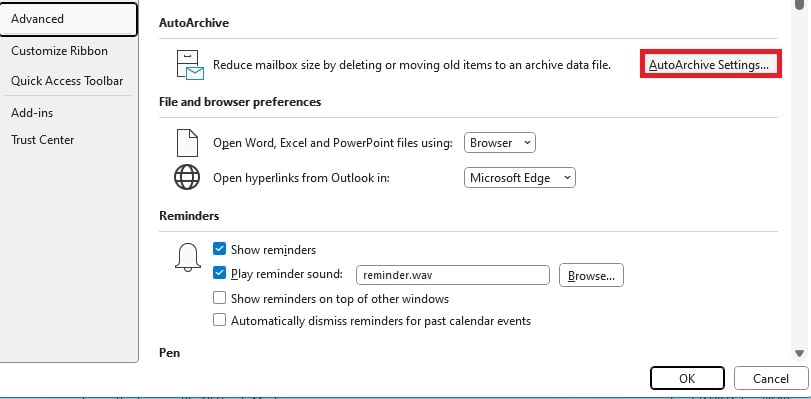
6. Click on “AutoArchive Settings.”
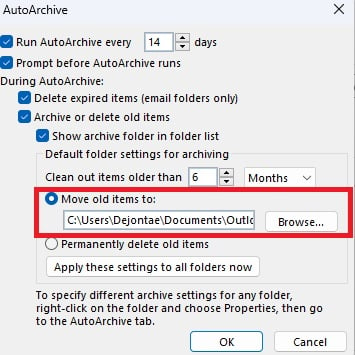
7. Choose how often you want AutoArchive to run and set other preferences such as how old items should be before they are archived.
8. Ensure the “Move old items to” option points to the PST file you created.
Why Backup Outlook Emails?
Backing up Outlook emails is important to prevent data loss and secure emails because all email accounts are vulnerable. Moreover, when you switch to a new email service or migrate to a different email client, having backups of your old emails makes the transition smoother
Finally, some industries and organizations are required to retain email records for a certain period to comply with legal or regulatory requirements. Backup copies can help you meet these obligations.
How to Restore Outlook Emails from a Backup
Restoring your emails from a backup ensures that you can quickly recover your data in case of any errors or issues with Outlook. Below is a step-by-step guide.
1. Open Outlook.
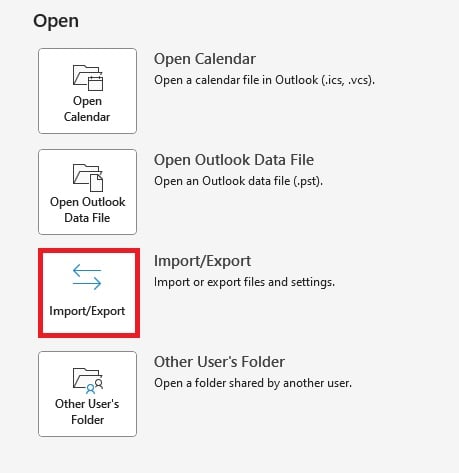
2. Go to File > Open & Export > Import/Export.
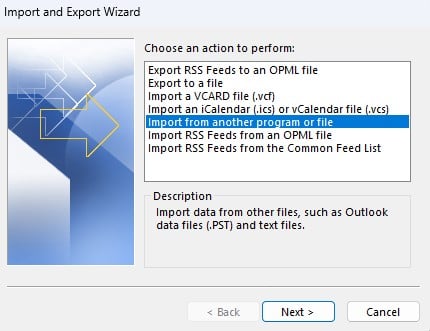
3. Select Import from another program or file and click Next.
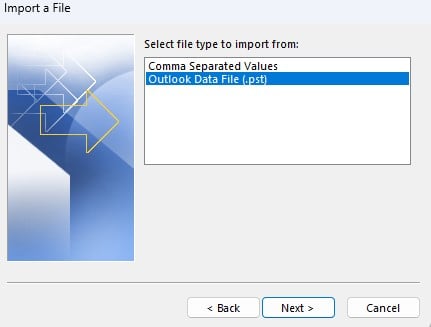
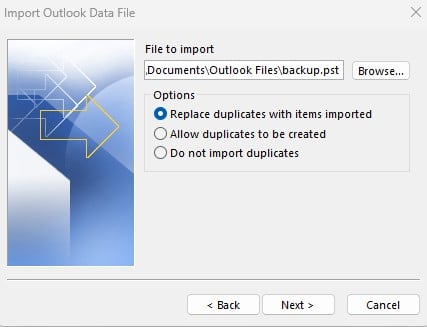
4. Choose Outlook Data File (.pst) and browse to your backup file.
5. Select whether you want to:
- Replace duplicates
- Allow duplicates
- Skip duplicates
6. Pick the folder to import into (usually your main mailbox or Inbox).
7. Click Finish.
Your backed-up emails will now appear in Outlook.
What is a PST file in Outlook?
A PST (Personal Storage Table) file is an Outlook data file that stores your emails, calendar events, and other items. It acts as a local archive and allows you to manage your email data.
Best Practices for Email Backups
Protecting your data should be a primary concern for any computer user. Given the critical nature of email communications in both personal and professional realms, it’s critical to have backup strategies for your emails.
Below are a few best practices for email backup:
1. Perform Regular Backups
Regularly updating your backups ensures you have the most recent copy of your data safe and secure. Creating a schedule is a proactive way to keep your data backed up regularly.
Depending on the volume of emails and changes you have, determine how often you should back up. Daily backups may be recommended for business users, while weekly might suffice for personal use. You can use reminders or even alarms to remind you to perform backups.
Always have more than one backup and store them in different locations. This diversifies the risk and ensures that another can be used if one backup fails or becomes inaccessible.
2. Use Secure Storage Solutions
One simple method is to store your backup on an external hard drive. Ensure it’s encrypted and stored in a safe location. Alternatively, you can utilize cloud solutions such as OneDrive or Dropbox to provide accessibility from anywhere.
Ensure you use strong passwords and two-factor authentication. Network-attached storage (NAS) might also be a good investment for businesses, offering centralized storage that can be accessed over a secure network.
3. Restore Your Backup Often
Every once in a while, you should try restoring from your backup to ensure the data is intact and retrievable. Keeping your Outlook and backup software updated ensures compatibility when performing a restore.
4. Manage Storage Space
Instead of backing up every email, consider archiving older emails. Outlook has an Archiving feature that can reduce the size of your mailbox.
Regularly saving and then removing large attachments from emails can also help to minimize the size of your backup. Lastly, always rotate and replace older backups with newer ones.
Conclusion
In the digital age, emails often contain significant professional and personal information that individuals and businesses cannot afford to lose, as loss of vital communication can lead to both personal and professional setbacks. We hope this guide provided sufficient information on backing up, exporting, and restoring your Outlook emails. Using the simple steps in the methods mentioned above, you can confidently safeguard your emails and enjoy peace of mind.
FAQ
Can I back up all my emails from Outlook?
Can you back up Outlook emails to an external hard drive?
How do I retrieve all my Outlook emails?
1. Open Outlook and go to « File » in the top-left corner.
2. Select « Open & Export » and choose « Import/Export. »
3. Choose « Import from another program or file » and click « Next. »
4. Select « Outlook Data File (.pst) » and click « Next. »
5. Click « Browse » and navigate to your PST file’s location. Select the file and click « Open. »
6. Choose the appropriate option for handling duplicates and click « Next. »
7. Select the destination folder, usually the root folder (your email address), and ensure « Include subfolders » is checked. Click « Finish. »
8. Outlook will begin importing your emails from the PST file.
Where Are All My Outlook Emails Stored?
Outlook emails are stored in different locations based on the type of account you are using. For Microsoft Exchange and IMAP accounts, emails are primarily stored on the mail server, with local copies kept in an Offline Outlook Data File (.ost) on your computer. The default location for these .ost files on Windows is within the user’s AppData folder.


