This article provides 16 tips to help you manage contacts in Outlook in 2024.
The tips range from
- creating a contact list
- adding contacts to sharing contact lists
- syncing Outlook contact lists to smartphones
- organizing contacts in Outlook for a clean experience
- using view and categories
- and more!
Let’s make your Outlook experience better than you could ever imagine.
Top Outlook Contact Management Tips
- To create a contact list in Outlook, click the People icon > New Contact List > Save and Close.
- You can use CiraSync to sync Outlook contacts to iPhone and Android devices.
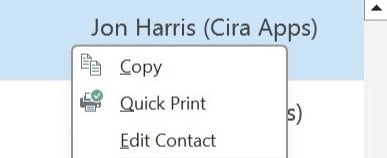
- To view and edit contacts, select contact > right-click> edit contact.
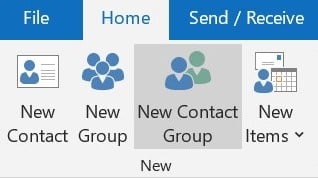
- To create an Outlook contact group, go to People > New Contact Group > Add Members > Save & Close.
- To create an Outlook contact folder, click the ellipsis in the bottom-left corner > New Folder > Name your contacts folder > Ok.
Tip #1: Create a Contact List in Outlook
Using a contact list in Outlook is one of the best ways to manage contacts in Outlook. It makes it simple to send emails to several recipients at once. You are able to include a wide range of contacts in this contact list and give each one an individual name. Here’s how you can create a contact list in Outlook.
1. Click on the People icon after opening Outlook.
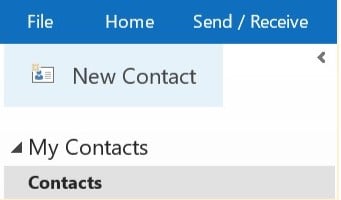
2. Select New Contact List from the drop-down menu by clicking on the New Contact option in the top left menu.
3. Click Save and Close after adding the desired contact to the list.
Tip #2: Sync Outlook Contact Lists to Smartphones
Our fifth tip to manage contacts in Microsoft Outlook is related to Syncing and one good way to sync Outlook contact lists is using CiraSync.
CiraSync is a cloud-based service that automates the syncing of contacts, calendars, CRMs, public folders, and global address lists (GAL) to smartphones. This solution acts as a one-way sync between the user’s mailbox and the Source.
CiraSync can sync multiple contact lists and shared calendars to an unlimited number of business smartphones with a sync frequency of multiple times per day. Thanks to this sync, for example, you can have Outlook contacts on your iPhone.
Here is how to sync Outlook contacts to smartphones:
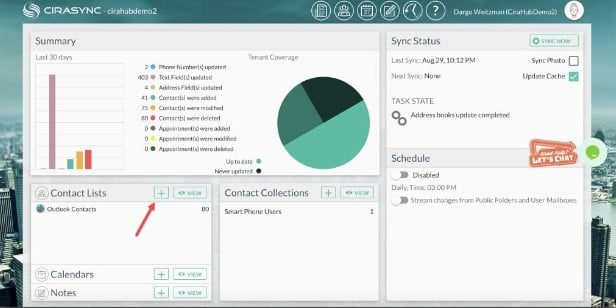
1. First Log in to your Cirasync account.
2. Click the ‘+’ icon from the ‘Contact Lists option down below.
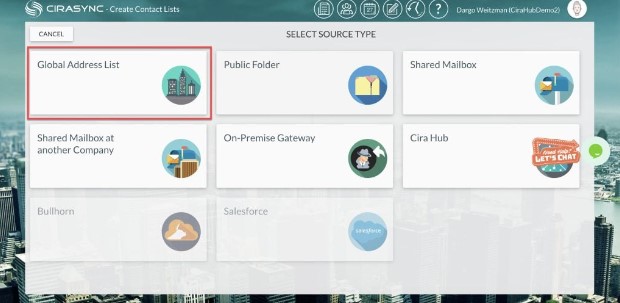
3. Select a ‘Source Type.
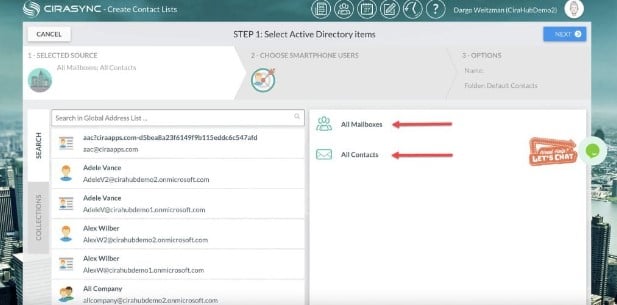
4. Choose which contact sources you want to synchronize.
5. Select « NEXT » from the menu in the upper-right corner.
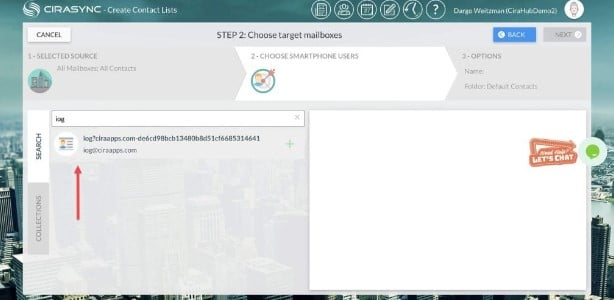
6. You can choose the user you want to set as a target by searching for their name in the GAL field.
7. Then Click ‘NEXT’ in the top-right corner.
8. In the « Provide Contact List Name » field, assign the contact list with a name, then click SAVE.
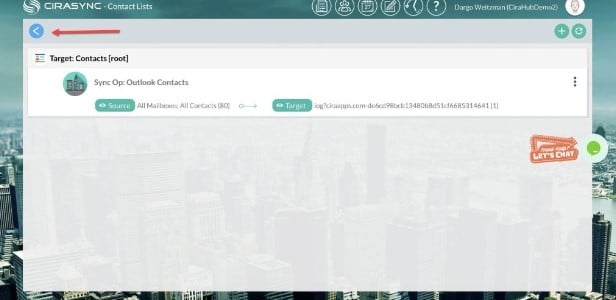
9. The dashboard for the sync summary will be displayed to you. To go back to the CiraSync main dashboard, click the Return icon, which is situated in the upper-left corner of the screen.
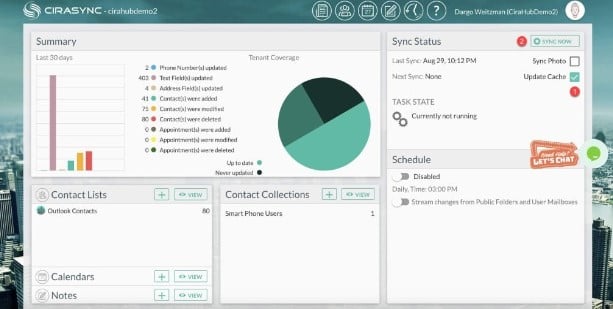
10. To start a manual sync, check the box next to « Update Cache » in the « Sync Status » section at the top-right of the dashboard. Then, click « SYNC NOW. »
Tip #3: Add a New Contact to a Contact List
Adding a new contact to your contact list is obviously a key tip for managing Outlook contacts. Here is how to do it:
1. Log in to Outlook.
2. From the navigation pane, select the People icon
3. Select New contact from the toolbar on the People page.
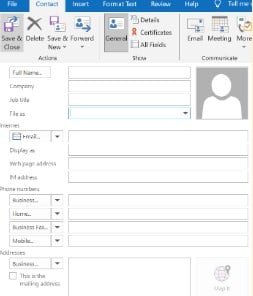
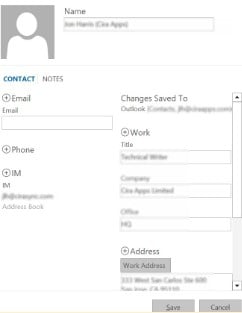
4. Enter the contact’s information.
5. Choose « Save and close. »
Tip #4: View and Edit Contacts in Outlook
Users can view and edit any of their contacts in Outlook. To edit a contact, follow the below steps:
1. Choose the contact for which you wish to edit.
2. Select Edit Contact with a right-click on it.
3. Make the edits you want.
4. After editing, select Save and Close.
Tip #5: Share Outlook Contact Lists With Others
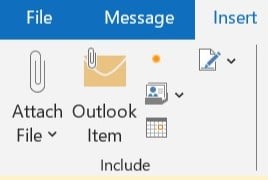
You can also share a contact list with others by attaching it to a message. It can then be saved by the recipient in their Contacts folder.
1. Open a new message.
2. In the message body, click on Outlook Item and drag the contact group from Contacts.
3. Send the message.
Tip #6: Regularly Update Contact Information
Outlook and Outlook Web Access allow you to use various address books and contact lists. Using the People app launcher in Outlook online or the Outlook navigation window, you may access your personal contacts. To see and edit all of your contact information on Outlook, click on the contact in the center pane on the People page.
Tip #7: Add Notes and Context
Notes are one of the best ways to manage contacts in Outlook, and keeping notes makes you more organized and on task. To create and manage notes in Microsoft Outlook, just follow these easy instructions.
1. To create a note, press CTRL+SHIFT+N.
2. Type the note’s text.
3. Click the note icon Button image located in the note window’s upper-left corner, and then select Close to end the note.
Finally, check out this guide to learn how to sync Contact notes.
Tip #8: Take Advantage of the Microsoft Copilot to Enhance Outlook
Microsoft 365 Copilot is a new application that uses artificial intelligence (AI) to produce excellent content. Copilot is integrated with Microsoft 365. Word, Excel, PowerPoint, Outlook, Teams, and other Microsoft 365 programs you use daily are just a few of the apps that work with Copilot.
Copilot was designed to help users in Outlook complete several tasks quickly.
With the AI tool, users can write papers, read email messages, and create presentations. They can also use it, to generate emails, blog posts, presentations, and offer grammatical recommendations. Users only need to provide instructions, and Copilot will automatically respond with meaningful information that reflects their intended meaning.
Tip #9: Organize Contacts in Outlook For a Clean Experience
Your contact list may get a little overwhelming if you have a large number of contacts. You can find the people you need by rearranging the contacts on your list.
1. Select People.
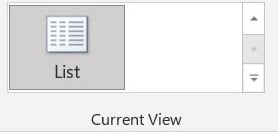
2. Select List under Home > Current View.
3. Click the column heading you would like to use to sort your contacts.
Tip #10: Use Outlook Contact Groups
A distribution list, also known as a contact group, is a list of email addresses that may be used to send an email to several recipients at once. When you often send emails to the same set of individuals, such as teammates, friends, or members of a club or organization, this functionality is crucial.
1. Select People from the Navigation bar.
2. Choose New Contact Group under Home.
3. Enter the group name in the Contact Group box.
4. Choose Contact Group > Add Members, then choose one of the following:
- Choose From Contacts in Outlook.
- Choose « From Address Book. »
- Click on Add New Email Contact.
5. Select OK after adding contacts or entries from your address book.
6. Select « Save & Close. »
Tip #11: Use Contact Folders in Outlook
An Outlook contact folder is a container for storing contact information. You can create folders to organize your contacts by company, type, or other criteria. You can also share Outlook contact folders can also be used to share contacts with other people.
Moreover, with the right tool, you can even sync Public Folder contacts.
Follow these steps to create a contact folder:
1. First login to your Outlook account .
2. In the navigation menu, click the ellipsis in the bottom-left corner.
3. Click on the Folders option.
4. Right-click the Contacts folder in the bottom right corner.
5. Click New Folder.
6. Name your contacts folder.
7. Click OK.
8. Locate your newly created folder and click Open.
9. Select New Contact to start adding contacts to the contacts folder.
Tip #12: Contact Views
Let’s look at one more tip for managing Outlook contacts.
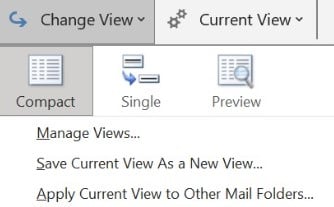
You can view items in a folder in multiple ways with the help of views. Users can modify fonts, how elements are organized, and numerous other options by customizing your view for each Outlook folder, including Inbox and Calendar.
1. Click the Ribbon’s View tab.
2. Next, choose the Current View group and click the Change View button.
3. From the drop-down menu, choose a view from the options.
Tip #13: Use Categories and Labels for Better Customization
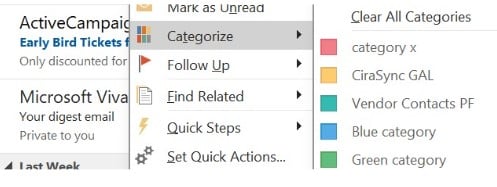
Outlook on the web and the new Outlook both have categories that make it simple to tag, categorize, and group messages. Assign one or more categories to your messages by selecting from pre-made ones or making your own.
1. Right-click on an email or calendar event that you’ve selected.
2. Click New Category from the Categorize menu.
3. After giving your category a name, click the category icon to select a color, if you’d like.
4. Hit the Enter key.
Tip #14: Export Outlook Contacts to Use Them in Other Tools
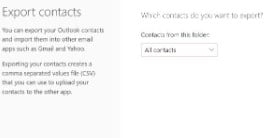
Exporting Outlook contacts allows you to back up your data and even use it when changing devices or email systems. Let’s look at how to export Outlook contacts by following these easy steps.
1. Select the People icon from the left navigation bar.
2. Choose the Manage Contacts icon from the Home tab. Export Contacts after managing contacts.
3. Under Contacts from this folder, choose an option, then select Export.
4. Select which contacts you want to export and choose Export.
You may also like: How to Backup Outlook Emails?
Tip #15: Manage and Remove Duplicate Contacts Regularly
1. Click on People from the Navigation panel.
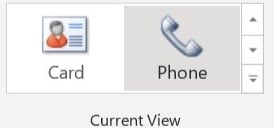
2. From the Current View group, click the right corner of the views box, and then select Phone.
3. To remove a contact from your list, click on it while holding down the Ctrl key.
4. Press Delete or Ctrl+D once all of the duplicates have been chosen.
Tip #16: Set Contact List Permissions and Privacy
Last, but certainly not list on our list of the best tips to manage contacts in Outlook, is permission and privacy. To modify who may access your contact list folder, simply follow these easy steps:
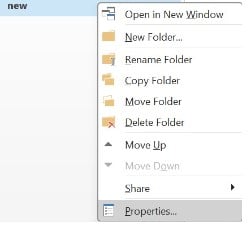
1. Right-click the Contacts folder whose permissions you wish to modify in People’s Folder Pane.
2. Select Properties.
3. Modify the permissions of each user from your contacts.
Takeaway
Hopefully, you now know a little bit more about how to manage your contacts in Outlook. Maintaining an up-to-date and well-organized database of business contacts is essential to making sure your company’s communication channels are operating at maximum efficiency.
It’s important to fully understand how to use all of Microsoft Outlook’s features to help improve customer and internal communication within your organization.

