
Microsoft Outlook is an excellent tool for managing your calendars and other information. And you will improve your experience further if you use the best Outlook calendar tips and tricks.
In this article, we’ll look at 28 simple yet useful tips for using Outlook Calendar successfully.
Top Outlook Calendar Tips
- Schedule Appointments: In any calendar view, go to New Appointment > Enter the appointment details > Click the Recurrence icon > Save & Close.
- Auto-Decline Conflicting Events: Go to File > Options > click the Auto Accept/Decline button > Choose Accept or Decline option > click OK and restart Outlook.
- Use Keyboard Shortcuts: Ctrl+1 Switch to Mail, Ctrl+2 Switch to Calendar, Ctrl+3 Switch to Contacts, Ctrl+4 Switch to Tasks, etc.
- Set Your Availability Status: To modify your presence status, click My Info at the bottom of the screen, then Status, and choose between Available, Busy, Do Not Disturb, Be Right Back, etc.
Tip #1: Schedule Appointments and Meetings
You can organize meetings with others (Meetings) or use the calendar to remind yourself of upcoming commitments (Appointments). Many businesses and individuals use the Outlook calendar to keep track of their daily plans and increase productivity.
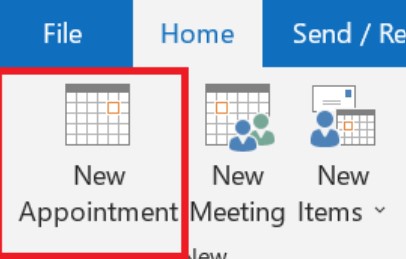
How to Set Up an Appointment
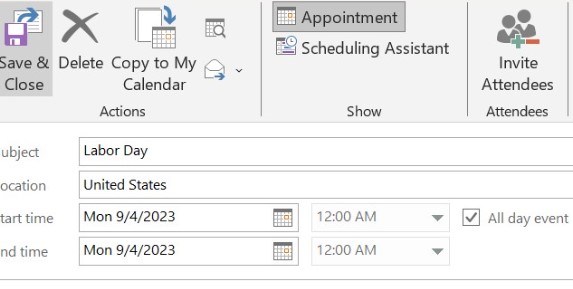
1. Begin in any calendar view, but make sure the Home tab is selected. Click the New Appointment icon.
2. After you Click the New Appointment icon, a blank Appointment screen should appear. Then, enter the necessary details about your appointment in the fields.
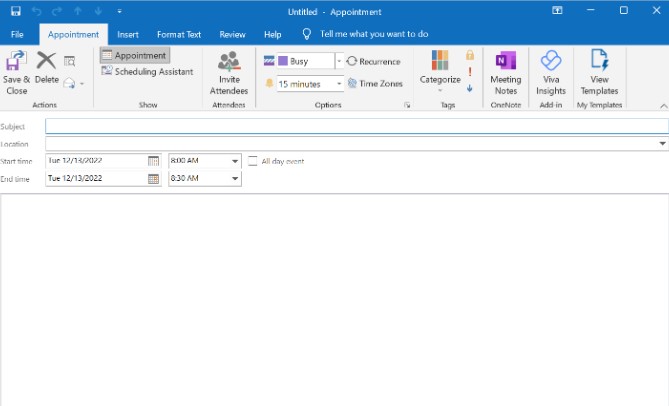
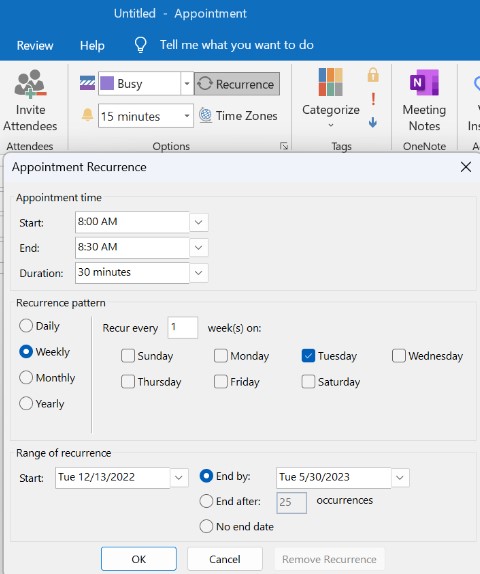
3. Click the Recurrence icon in the ribbon to set up a recurring appointment.
4. Click the Save & Close icon in the upper left corner of your Appointment screen once you have finished filling out the form for your appointment. The appointment is added to your calendar.
How to Set Up a New Meeting
The calendar feature in Microsoft Outlook allows you to add and view the meetings you’ve scheduled for each day, week, and month. Follow these steps to schedule a new meeting in Outlook:
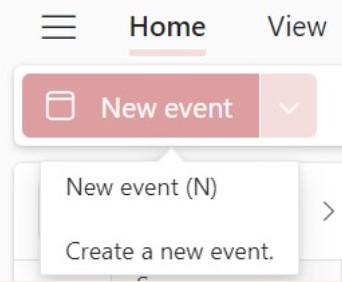
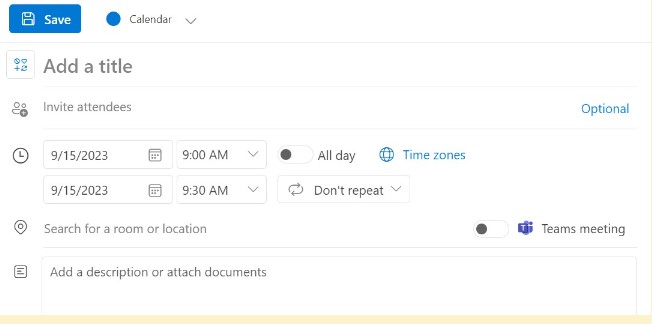
1. Select New Event from the calendar.
2. Give your meeting a title.
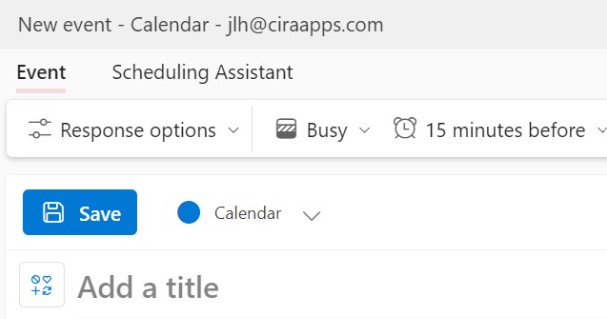
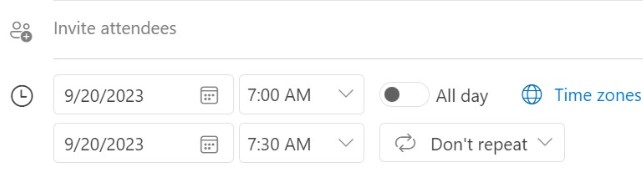
3. Select the « Invite attendees » option. Invite attendees, then input the names of people you want to invite to the meeting.
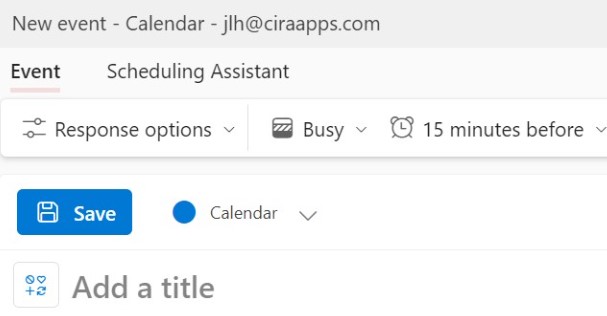
4. Choose a suggested time slot for the meeting, or specify a date and start and finish timings manually.
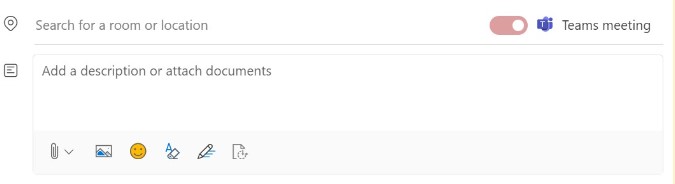
5. Enter a meeting location and slide the Teams meeting toggle to the left or right as needed:
Tip #2: Auto-Decline Conflicting Events.
One of the useful Outlook calendar tips is the Auto Accept/Decile Events feature. It allows you to automatically accept or decline meeting requests.
First, double-check that the option « Auto-accept invitations that do not conflict » is enabled. From the Calendar’s three-dot menu, go to Settings and Sharing> Auto-accept invitations. Unless the events are manually added, this feature should keep declining invites in conflict automatically.
Now follow the process below to auto-decline conflicting events.
1. Click File > Options.
2. In the Outlook Options window, click the Calendar tab in the left pane, then go to the right pane, scroll down to the end, and click the Auto Accept/Decline button.

3. In the Automatic Accept or Decline dialog, check the option(s) you need. Click OK to close it.

4. Go back to the Outlook Options window, scroll the right pane to the Calendar options section, and you’ll see “Use this response when proposing a new meeting time.” Choose the option you prefer between “Accept or Decline.”

5. Click OK and restart Outlook. From now on, all coming meeting invitations will be auto-accepted or auto-declined as you set.
Tip #3: Create a Findtime Poll
- Choose an email to respond to or create a new email.
- List attendees who are needed for the meeting in To and those who are optional in Cc.
- Select Reply with meeting poll under the Home tab.
- Choose the meeting options:
- FindTime proposes ideal meeting times based on a review of the attendees’ schedules (if any are available).
- Pick a few times that are suitable your meeting.
- Enter the meeting location.
- Toggle the ON/OFF switch under Poll Settings.
- Select Insert to email. To invite attendees to the meeting and begin voting, choose Send.
- A direct link to the voting website for your meeting will be sent to you.
Tip #4: Share, Publish, and Manage Shared Calendars
Share Outlook Calendars
When you share your Outlook calendar with others, they can immediately add it to their Outlook calendar view. Sending a sharing invitation to other users will allow them to view your calendar in their own Calendar list.
1. At the bottom of the page, select to go to Calendar.
2. In Calendar, on the toolbar at the top of the page, select Share, and choose the calendar you want to share.
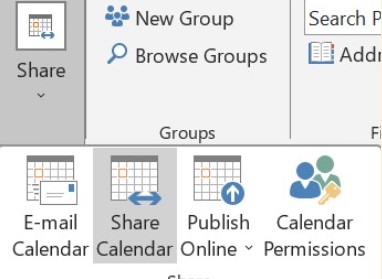
3. Enter the name or email address of the person you want to share your calendar with.
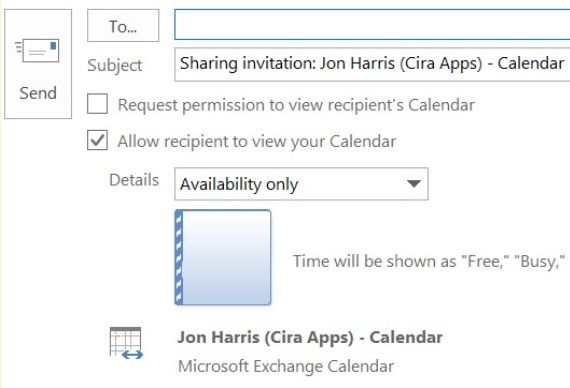
4. Select Share. If you decide not to share your calendar right now, click on the trash icon.
Publish Outlook Calendars
In Calendar settings, you can publish your calendar so anyone can view your calendar or subscribe to it.
1. In Calendar view, select Settings > View all Outlook settings.
2. Select Shared calendars.
3. Under Publish a calendar, choose which calendar you want to publish and how much detail people can see.
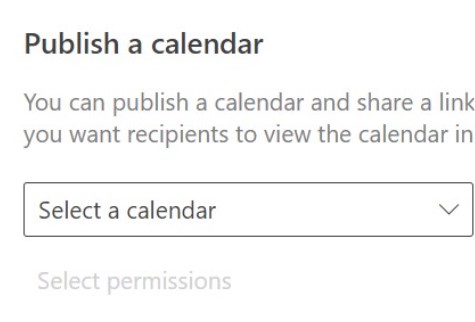
4. Select Publish
Being an Outlook user also means you have to manage shared Outlook calendars. It’s part of the daily of those working in big organizations.
Tip #5: Overlay and Work with Multiple Calendars
Our fifth Outlook Calendar tip is about overlaying and working with multiple calendars.
In order to help you see availability across calendars, you may browse multiple Outlook calendars side by side or merge them into a stacked overlay view.
1. In Calendar, under the Navigation Pane, click the box next to another calendar that you want to view.
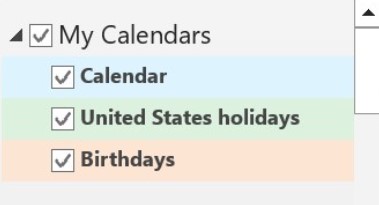
2. Right click on your calendar and click on Overlay.
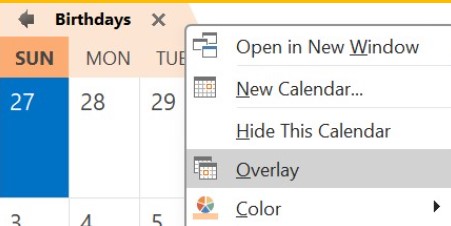
3. Repeat step 2 to add another calendar to the overlay.
Tip #6: Make a Calendar Private
The sixth tip among our Outlook Calendar tips is one that lets you set a calendar private.
Microsoft Outlook users in the same Office 365 mail environment benefit from having the best collaboration tools. However, you should think about what information is publicly available.
Follow the steps below to review your calendar permissions and set your calendar to private.
1. Open Outlook and select Calendar from the navigation menu.
2. Right-click the calendar you want to make private and select Properties.
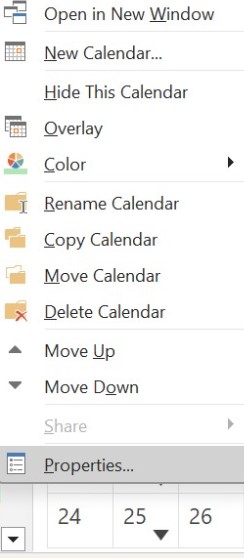
3. In the Permissions tab, select Default, and choose None from the drop-down menu.
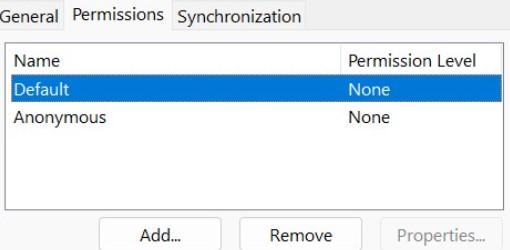
4. Click OK to save your changes.
Tip #7: Change Your Calendar View
In Microsoft Outlook, you can see multiple views simultaneously by opening them side by side. Here’s how you can view your calendar and inbox at the same time in Outlook:
1. On the Navigation Pane, right-click any of the side buttons.

2. Choose “Open in New Window”
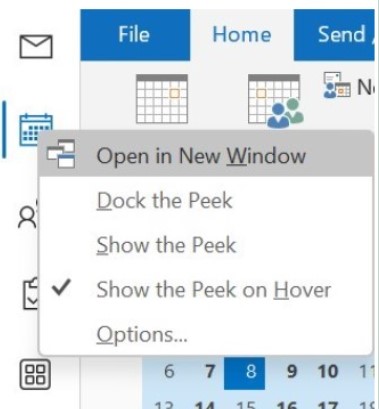
3. Following that, move that window to your second monitor.
Tip #8: Use Keyboard Shortcuts
Here are some of the most popular—and useful—Outlook keyboard shortcuts, and there are more than these out there.
- Ctrl+1 Switch to Mail.
- Ctrl+2 Switch to Calendar.
- Ctrl+3 Switch to Contacts.
- Ctrl+4 Switch to Tasks.
- Ctrl+5 Switch to Notes.
- Ctrl+6 Switch to Folder List in Navigation Pane.
- Ctrl+7 Switch to Shortcuts.
Tip #9: Set Your Availability Status
Another useful Outlook calendar tip is the ability to set your availability status. This means that you can indicate if you are available, busy, off work, and more.
To modify your presence status, click My Info at the bottom of the screen, then Status, and then from the Status page, choose one of the following:
- Available
- Busy
- Do Not Disturb
- Be Right Back
- Off Work
- Appear Away
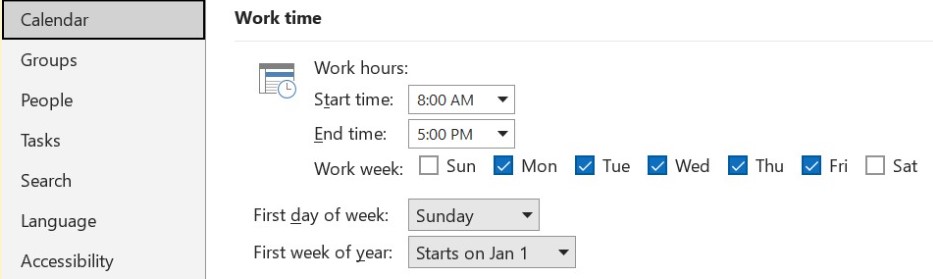
Tip #10: Set Working Hours
1. Click the File tab
2. Select Options.
3. Select Calendar.
4. To adjust your work hours, click the start and finish times of your work day in the Start time and Finish time lists.
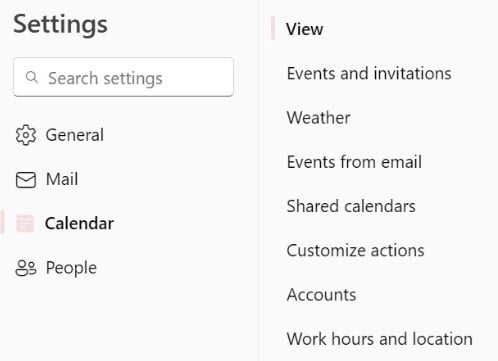
Tip #11: Customize Your Calendar Appearance
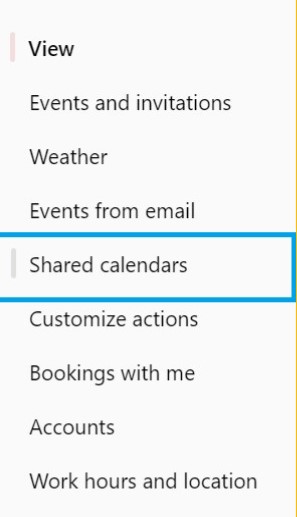
1. Choose Settings > View All Outlook Options > Calendar.
2. To change each setting, select one of the following:
View – Personalize your calendar’s appearance.
Events and invitations – Control the settings used when creating events.
Weather – Customize your weather experience.
Events from email – Control how events are added to your calendar via email.
Shared calendars – Share a calendar with specific people, publish a calendar for anyone to access through a link, and manage shared calendars.
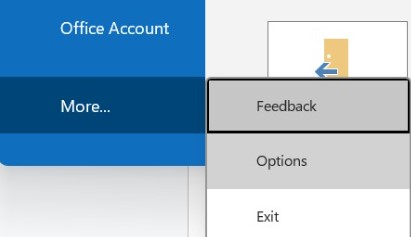
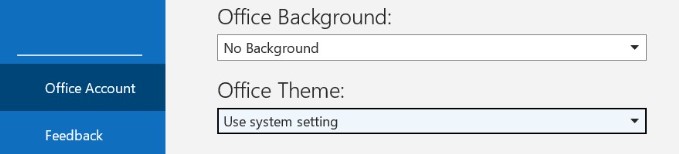
Tip #12: Activate Dark Mode
The dark mode in Outlook for Microsoft 365 features a black background for the message pane. If you like, you may change the message window’s backdrop to white.
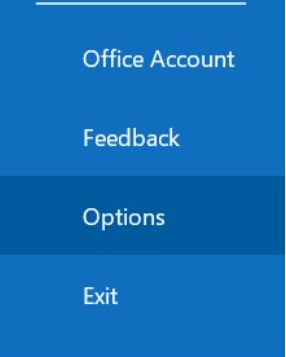
1. Go to the toolbar and select File, then select Office Account.
2. Under Office Theme, select Black.
3. Select the back arrow at the top to return.
Tip #13: Change Your Outlook Theme
Customizing the Outlook inbox theme is one of the coolest Outlook calendar tips. It can be done for aesthetic reasons or to increase visibility and minimize eye strain.
The number of theme options available is determined by the operating system and browser version. You may modify the Outlook theme in your account settings to customize your mailbox and improve the overall experience.
1. Open a Microsoft 365 app, like Word, Excel, or PowerPoint.
2. In the top left, select File > Options > General > Office Theme.
3. Choose one of the options.
Tip #14 Add a Calendar
One of the Outlook tips you’ll likely use is adding a calendar.
Outlook on the web allows you to browse many calendars at once. The calendars might be yours or a combination of yours and calendars from persons within and outside your business.
1. In Outlook.com, select Calendar > Add calendar > Create new calendar.
2. Give your calendar a name.
3. Customize your calendar with a color, a charm, or both.
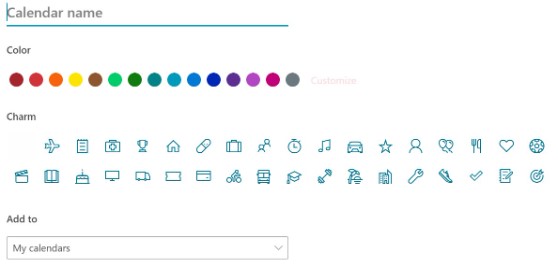
4. Select Save.
Tip #15: Use Calendar in Gmail
Let’s start by discussing how to configure Outlook to operate with Gmail. This is useful if you want to use Gmail for the majority of your email needs but still want to use Outlook’s organizational features.
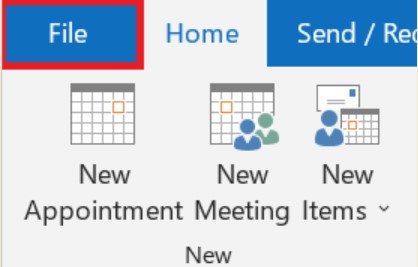
1. Open Outlook and go to File.
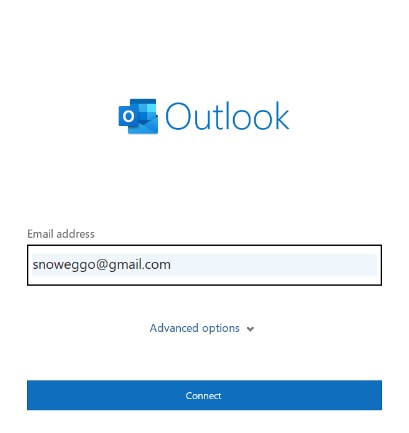
2. Click Add Account.

3. Enter your Gmail email address in the Email Address text box. Select Connect next.
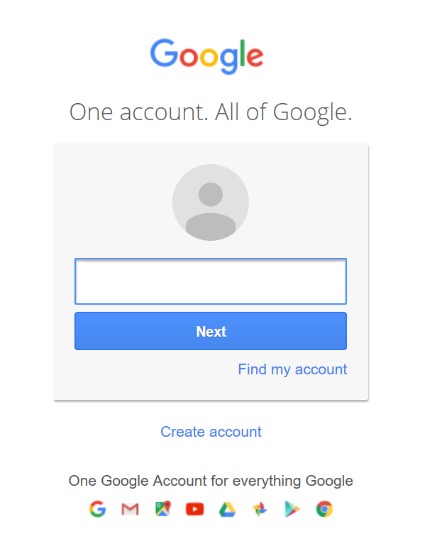
4. Enter your Gmail password, then select Connect.
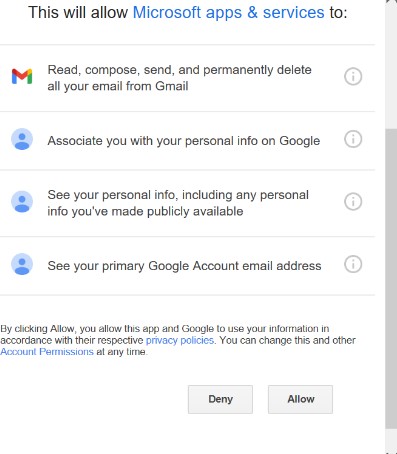
5. Click Allow to give Microsoft Outlook access to your Gmail Account.
6. Wait while Outlook connects with your Gmail account.
7. You can add another email account or choose Done once Outlook has finished adding your Gmail account.
However, if you want the opposite, meaning you want Gmail in Outlook instead, check out our tutorial on how to access Gmail in Outlook.
Tip #16: View Calendar in Microsoft Teams
Let’s look at a few more Outlook calendar tips.
Microsoft Teams also allows you to view all of your calendars through that application. Follow these steps to sync all of your calendars to Microsoft Teams.
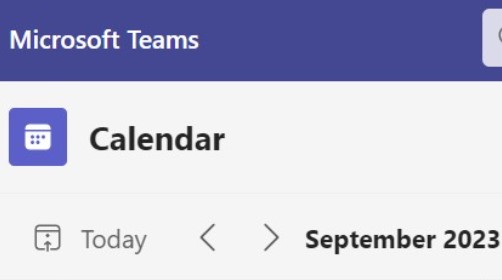
1. Go to the navigation panel and click on Calendar.
2. You will be displayed your work week by default. To access the dropdown menu of several views, select Work Week at the upper right of your calendar.
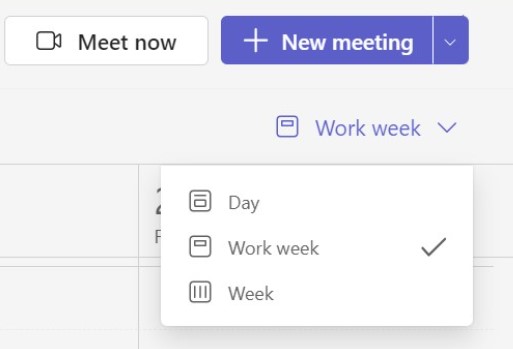
3. The month and year are displayed in the upper left corner. Select the month to alter your calendar view to any date in the past or future. Select the right and left arrows adjacent to the month to scroll by day or week.
Tip #17: Set Up Teams Meetings (Microsoft Teams)
Still in our list of the best Outlook Calendar tips, you can use Microsoft Teams meetings to organize virtual presentations and discussions for your whole organization. Here’s how to set up a Microsoft Teams meeting.
1. Open Outlook and switch to the calendar view.
2. Select New Items > Teams Meeting at the top of the page, under the Home tab.
3. Select which account you want to schedule a Teams meeting with.
4. Select Schedule Meeting. Or, if applicable, select a meeting template.
5. Add your invitees to the Required or Optional field(s)—you can even invite entire contact groups (formerly known as distribution lists).
6. Add your meeting subject, location (if applicable), start time, and end time.
7. Create your message.
8. Select Send.
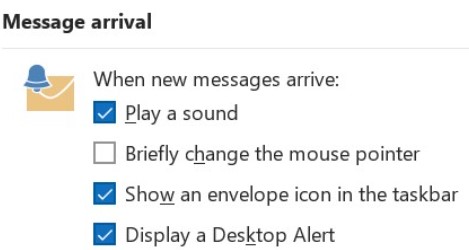
Tip #18: Activate Desktop Notifications
When you get a new email message, a meeting request, or a task request, a Desktop Alert shows on your desktop. Desktop Alerts are enabled by default. Here’s how you can Turn alerts on or off.
1. Select File > Options > Mail.
2. Under Message arrival, select or clear the Display a Desktop Alert check box and then select OK.
Tip #19: Export Calendar
Our 19th Outlook Calendar tip is about exporting calendars.
Many professionals utilize scheduling systems to plan their projects and meetings. You may need to export your calendars to Excel from time to time. This action lets you share events with other members of the team or evaluate them in a list.
1. Open the Calendar in Outlook and pick the calendar you wish to export.
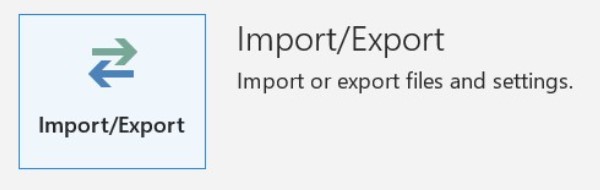
2. Navigate to File > Open & Export.
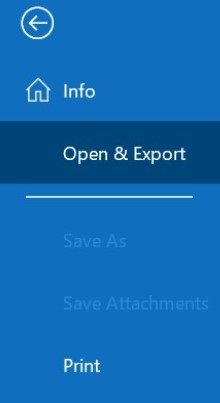
3. Click Import/Export to export your calendar settings
Tip #20: Change Event and Invitations Settings
You can update your Outlook calendar and notify others about schedule changes by changing an appointment, meeting, or event that you made.
1. Open the appointment, event, or meeting from your calendar.
2. Edit the item details on the Appointment or Meeting tab. When you’re done, click Save & Close for an appointment or event or Send Update for a meeting you created.
Tip #21: Create an Event
Whether you’re making a personal appointment or organizing a meeting, Outlook on the web has all the functionality you need to find the best time for everyone. The steps for organizing an event are almost identical to those for setting an appointment or a meeting.
1. Select New event.
2. Add details, like a title, date and time, a description, and how you want the meeting to Show as.
3. Select Save.
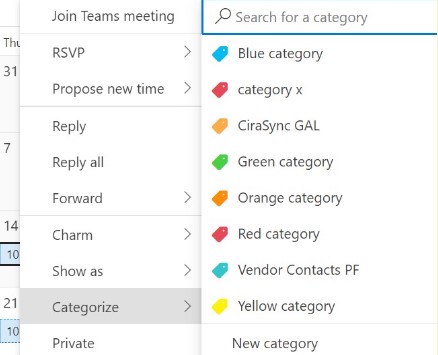
Tip #22: Assign Colored Categories to Your Events
Color categories in Microsoft Outlook let you readily recognize and organize related items. Assign a color category to a set of similar objects, such as notes, contacts, appointments, and email messages, to help you monitor and organize them easily. Items can also be assigned to more than one color category.
1. From your main calendar view, right-click the appointment, meeting, or event, point to Categorize, and then click a color category.
2. From an open appointment, meeting, or event, look for the Categorize button on the ribbon in the Tags group.
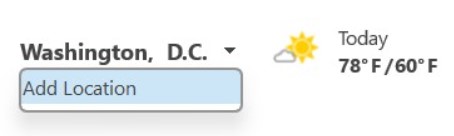
Tip #23: Edit and Display Weather Forecast
It’s easy to modify the location of the three-day forecast in your Microsoft Outlook calendar. The Weather Bar list must always have at least one place; you cannot delete a location if it is the only one in the list.
1. You may see the weather for a specific place in the Weather Bar when viewing your Outlook Calendar. Forecasts are offered for cities all across the world.

2. To change the city displayed in the weather forecast bar, use the down arrow.
Tip #24: Customize Your Calendar Appearance
To change the default background color for all calendars:
1. Go to File > Options > Calendar.
2. Under Display Options, select Default calendar color, select the color that you want, and then select the Use this color on all calendars check box.
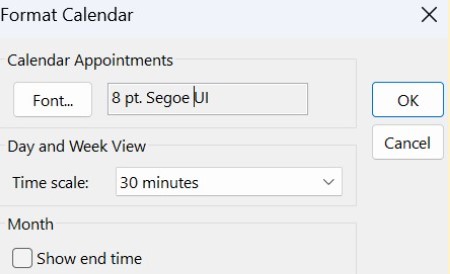
To change the calendar font:
3. On the View tab, in the Current View group, select View Settings, and then select Other Settings.
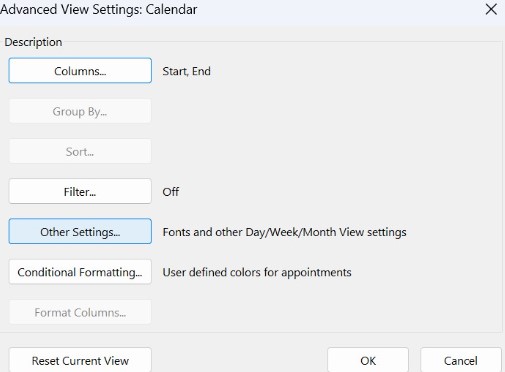
4. Use the buttons to choose the fonts and sizes that you want to use.
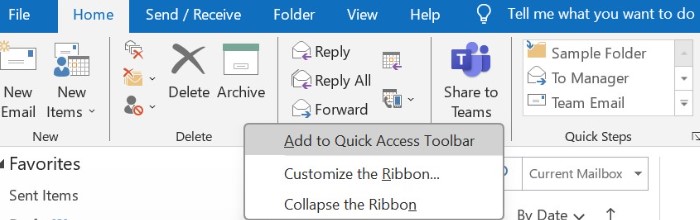
Tip #25: Customize the Event Toolbar
Outlook includes a toolbar that you may customize so that the functions you use the most are conveniently accessible. The Microsoft Quick Access toolbar is a menu that may be seen in the upper-right or lower-left area of the Microsoft Outlook application.
1. On the ribbon, select the appropriate tab or group to display the command that you want to add to the Quick Access Toolbar.
2. Right-click the command, and then select Add to Quick Access Toolbar on the shortcut menu.
Tip #26: Print Calendar
When printing your Outlook calendar, you may choose the current day, week, or calendar month or specify a custom date range. Only one calendar’s appointments and meetings can be printed at a time.
1. In Calendar, click File > Print.
2. Under Settings, click the print style you want. As you click print styles, the preview window changes to match the style.
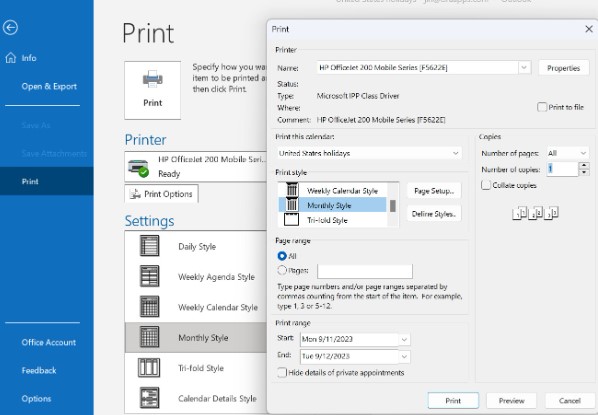
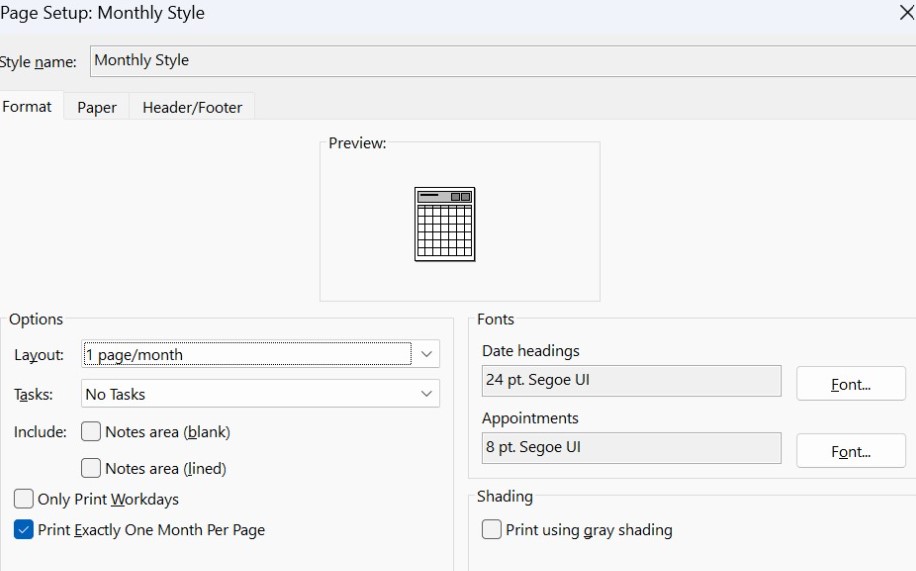
3. To set other print options, such as the paper orientation or the fonts used, click Print Options.
4. Use the Print Options button and dialog box from to select a custom date range, specific pages to print, or the number of copies.
5. Click Print.
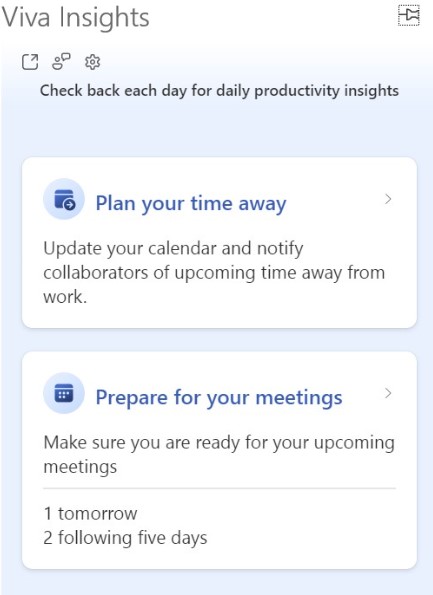
Tip #27: Track Your Work Insights
Microsoft Viva Insights elements are available at various levels to Microsoft Office 365 and Microsoft 365 subscribers. This Outlook add-in assists you in maintaining work connections, planning time away from work, and improving your overall work-life balance.
1. In Outlook, navigate to your sent folder.
2. On the Home ribbon, click the « insights » button.

3. From here Viva Insights panel on the right will help users plan their hours throughout the workday, prepare for meetings, or even set up reminders.
Tip #28: Time Zone Management
Last but certainly not least in our list of the best Outlook Calendar tips is time zone management. If you travel frequently, setting up multiple time zones in your calendar can help you avoid confusion.
Three different time zones can be displayed in the Calendar in the most recent versions of Outlook for Microsoft 365.
1. Navigate to the File menu.
2. Select Options.
3. On the Calendar tab, under Time zones, select the Show a second time zone check box and, if needed, the Show a third time zone check box.
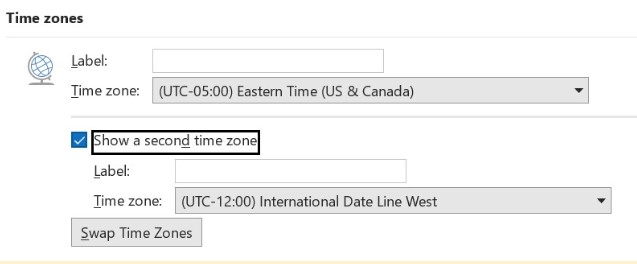
4. Click the time zone you wish to add to the Time zone list.

Manage Your Calendar Like a Pro with These Outlook Calendar Tips
We looked at 28 fundamental Outlook Calendar tips and tricks in this article. Outlook continues to offer even more useful tools that can aid in the effective and productive use of the platform.
As you learn more about the world of Outlook Calendar, you will find how it may assist you in managing your time and optimizing efficiency for your profession.
So, what Outlook calendar tips do you already use?
Frequently Asked Questions
How do I make my Outlook calendar look better?
You can make your Outlook calendar look better by changing its appearance. Go to Settings > Calendar and choose your starting calendar date and working hours. You can also customize events and invitations, weather, shared calendars, actions, and more.
To change the entire Outlook experience, go to Settings > General > Appearance > Theme and choose your preferred theme or use the dark mode.