In the U.S., around 47% of workers use Microsoft Office products, including Outlook. And reading this article means you are probably one of its 400 million users worldwide.
But how do you use the best Outlook features to improve your productivity?
In this article, we will share the best outlook tips. These practices will help you manage your inbox, calendar, and contacts like a pro.
Keep reading!
Best Outlook Tips to Improve Productivity
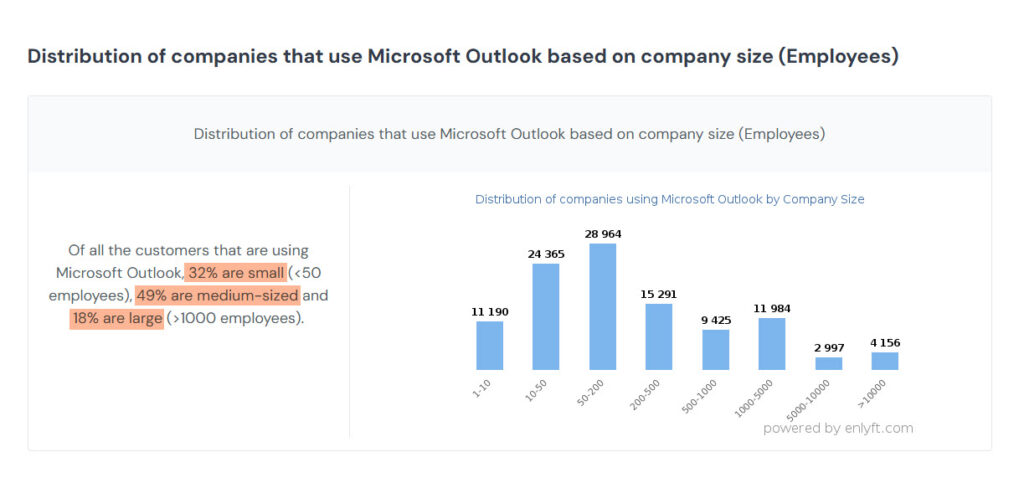
Enlyft analyzed its data of 111,046 companies that use Microsoft Outlook. They found out that 32% are small businesses (<50 employees), 49% are medium-sized, and 18% are large companies (>1000 employees).
These companies use Microsoft 365 Copilot (including Outlook) to improve productivity. Let us share some Outlook tips they use in their daily activities.
1. Set Up Quick Steps
The Quick Steps feature lets users automate repetitive email tasks with a single click. For instance, if you frequently move messages to a specific folder, you can set up a quick step to move them faster with one click.
Note:
You cannot undo Quick Steps using a menu command or a keyboard shortcut like Ctrl+Z. This is because Quick Steps can contain actions such as Permanently Delete that cannot be undone.
Let’s set up Quick Steps.
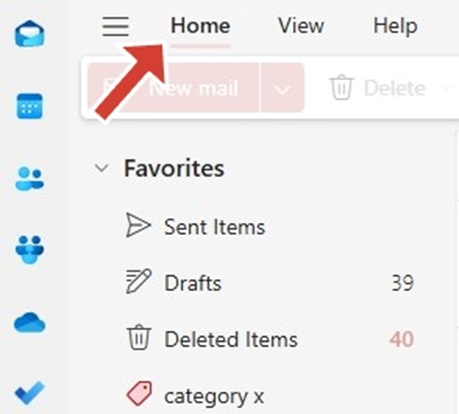
1. Open Outlook and navigate to the « Home » tab.
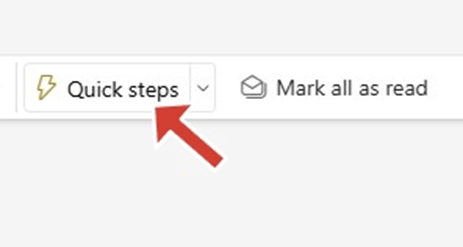
2. In the « Quick Steps » section, click the small arrow to open the Quick Steps Manager.
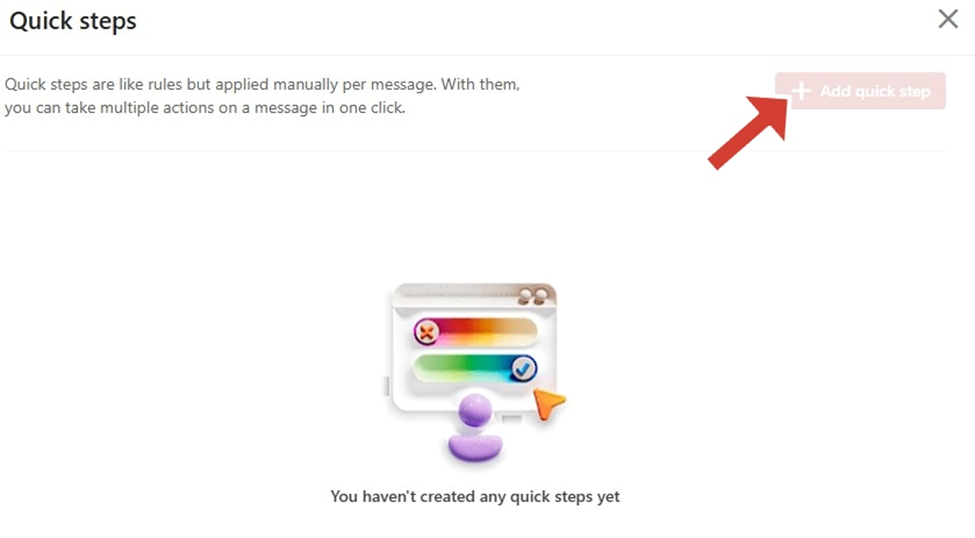
3. Click Add Quick Step. (Note: The Quick Steps feature is only available on the desktop version of Outlook and not on the web or mobile versions.)
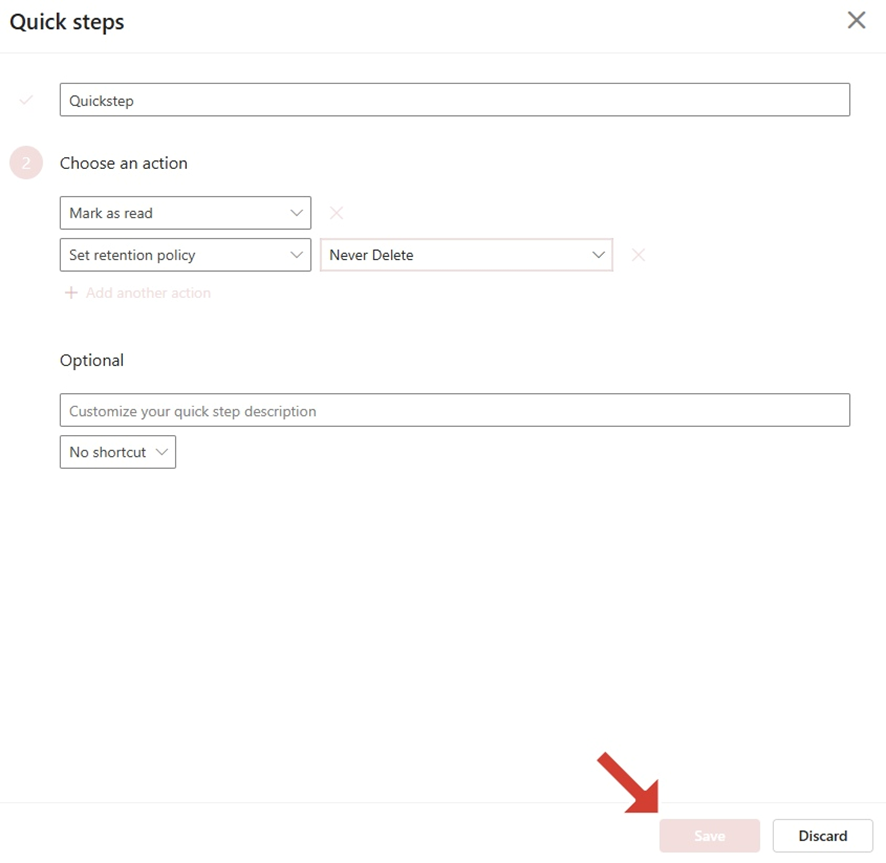
4. Name your quick step, choose an action, such as « Move to Folder » or « Forward, add a shortcut key.
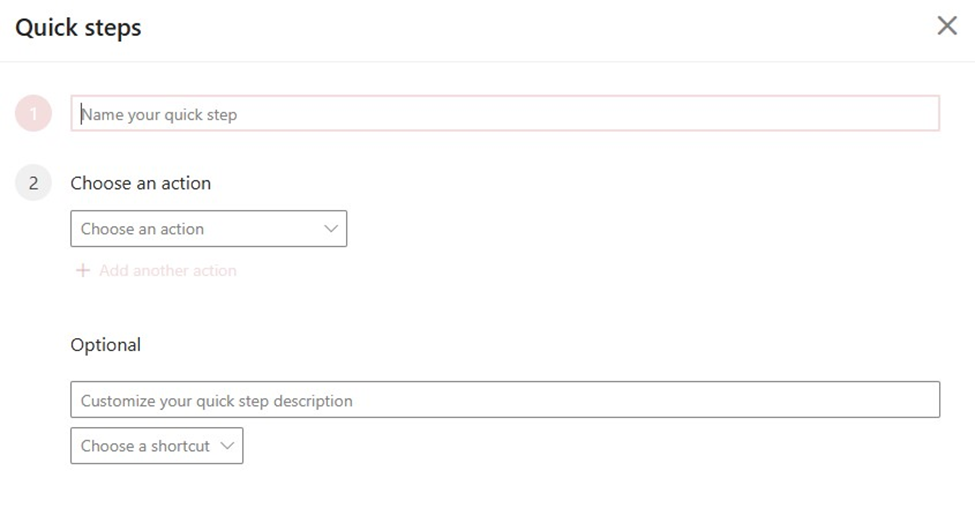
5. Save the Quick Step.
2. Use Keyboard Shortcuts
Like Quick Steps, keyboard shortcuts help you perform repetitive actions faster than using a mouse.
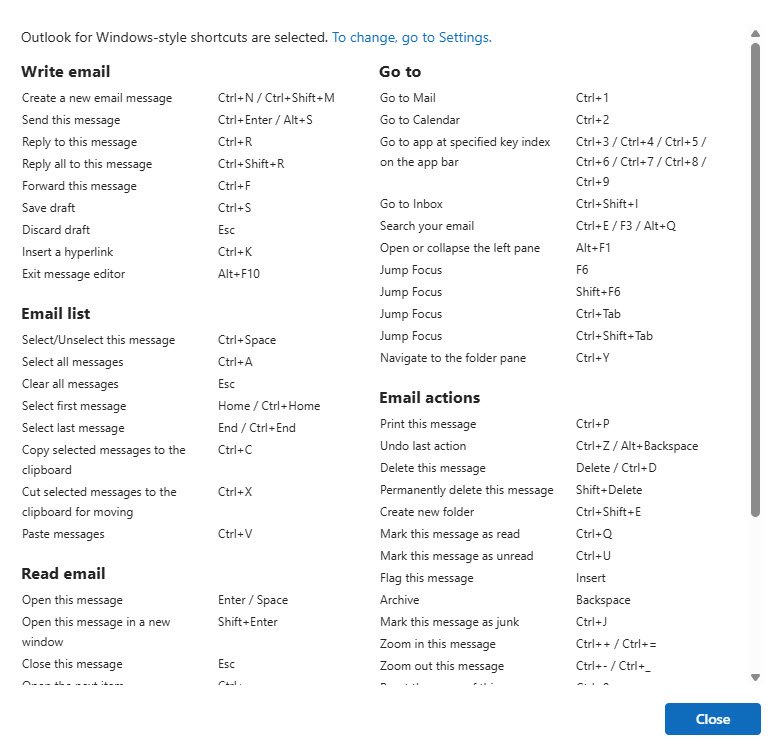
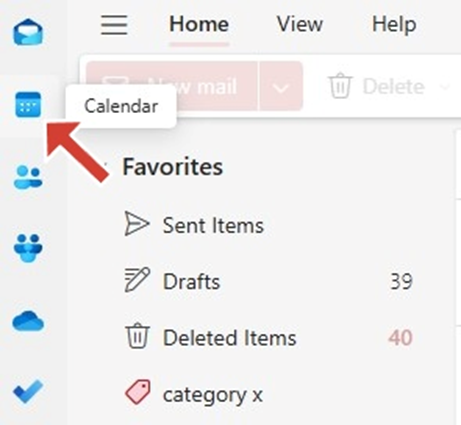
For instance, you can quickly switch between Mail (Ctrl + 1), Calendar (Ctrl + 2), and Contacts (Ctrl + 3). You can also open a new email (Ctrl + N), send an email (Ctrl + Enter), or reply to all (Ctrl + Shift + R).
Here are a few more Outlook keyboard shortcuts:
- Press Ctrl+N to create a new email.
- Use Ctrl+R to reply to an email. (This works only if you’ve selected or opened an email.)
- Try Ctrl+Shift+M to compose a new message from anywhere in Outlook. (Use this to find emails, events, or contacts without manually searching through folders.)
- Access the search bar quickly using Ctrl+E.
To access your keyword shortcuts, go to Settings (gear) > General > Accessibility > and choose the shortcuts version (Outlook for Windows or Outlook for Web).
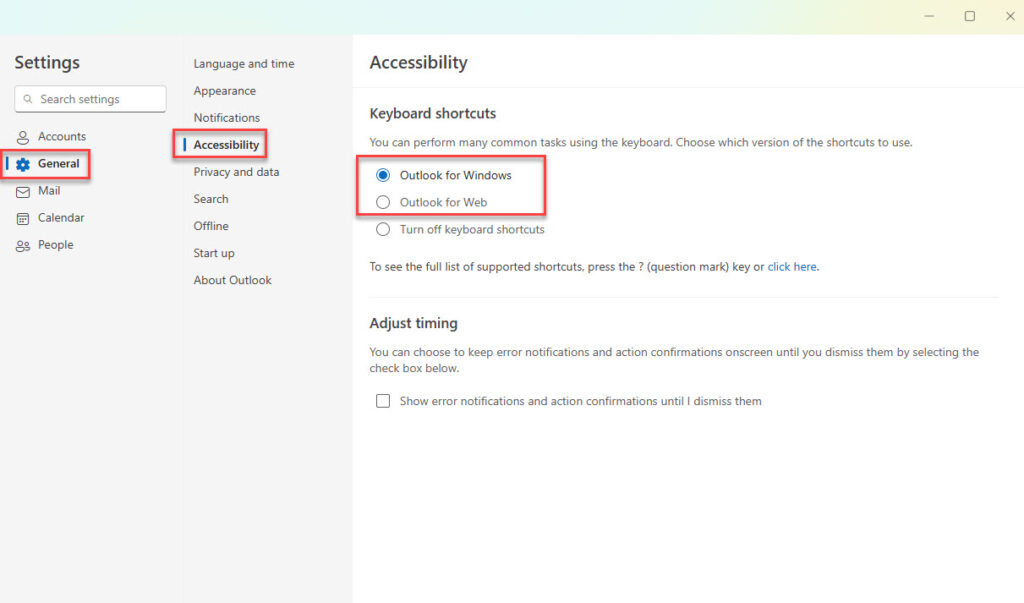
Next, press “Click Here.”

Outlook will show you the complete list of shortcuts.
3. Sync Outlook Contacts to Employee Smartphones
Companies that use Outlook also sync Outlook or GAL contacts to employees’ smartphones. For example, Skender and The Morse Group, top construction companies, respectively save 1500 and 500 hours in IT labor.
Without a doubt, this sync saves companies thousands of hours and money. Unfortunately, Outlook does not have a built-in synchronization feature that allows users to access company contacts in their phones’ contacts directory.
That’s why we created CiraSync, a tool that bridges the Microsoft synchronization gap with the only enterprise-grade solution specifically designed to sync Global Address List contacts to business smartphones.
Here’s how you can Sync Outlook Contacts to Employee Smartphones with CiraSync.
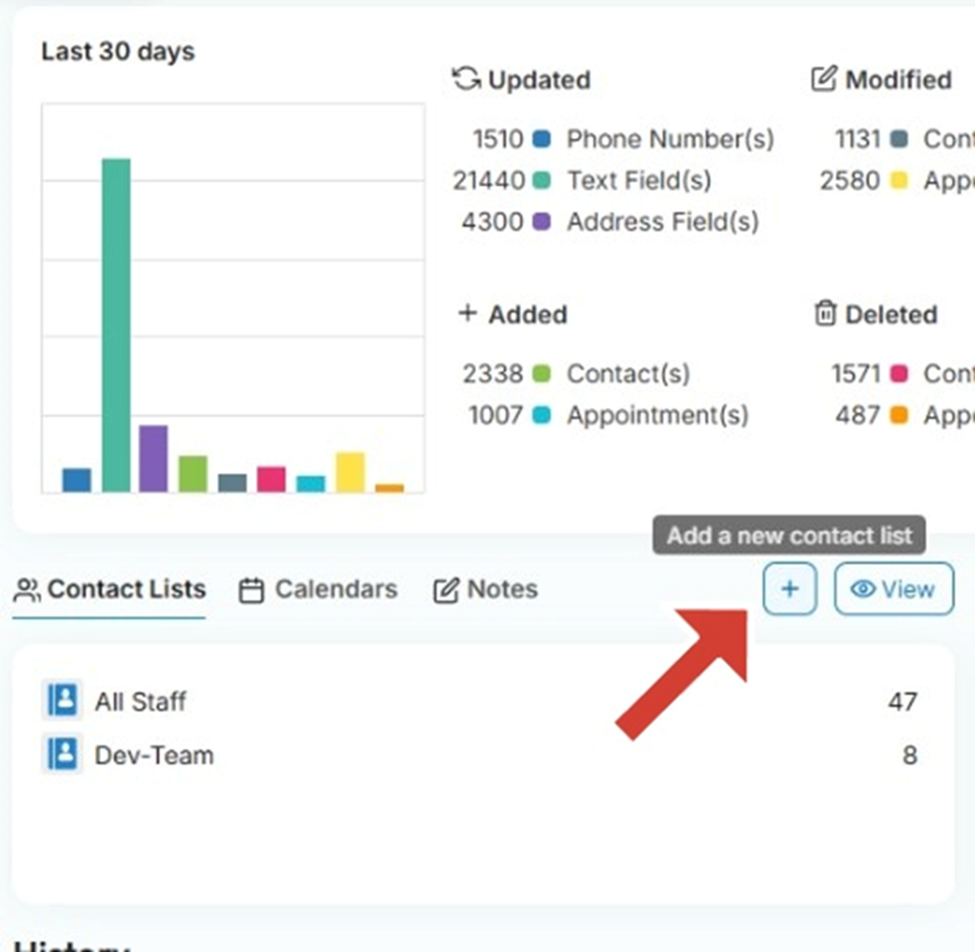
1. Log in to the CiraSync Dashboard.
2. Click the + in the Contact Lists.
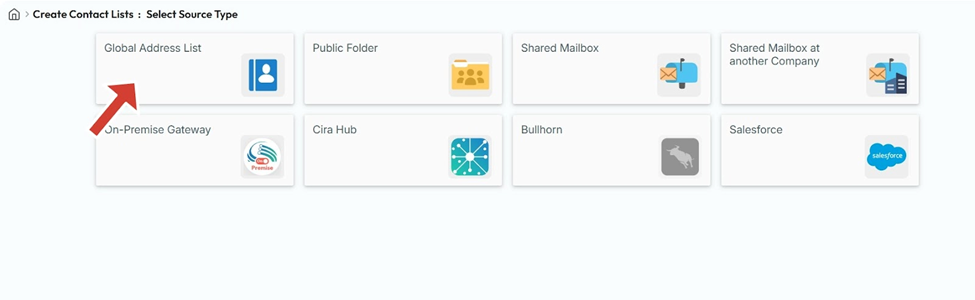
3. Select the Contact source type. CiraSync allows you to sync shared mailboxes at your company, shared mailboxes at another company, public folders, and Salesforce contacts.
We will choose Global Address List for this article.
4. Click on Collections.
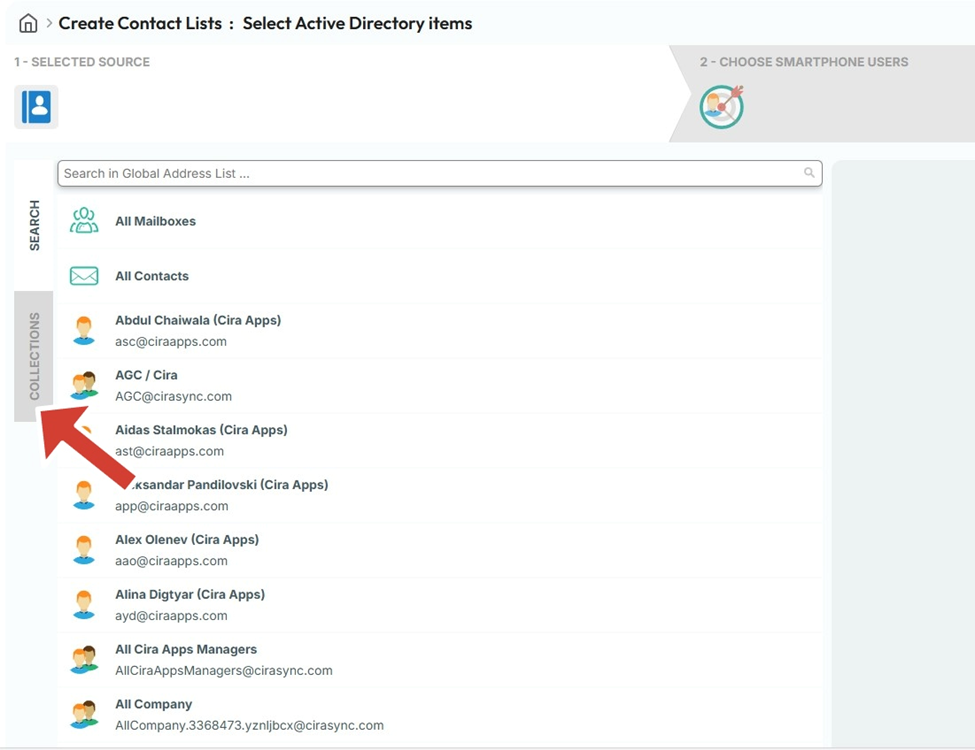
5. Select the desired Contact sources.
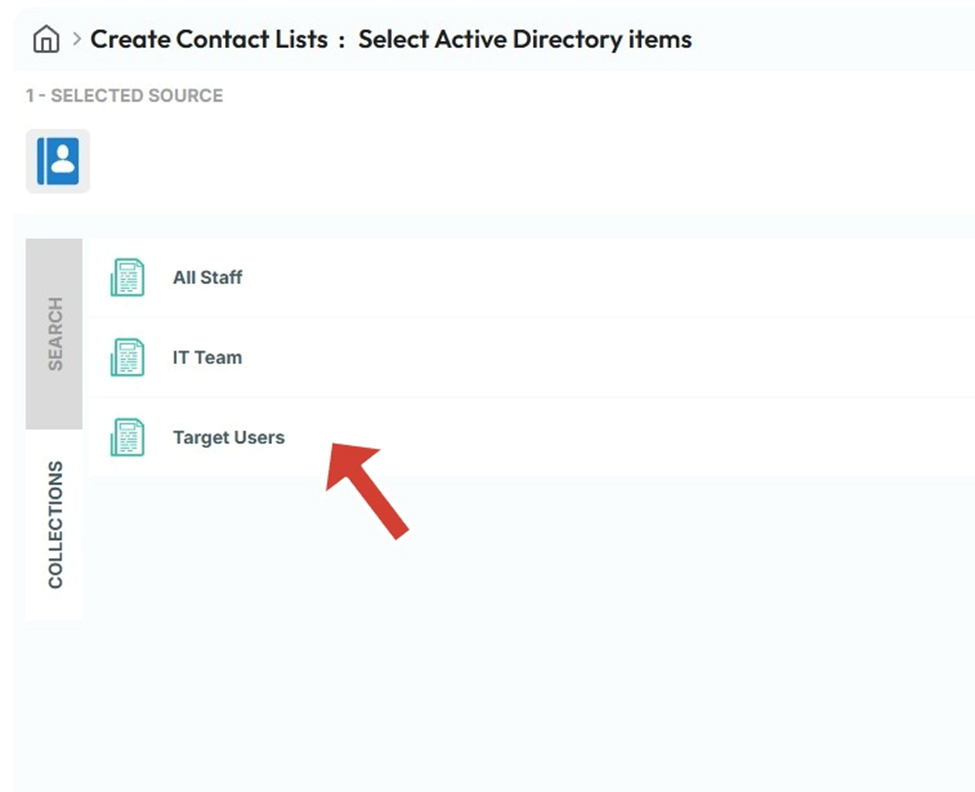
6. Click the NEXT button on the top-right corner.

7. Select the user contact you would like to use as a target.
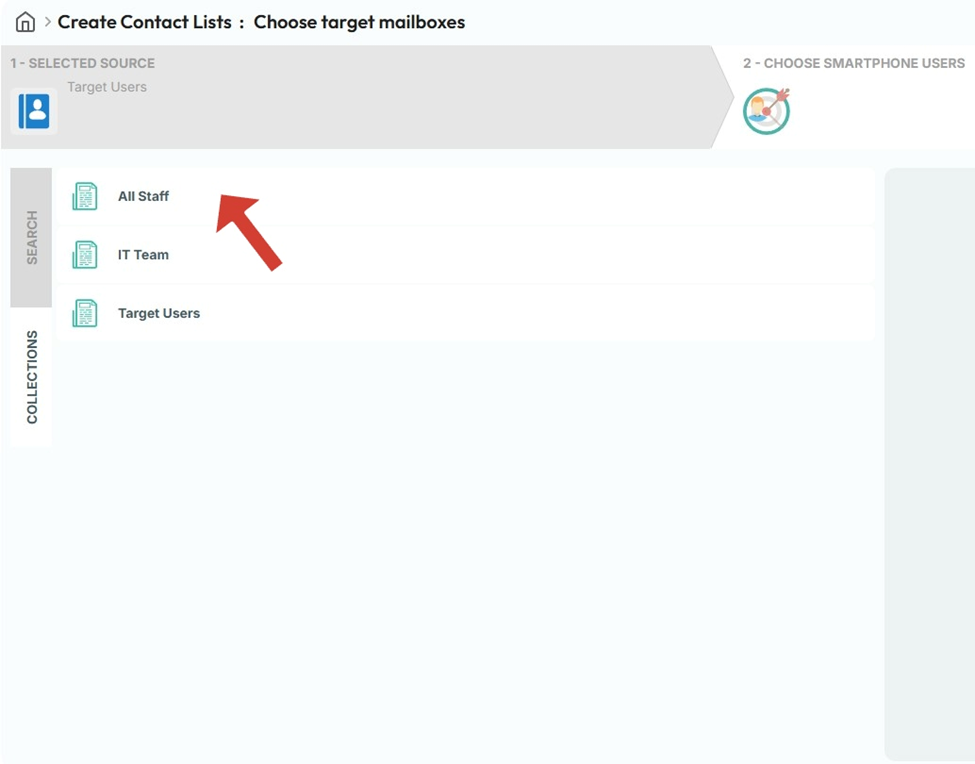
8. Click NEXT in the top-right corner.
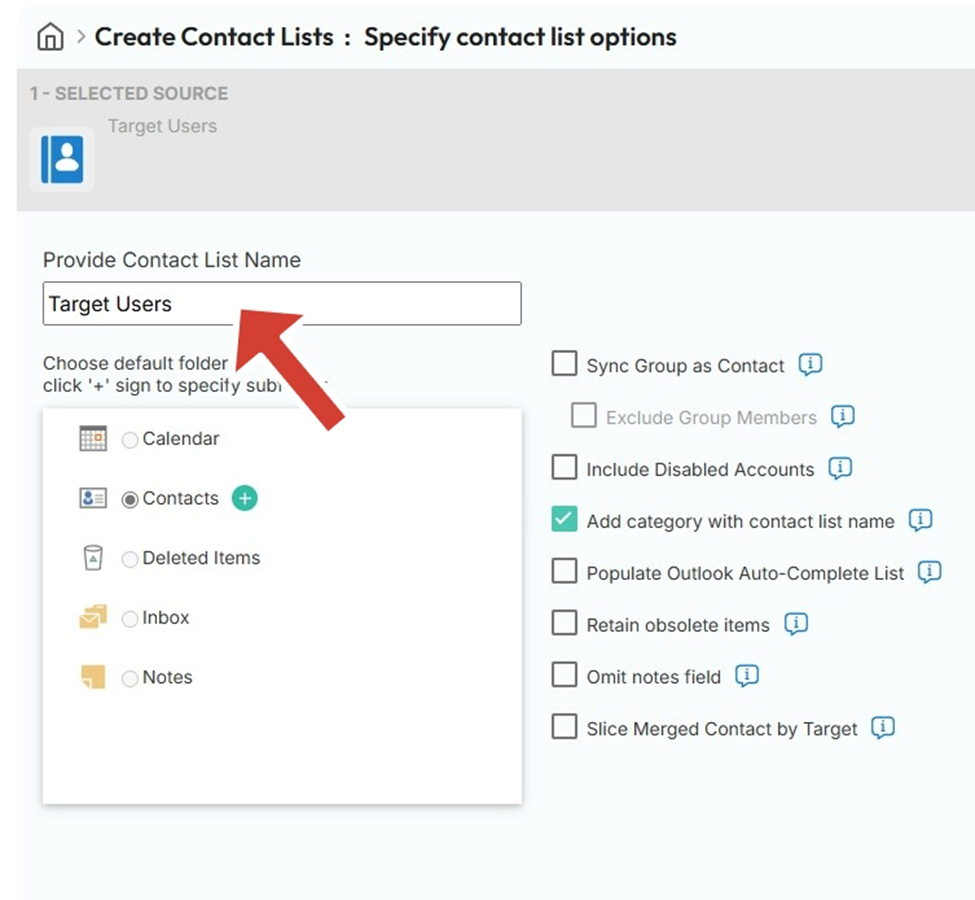
9. Name the contact list in the box under Provide Contact List Name. You can also
- Populate the Outlook Auto-Complete List,
- Retain obsolete items,
- Omit note fields, or
- Include disabled accounts.
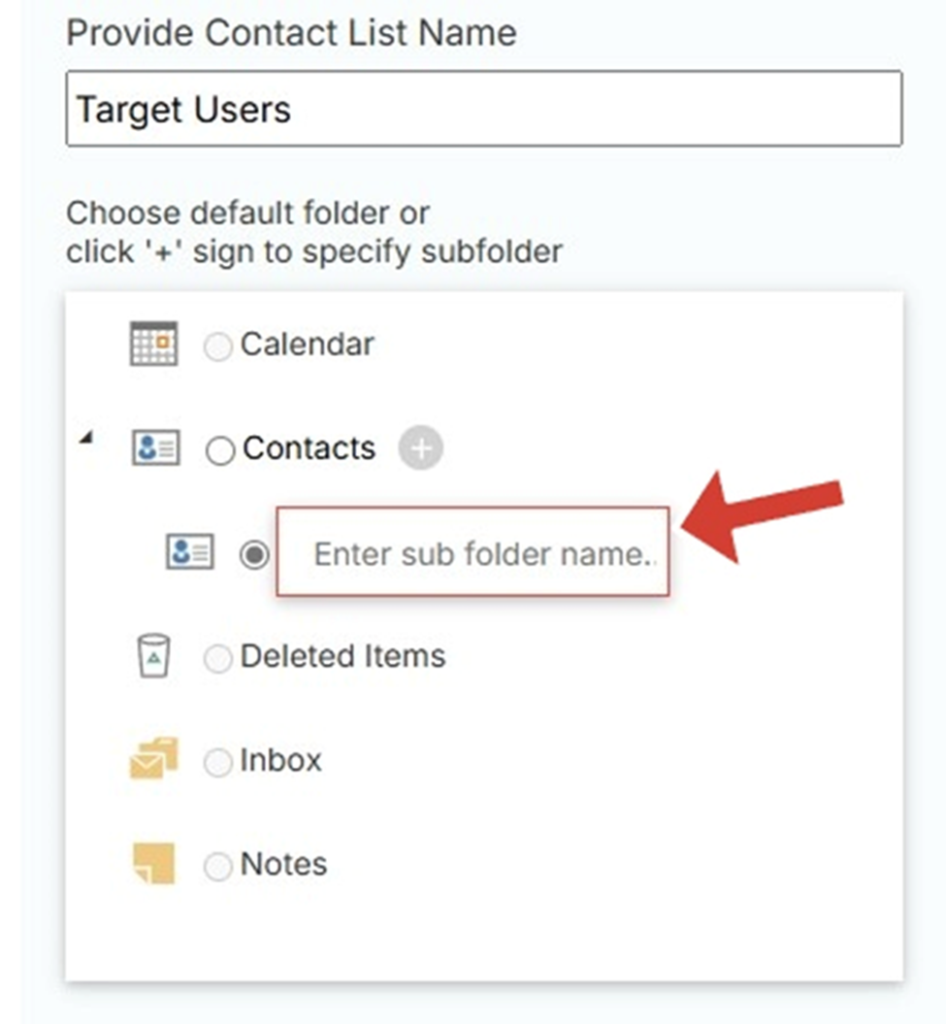
10.Click the + next to Contacts.
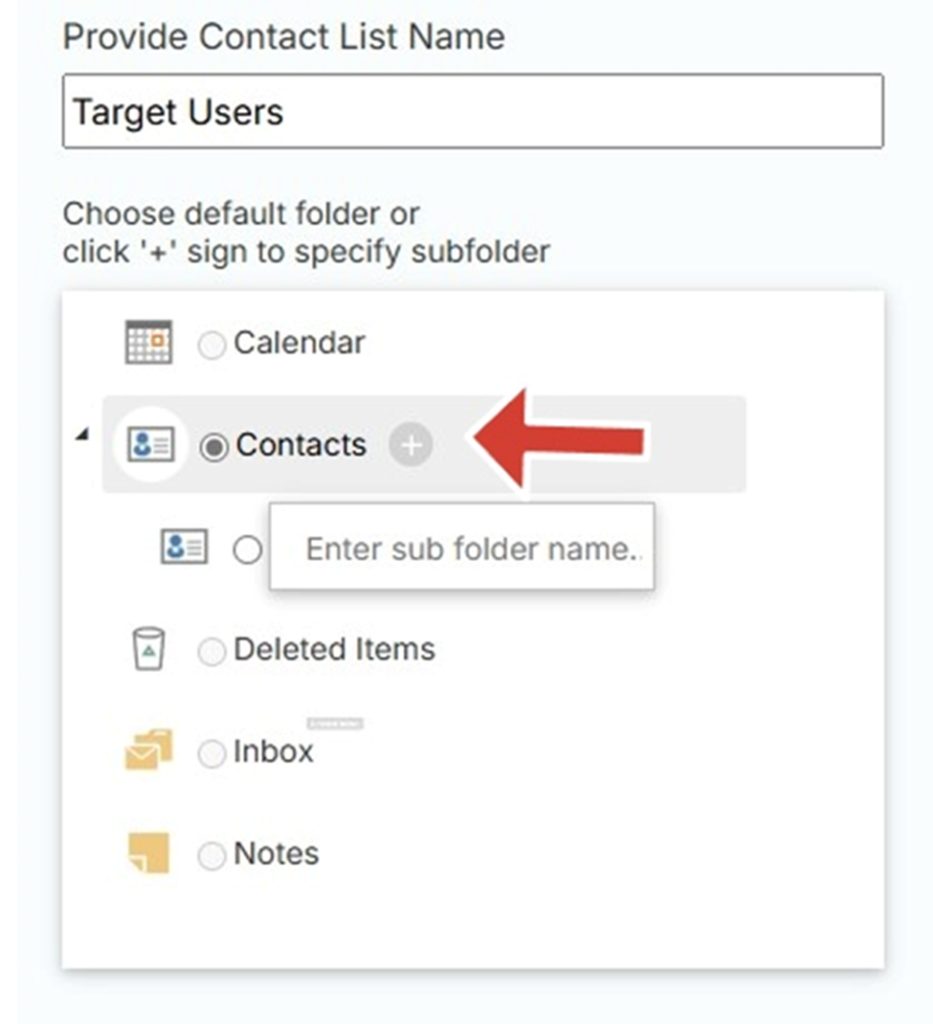
11. Enter the preferred name of your subfolder.
12. Check Sync Contact Groups if you have groups in the contact list and would like to sync members of that group.
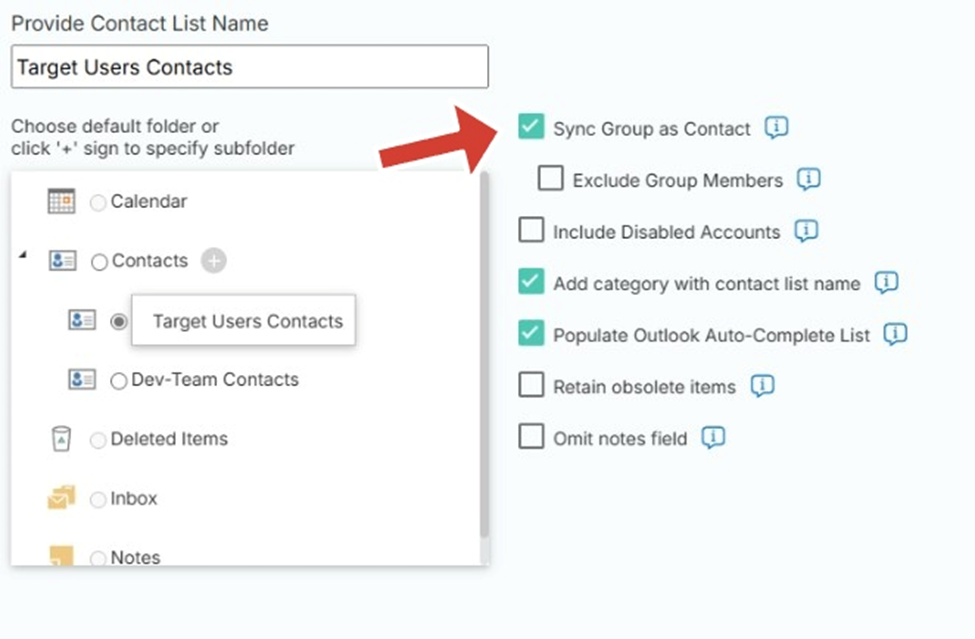
13. Check Populate Outlook Auto-Complete List if you want these synced contacts to appear in the Outlook Auto-Complete list.

14. By default, CiraSync will remove a contact from the targeted mailbox if it is removed from the Source. If you want to allow users to keep these obsolete items, check Retain obsolete items.

15. Click SAVE.
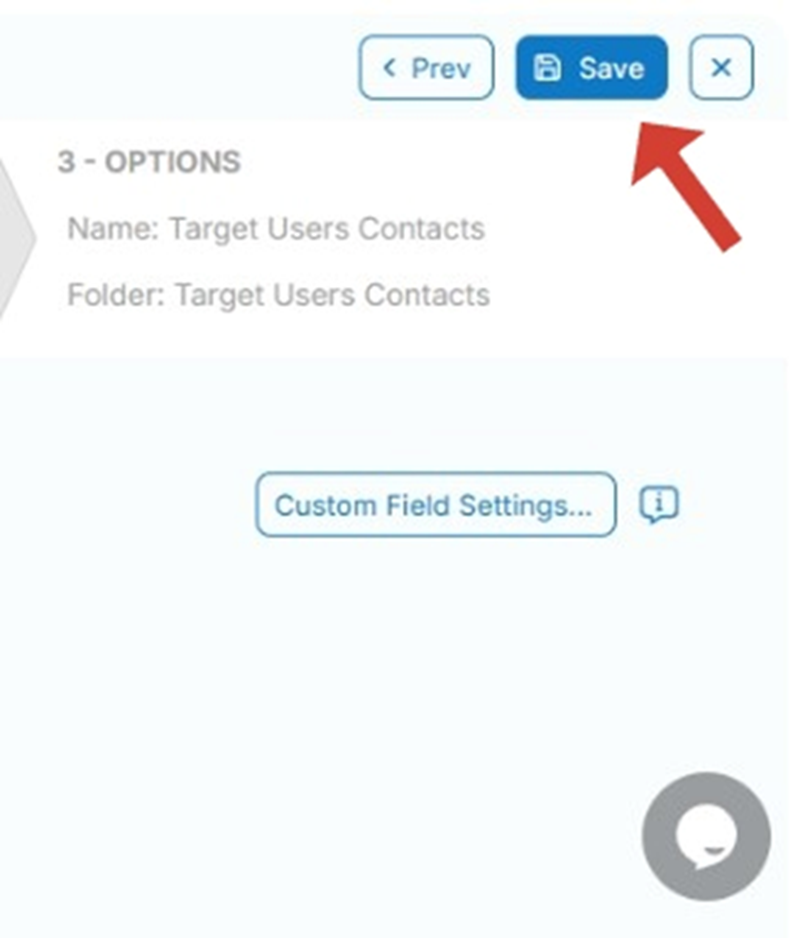
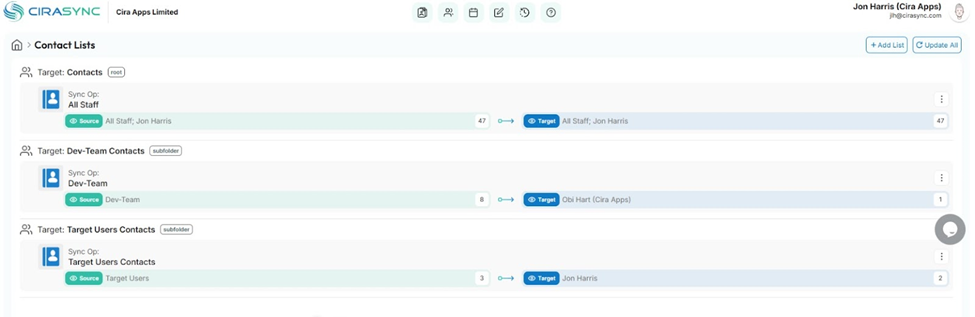
16. You will be taken to the sync summary dashboard.
17. Click the CiraSync icon in the top-left corner of the window to return to the CiraSync home dashboard.
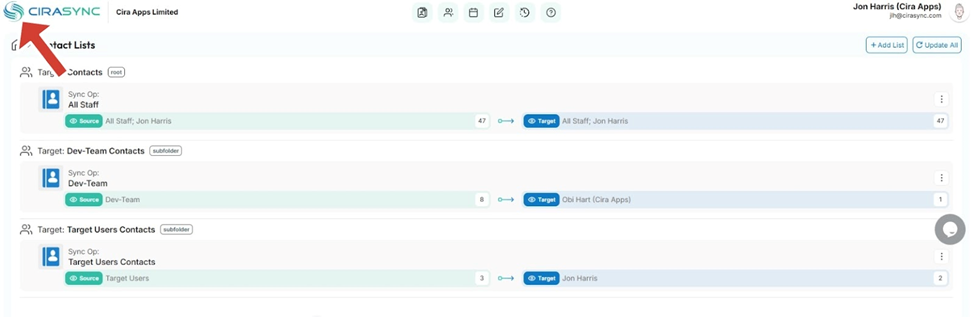
18. Check the Update Cache box under the Sync Status pane in the top-right corner of the dashboard.
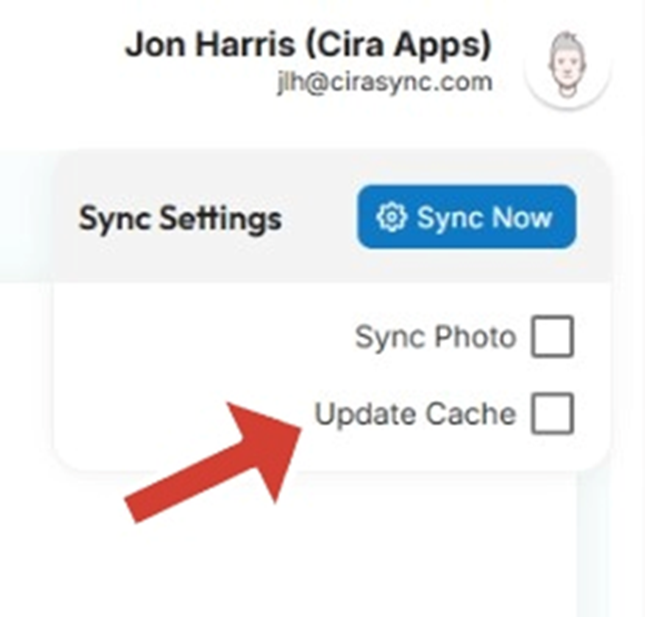
19. Click SYNC NOW to run a manual sync.

4. Use Calendar Reminders
Outlook’s Calendar Reminders feature helps users keep their calendars in order so they don’t miss any crucial appointments or meetings. This is a simple feature that is perfect for any professional who is constantly in and out of meetings every day.
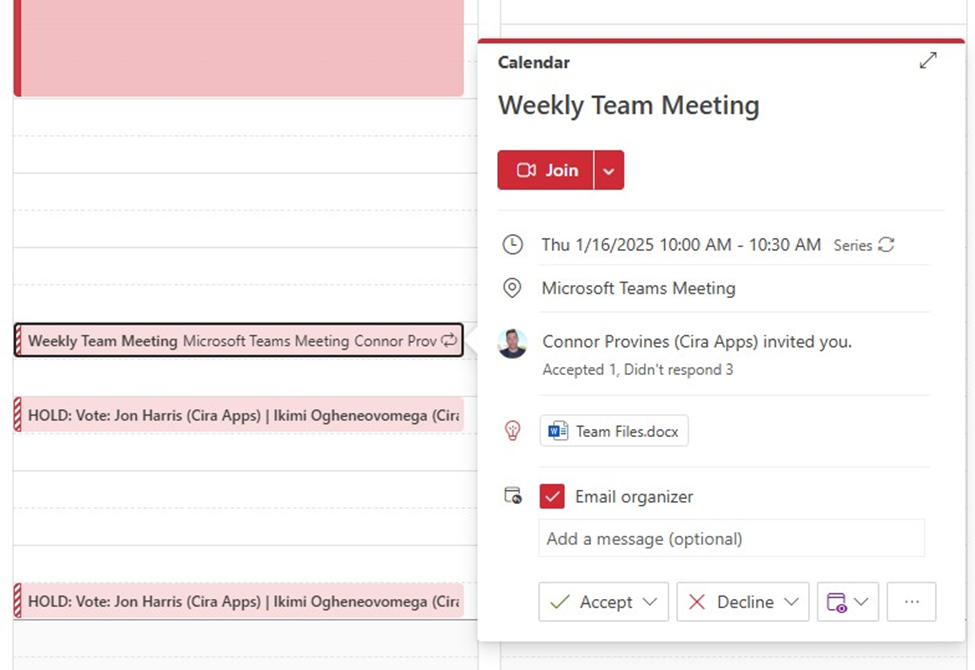
1. Open the Outlook calendar.
2. Double-click on an event or meeting to open its details. (This opens the details page where you can edit the event.)
3. Set a reminder by selecting a time frame from the « Reminder » dropdown menu.
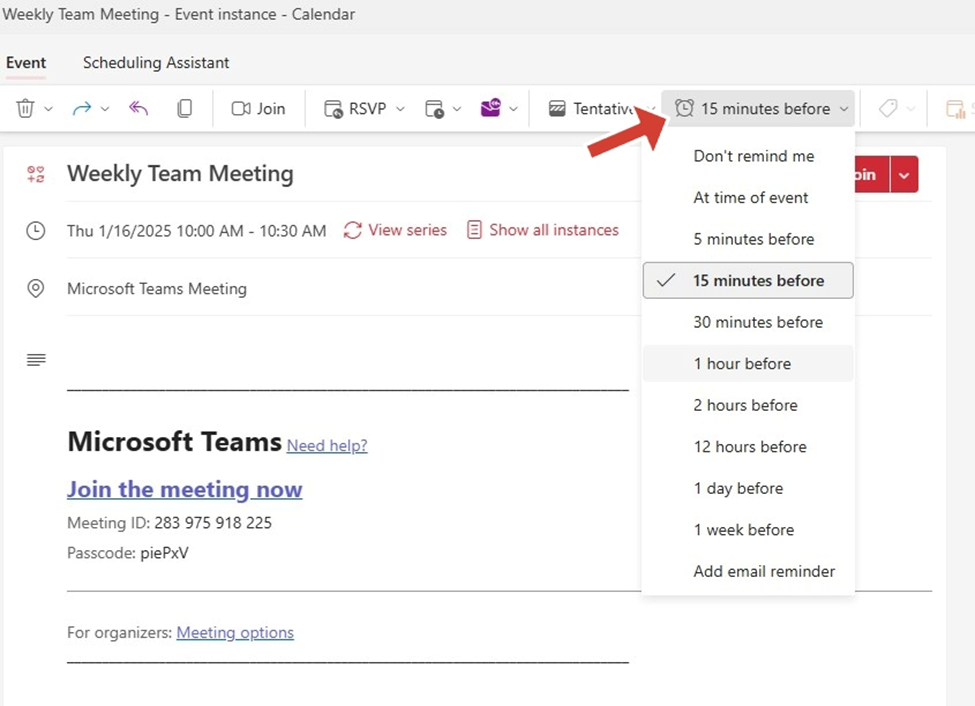
4. Save the event, and Outlook will notify you at the specified time.
Best Outlook Tips for Email Management
Let me share three key email statistics:
- The average office worker receives around 121 emails every workday.
- 40% of email users have at least 50 unread messages in their inboxes, and 1 out of 10 users admitted having over 1000 unread messages.
- 25% of remote workers in the US prefer communicating through email.
These statistics show the importance of efficiently managing your inbox. Let me share a few Outlook tips that will improve your email management.
5. Use Folders to Sort Emails
Outlook email folders help store messages in different folders based on sender, topic, or priority. You can move less urgent emails to dedicated folders or use rules to sort incoming emails into specific folders automatically.
Let me show you how to create an email folder in Outlook.
1. Right-click on « Inbox » and select « New Folder. »
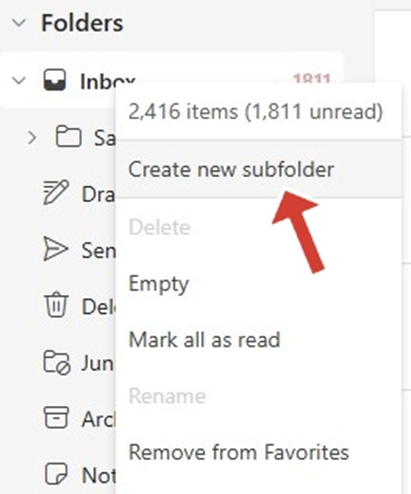
2. Create folders for specific categories, such as « Invoices » or « Personal. »
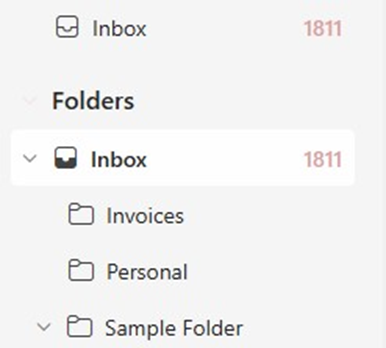
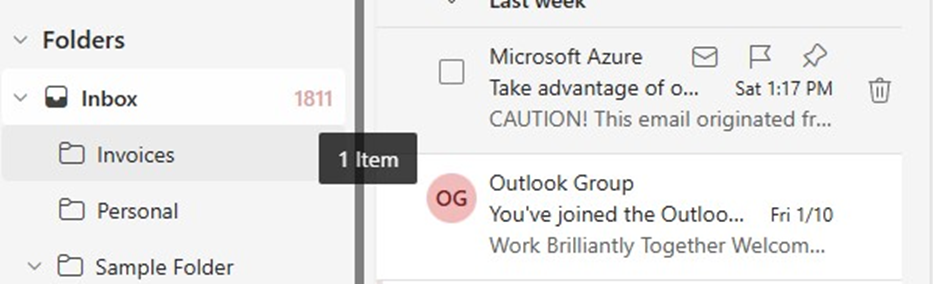
3. Drag and drop emails into these folders to keep your inbox clutter-free.
6. Set Up and Use Rules
Rules allow you to move, flag, and respond to email messages automatically. For example, you can create rules that change the importance level of messages as they arrive, automatically move them to other folders, or delete them based on certain criteria.
1. Open the « Home » tab and click « Rules » in the « Move » section.
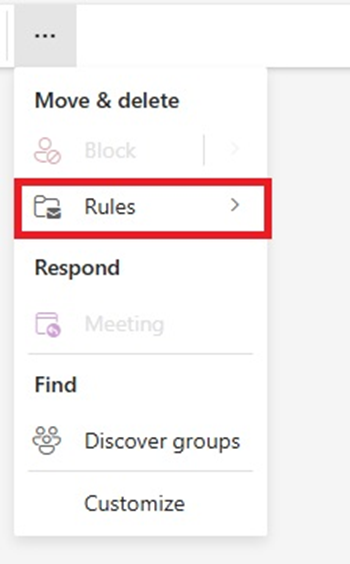
2. Select « Manage Rules. »

3. Click « New Rule » and choose a template, such as « Move messages from someone to a folder. »
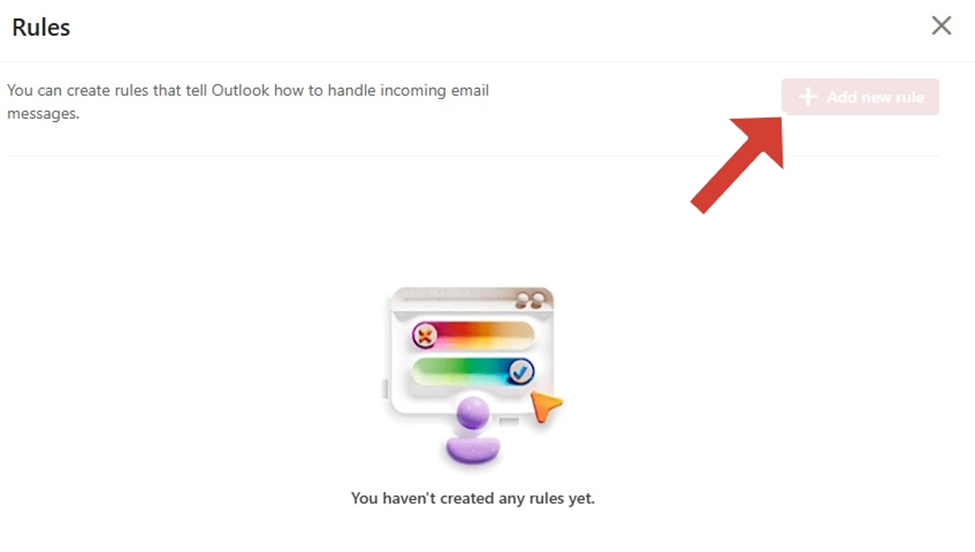
4. Define the conditions, actions, and exceptions.

5. Save the rule and apply it to organize emails automatically.
7. Set Up Automatic Replies
Microsoft 365 subscribers can set up automatic replies for when they are out of the office or unavailable to respond to emails.
Let me show you how it works.
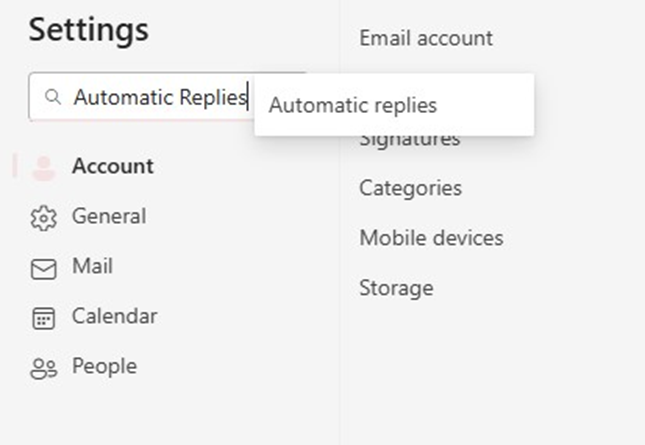
1. Go to settings
2. Type in « Automatic Replies. » and click on it.
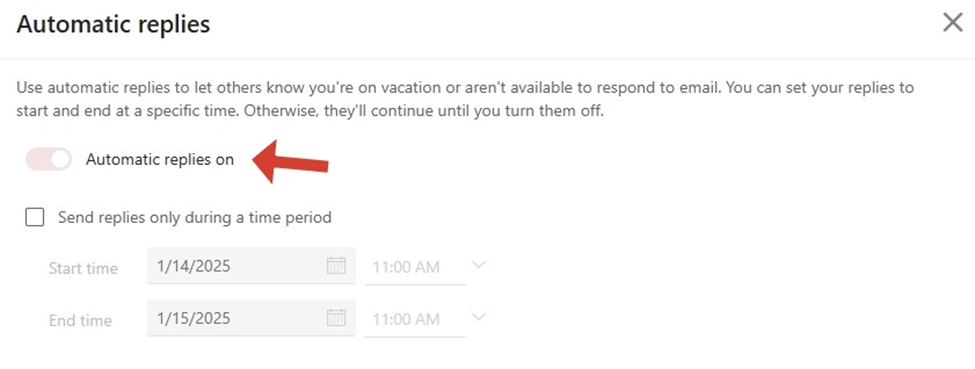
3. Select « Send automatic replies » and specify a time frame (if needed).
4. Compose the auto-reply message for internal and external contacts.
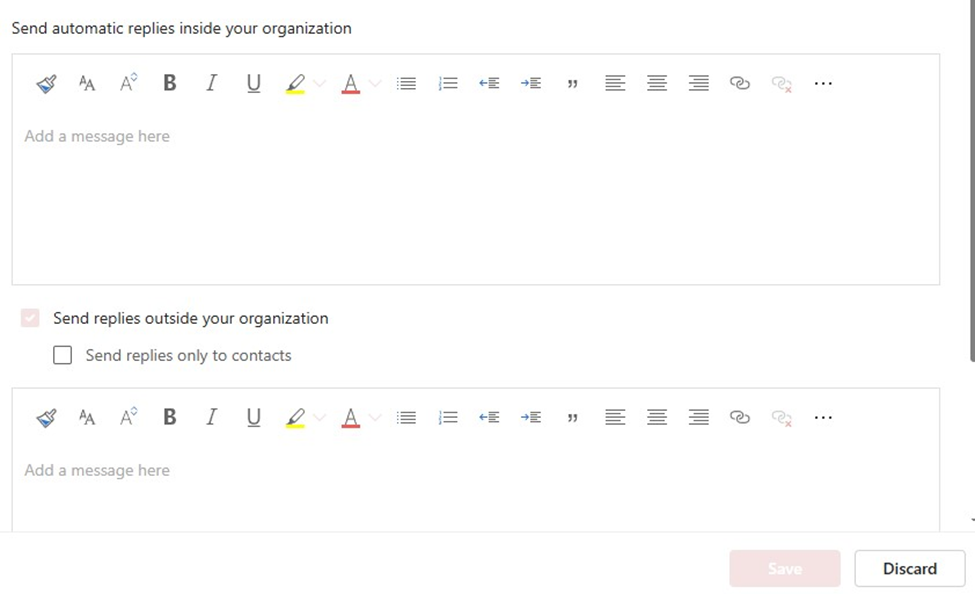
5. Save the settings, and Outlook will respond to emails automatically during the specified period.
Use the Best Outlook Tips
In this guide, we shared the best Outlook tips and tricks to manage your emails, contacts, calendars, and more.
For example, we saw how to use Quick Steps, keyboard shortcuts, and calendar reminders. We also used CiraSync to sync and update Outlook contacts to iPhone and Android devices.
Now is your turn to apply them daily and improve your productivity.
We often write similar articles that help Outlook users. Check out the following for example: