Over 400 million people worldwide use Outlook to manage emails, calendars, and contacts, which makes it the second most popular email provider (behind Gmail).
Chances are you use Outlook to manage your company’s activities and communication. However, one of the best Outlook tips involves creating, editing, deleting, and syncing contacts.
But how do you create contacts in Outlook? How do you view and edit them? And how do you sync Outlook contacts to your employees’ smartphones?
That’s what we will cover in this article!
Key Takeaways:
- You can create contacts in Outlook by going to the People icon > Create New Contact > Create or Save & Close.
- You can find contacts in Outlook by going to the People icon > Typing the name or email address of the contact in the search bar > Pressing Enter on the keyboard.
- You can use CiraSync to automatically sync Outlook contacts to smartphones.
How to Create Contacts in Outlook
You can create contacts in Outlook in two ways:
- From scratch or
- From an email message someone sent you.
Let’s check out these two options.
Create a Contact from Scratch
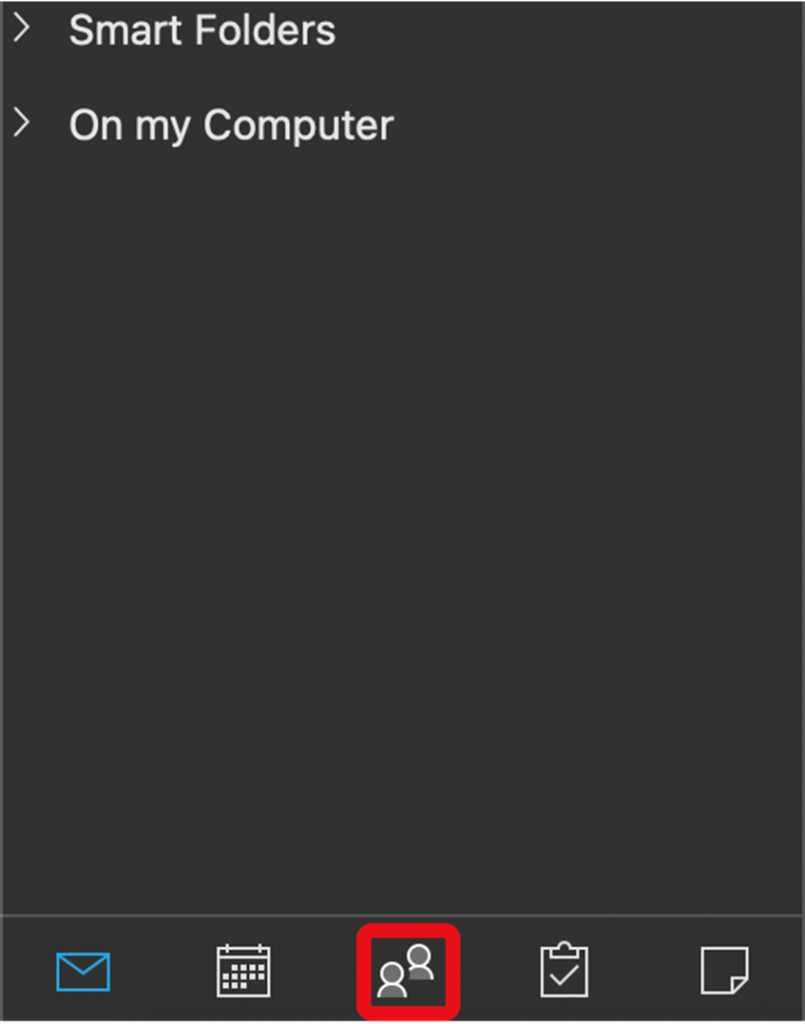
1. Click the “People” icon on the navigation pane’s bottom.
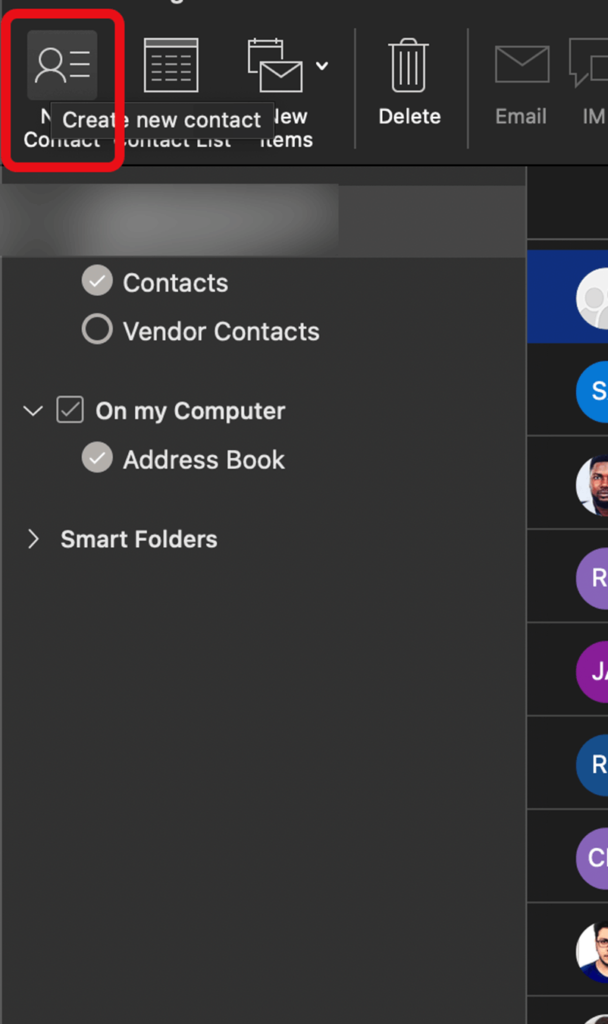
2. On the People page, on the toolbar, select “Create New Contact.”
3. Enter the information for your contact. You can select “Add more” to add an address or birthday for your contact.
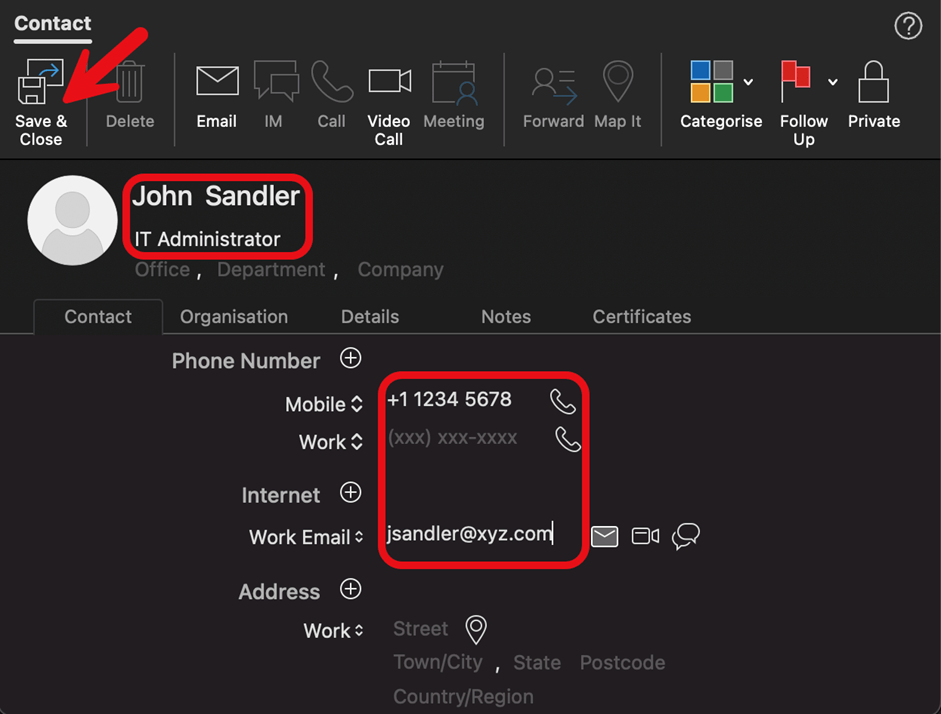
4. Click “Create” or “Save & Close.”
Pro Tip:
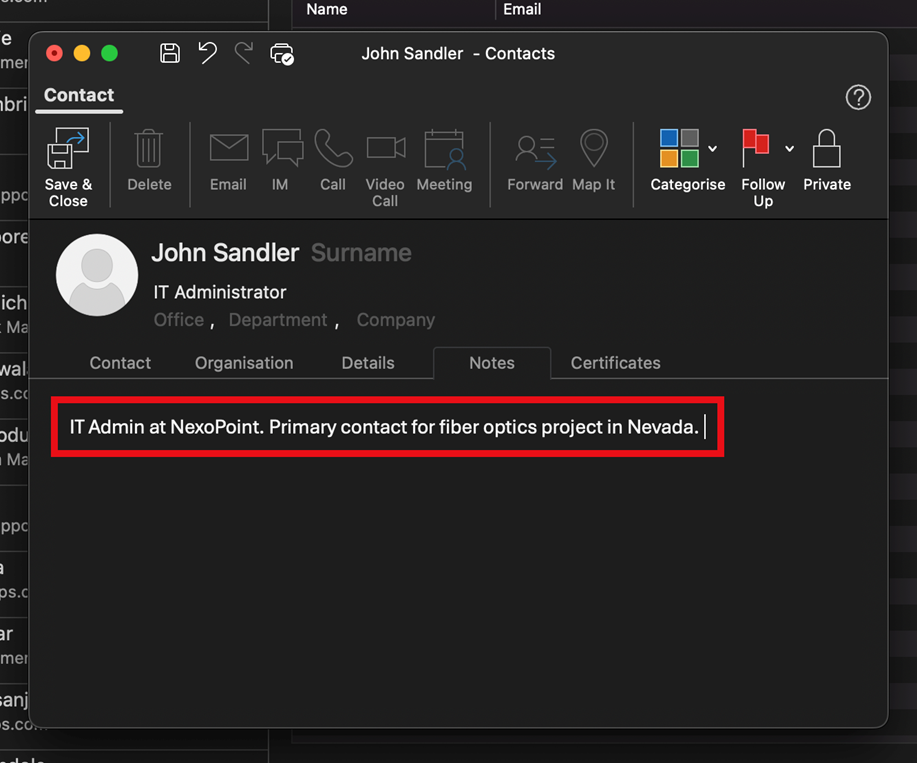
Use the “Notes” section to add additional information about the contact, such as where you met them or what you discussed. This could help you remember when and what you saved the contact for.
You might also like: How to Correctly Export Outlook Contacts?
Create a Contact from an Email Message
Let’s say you receive an email from a client, “Robert Smith.” You can quickly add Robert to your Outlook contacts by right-clicking on his name in the email.
Here’s how you can do it in Outlook:
1. Open an email message and click the sender or recipient name you want to add to contacts. On the contact card that appears for that person, click “Add to contacts” or “Open Outlook Contact…”
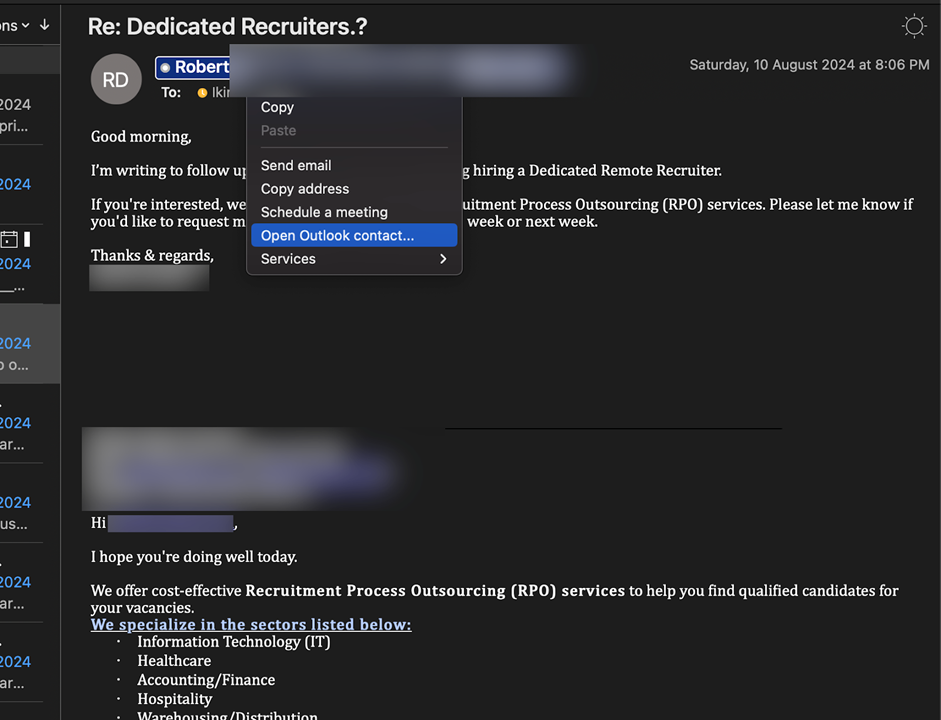
2. In the contact card for that person, enter the name and other information you want to include for the contact.
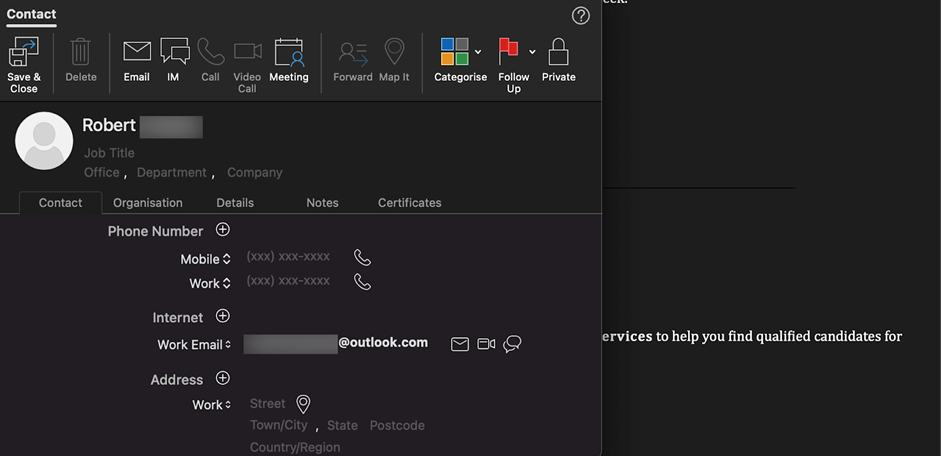
3. Once you enter the information, click “Save” or “Save & Close.”
How to Find Contacts in Outlook
Now that you’ve added new contacts to your Outlook address book, you may wonder how to find them when needed.
Outlook has search and filter options to allow you to find contacts quickly. Here are two ways to do it:
1. Use the Search Bar
1. Click on the “People” icon in the navigation bar.
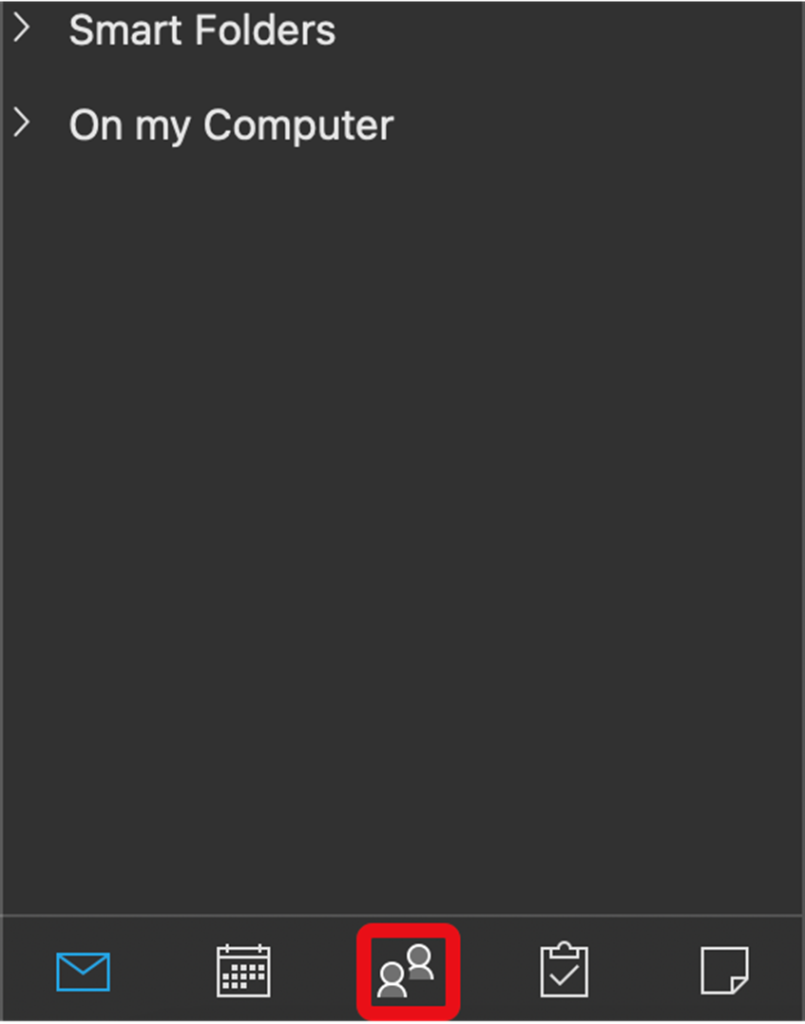
2. Type the name or email address of the contact you’re looking for in the search bar.
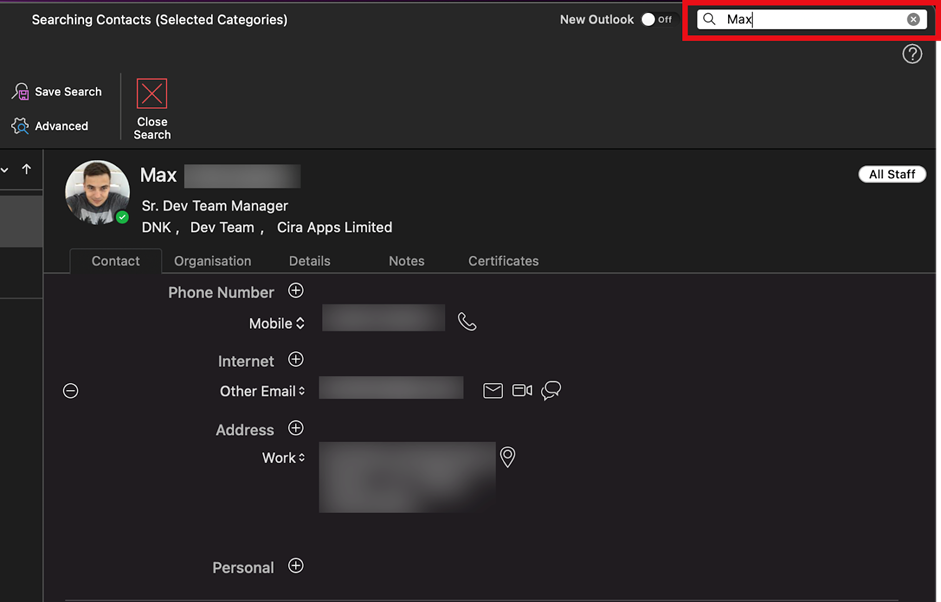
3. Press “Enter” to see a list of matching contacts.
2. Use the Filter Options
1. Click on the “People” icon in the navigation bar.
2. Click on “All Contacts” in the folder pane.
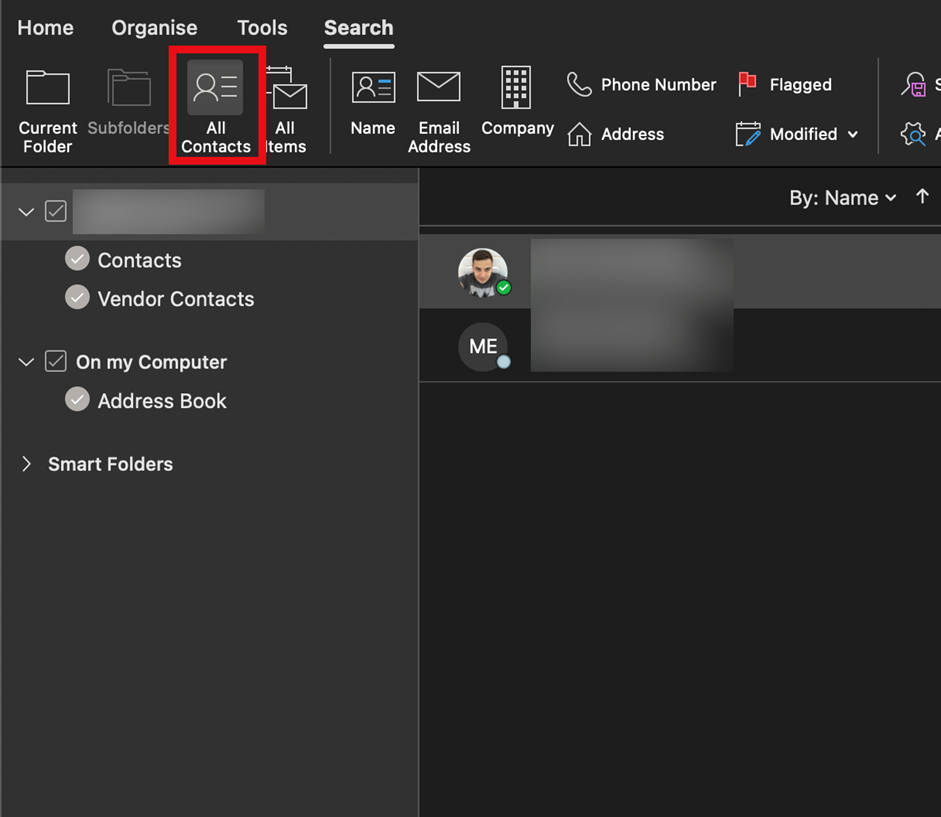
3. Use the filter options at the top of the contact list to narrow your search by category, company, location, or other criteria.
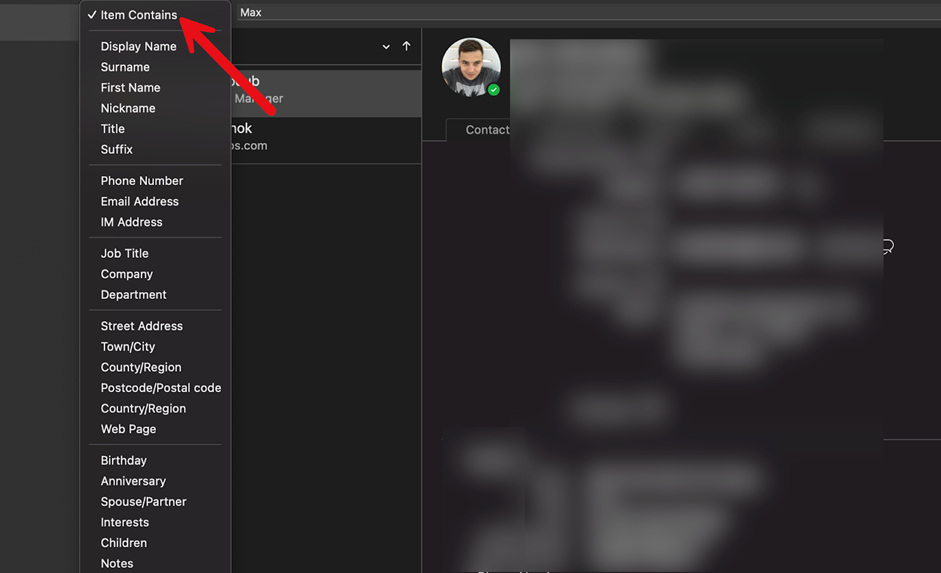
Pro Tip:
If you have many contacts, consider creating custom contact lists or categories to help you find what you need more quickly.
View and Edit Contact Information in Outlook
So, you’ve found the contact you were looking for, but you need to update their information or add a few more details. We got you!
Here’s how to:
1. View Contact Details
1. Double-click on the contact to open their contact card.
2. Scroll through their contact information to view their name, email address, phone number, company, and more.
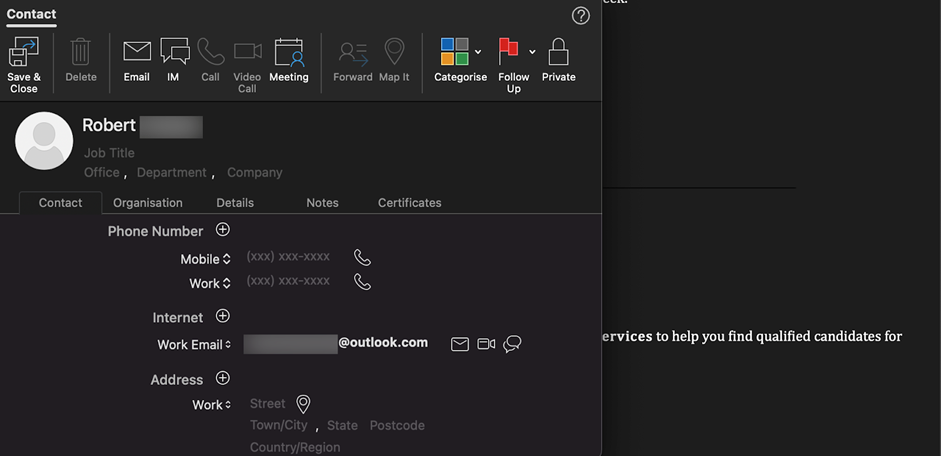
2. Edit Contact Information
1. Double-click on the contact to open their contact card.
2. Click on the field you want to edit, such as the phone number or email address.
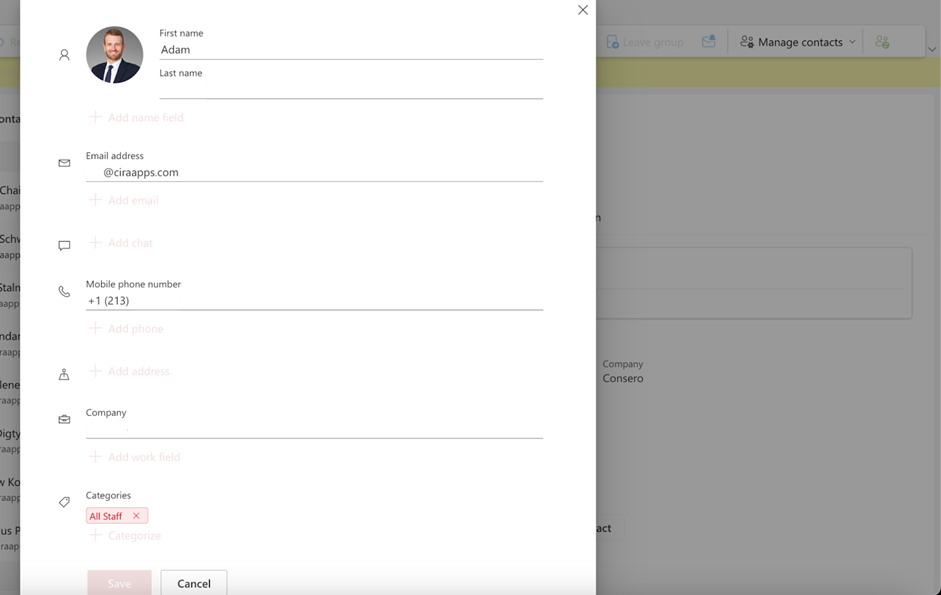
3. Make your changes and click “Save & Close.”
Sync Outlook Contacts to Smartphones
Now, we’ve discussed how to create, view, and edit contacts in Outlook. How do you sync these contacts?
The syncing process of Outlook contacts depends on the destination. For example, if the destination is a mobile device, you must use the best practices for iPhones and Android devices.
Otherwise, you’ll encounter many errors when syncing Outlook contacts.
Check out our guide on syncing Outlook contacts to Android for Android devices. We also have a step-by-step tutorial for syncing contacts from Outlook to iPhone.
But if you want to see a quick process, check out these steps where I use CiraSync to sync contacts from Outlook to mobile devices.
1. Sign up for CiraSync. It’s completely free.
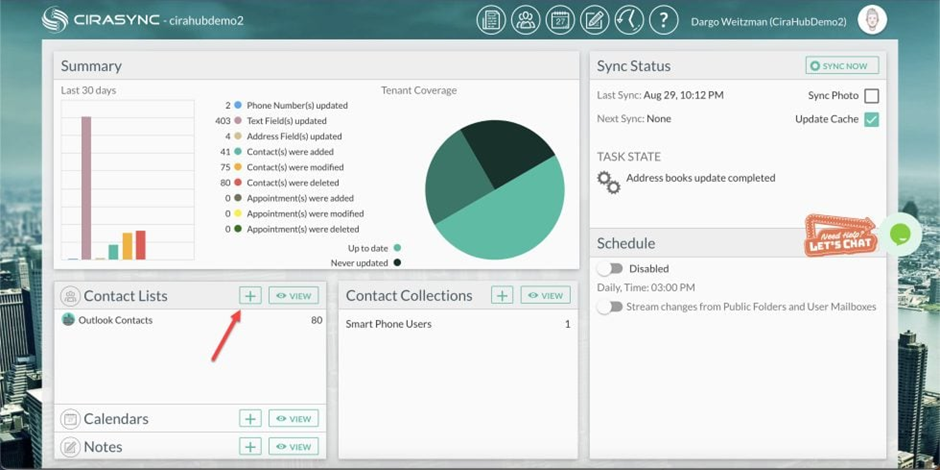
2. After following the embroidering process, you’ll get access to your dashboard. Click the + sign next to “Contact Lists.”
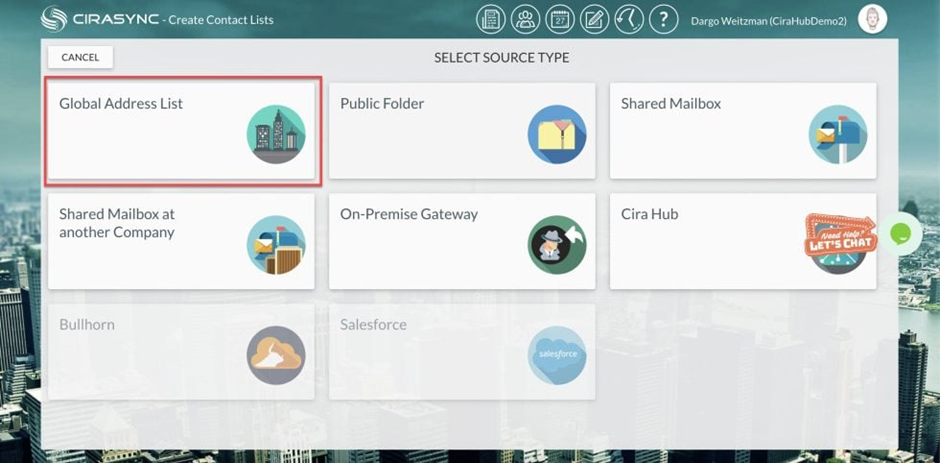
3. You’ll see multiple source types to choose from. The CiraSync platform needs to know where your contacts come from before pushing them to smartphones.
For this example, I will use the “Global Address List” as our source of contacts.
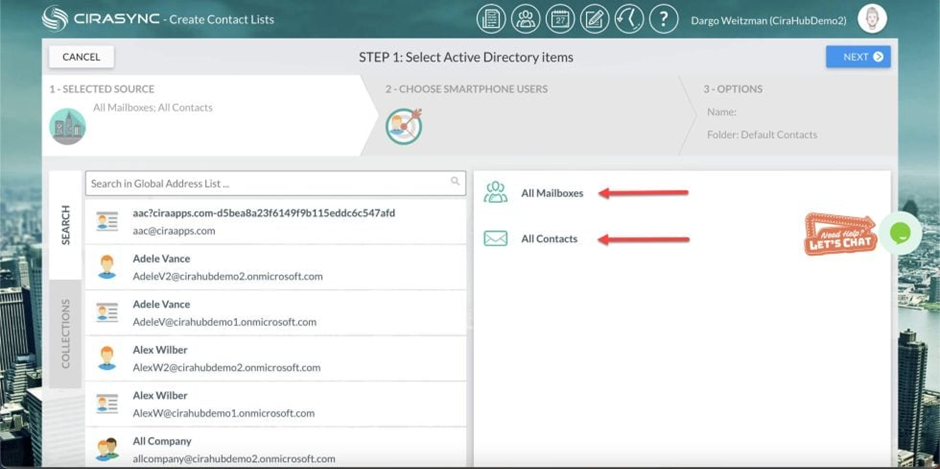
4. Next, select “Active Directory Items.” Here, you’ll just need to choose the contact sources you want to sync. Click NEXT in the top right corner.
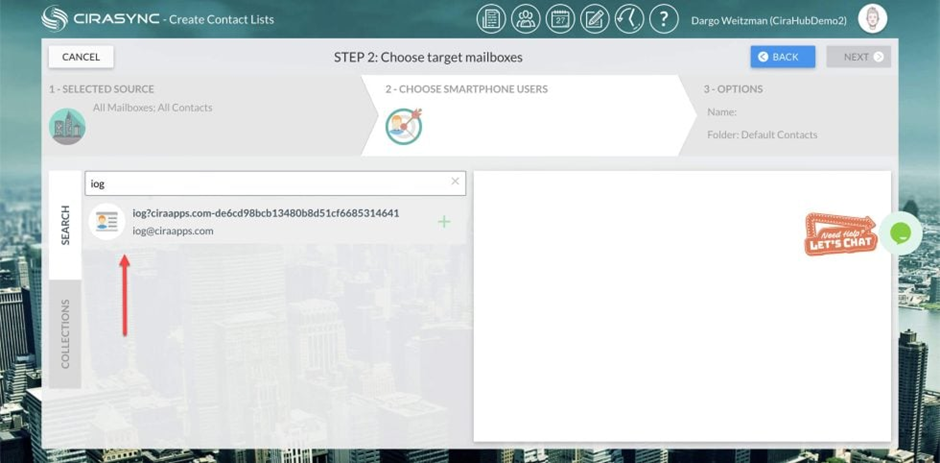
5. In the GAL field, search for a name and select the user (smartphone) you want to target. These users will always receive synced contacts. Click “Next” in the top right corner.
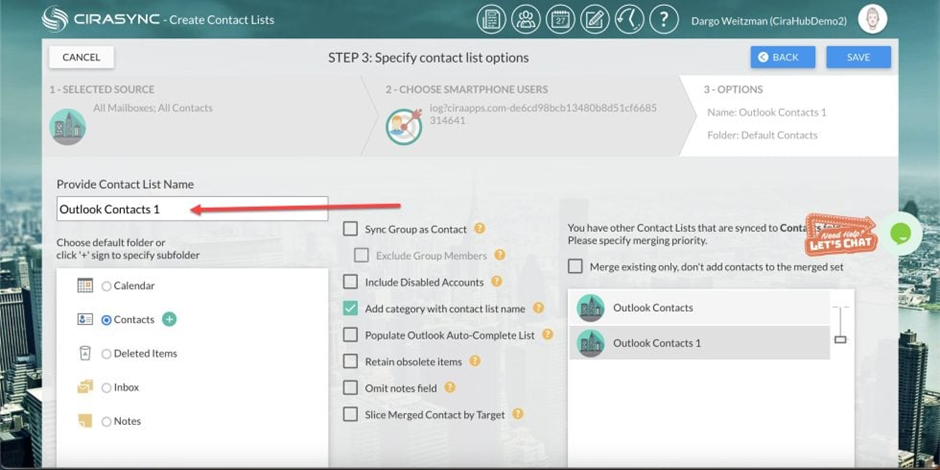
6. Fill out “Provide Contact List Name” to name the contact list and click “Save.”
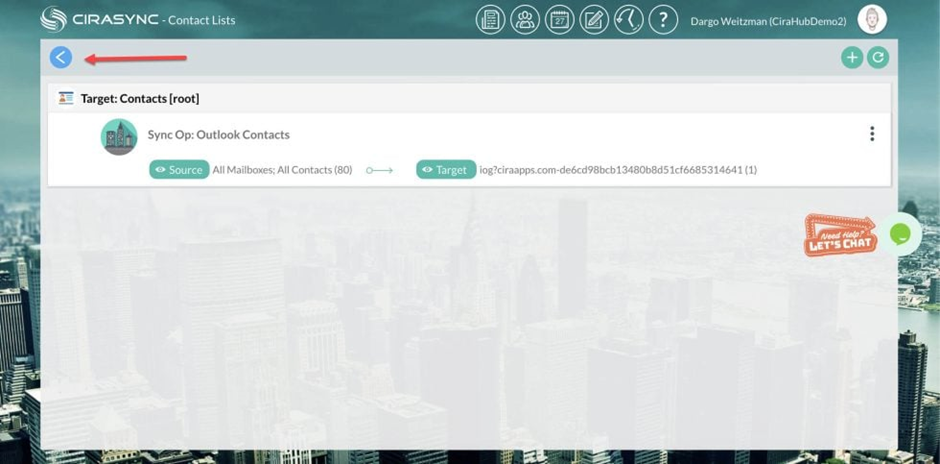
7. The sync summary dashboard will briefly appear. Open the CiraSync main dashboard by clicking on the “Return” icon at the top-left of your screen.
8. Check the “Update Cache” option in “Sync Status” at the top right side of the Dashboard and click on SYNC NOW to sync your contacts.
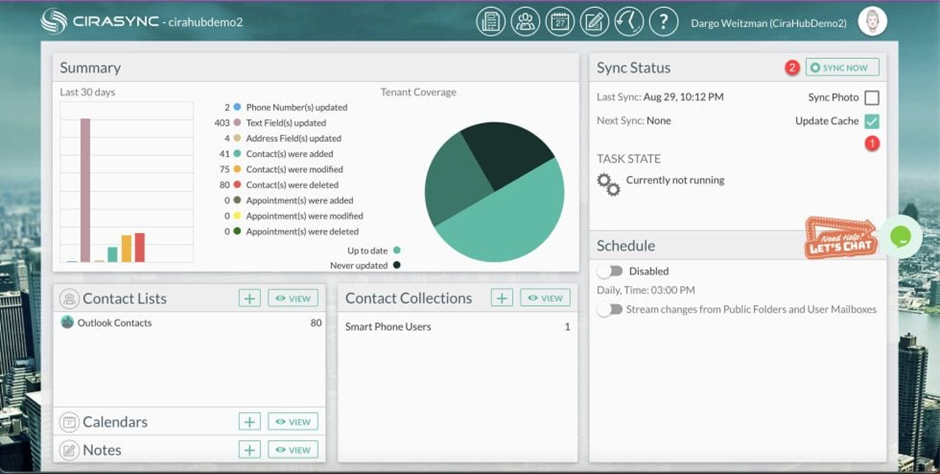
You have now set up the process to sync your selected contact repository to smartphones.
CiraSync will regularly scan contact lists, identify changes, and push updated contacts to all synced mobile phones.
Add a Photo to Your Outlook Contacts
As the famous saying goes, a picture is worth a thousand words. This holds true for Outlook contacts as well.
While adding a photo to contacts may seem like a small detail, it can make a big difference in helping others recognize and remember you.
Moreover, when you’re scrolling through your contacts list or receiving an email from someone, seeing their face can help you quickly identify who they are and put their message into context.
Here’s how to add a photo to your Outlook contacts:
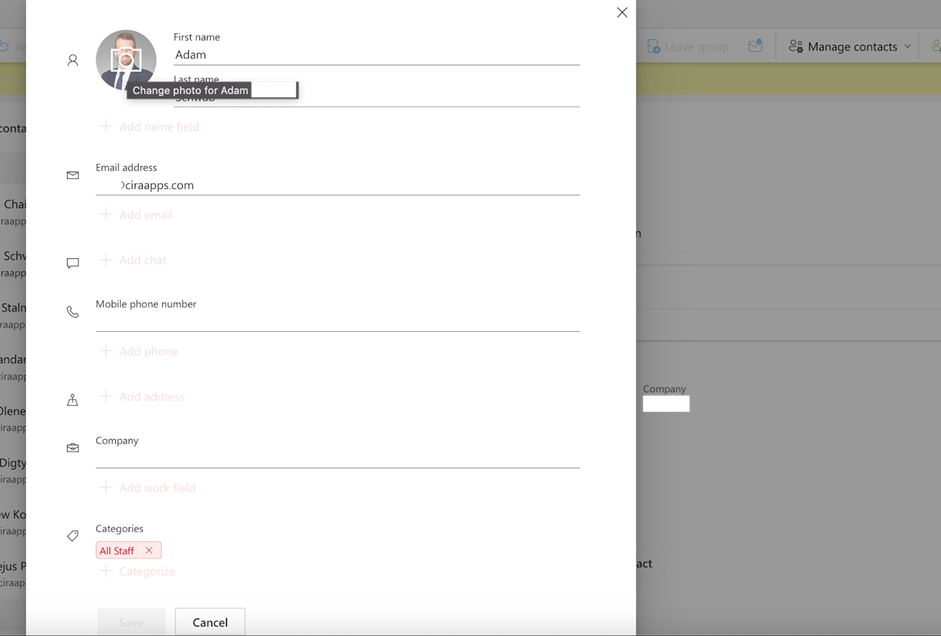
1. Double-click on the contact to open their contact card. Select “Edit contact.”
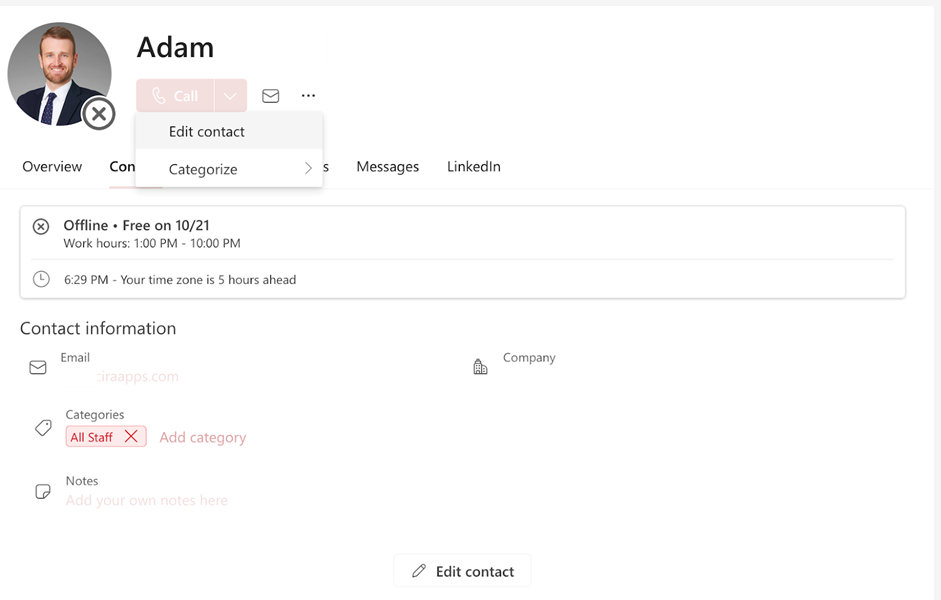
2. Select the camera icon, upload a photo by choosing the file you want to use, and then select “Save.”
Change How Contacts Display in Outlook (First and Surname)
Outlook offers flexibility in displaying your contacts, allowing you to customize the view to your preference.
A common customization is changing the display order of names
- From “first name” followed by “surname” to
- “Surname” followed by “first name.”
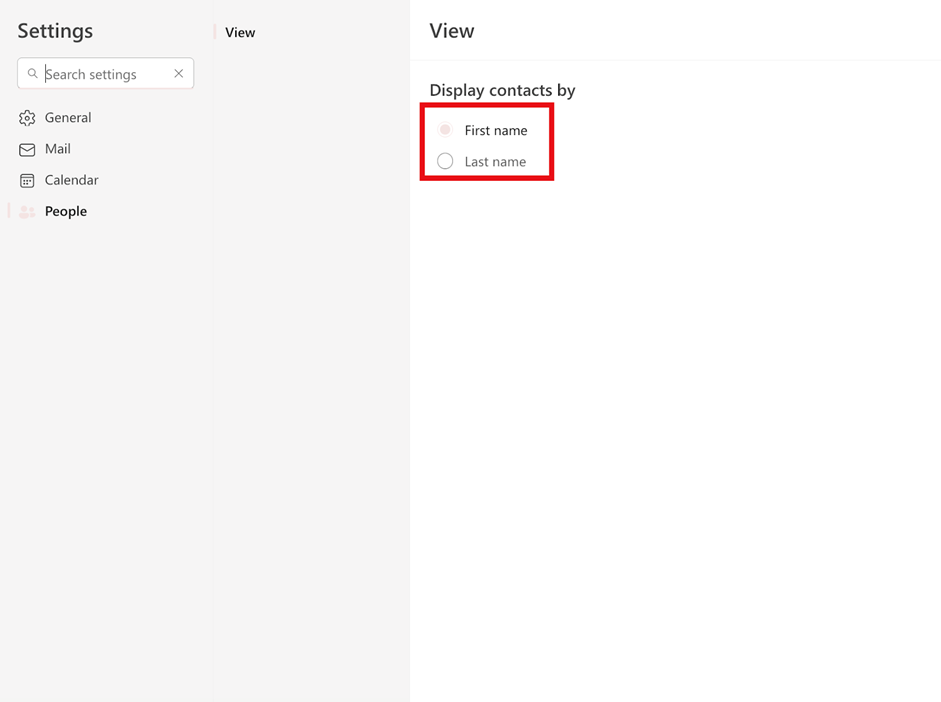
By default, Outlook displays contacts by their first name followed by their last name. However, you can easily change this setting to display contacts by their last name.
Here’s how:
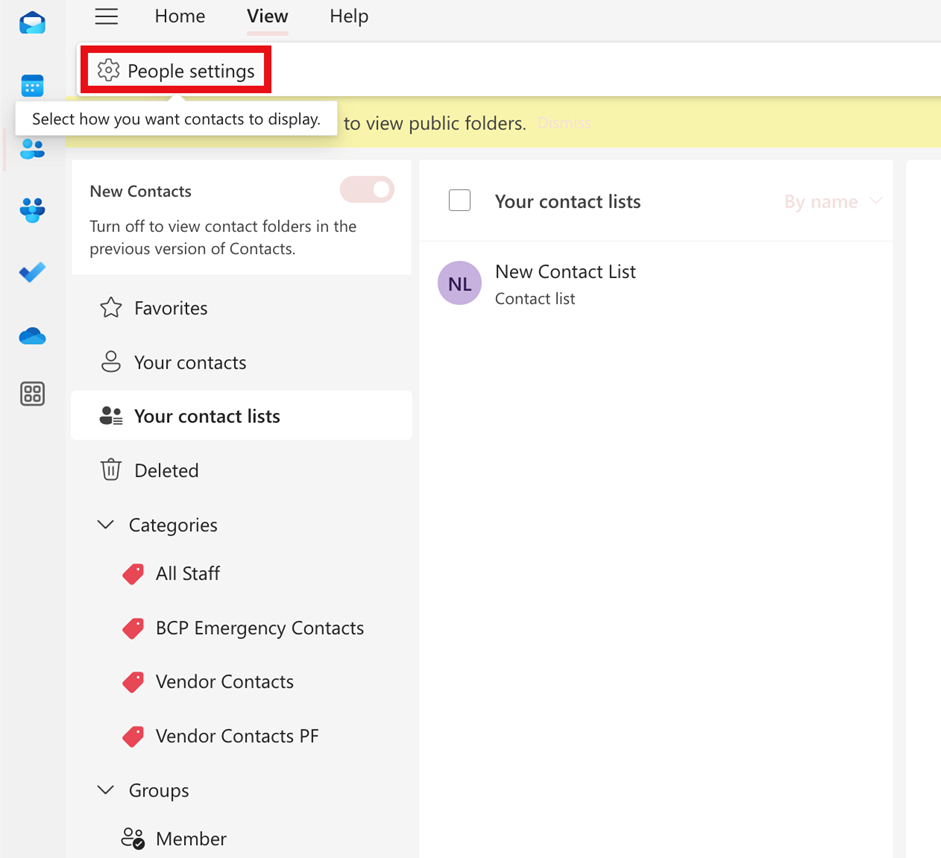
1. Click on the “People” icon in the navigation bar.
2. Click on “People Settings” in the dock.
3. Under “View,” select “First name” or “Last name.”
4. Click “OK” to save your changes.
How to Sort Contacts in Outlook
In Outlook, you can also sort your contacts by various criteria. This can come in handy if you need to quickly find contacts based on their company, location, or other information.
It’s pretty simple:
1. Click on the “People” icon in the navigation bar.
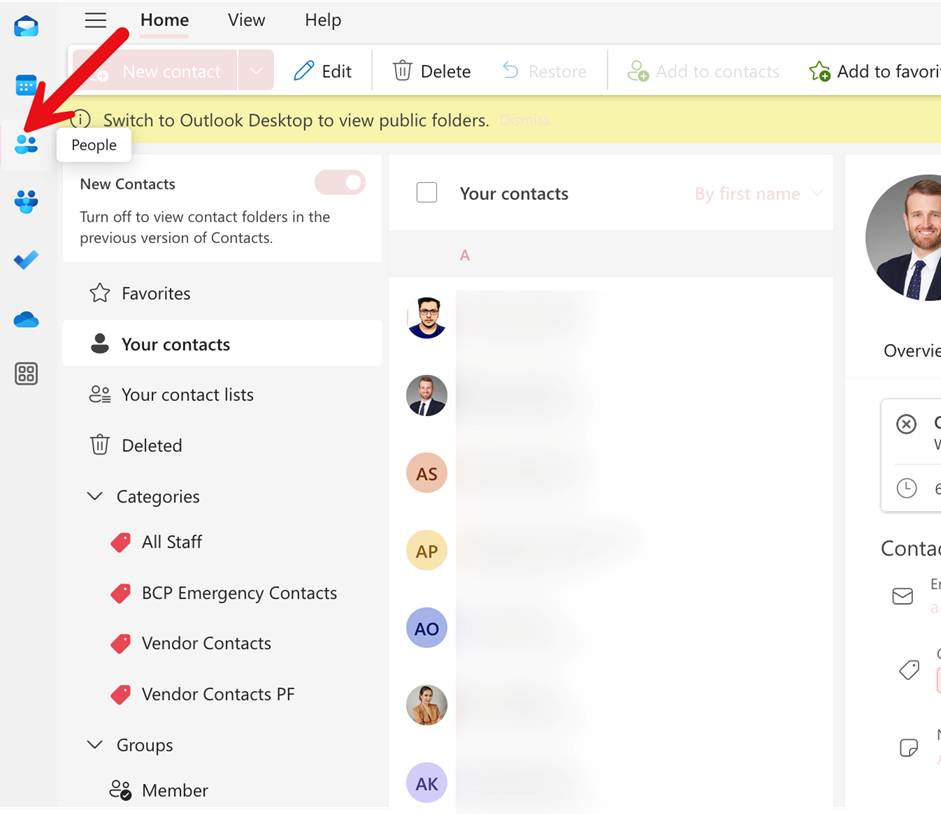
2. Click on an item on the drop-down list you want to sort by, e.g., “Company” or “Work City.”
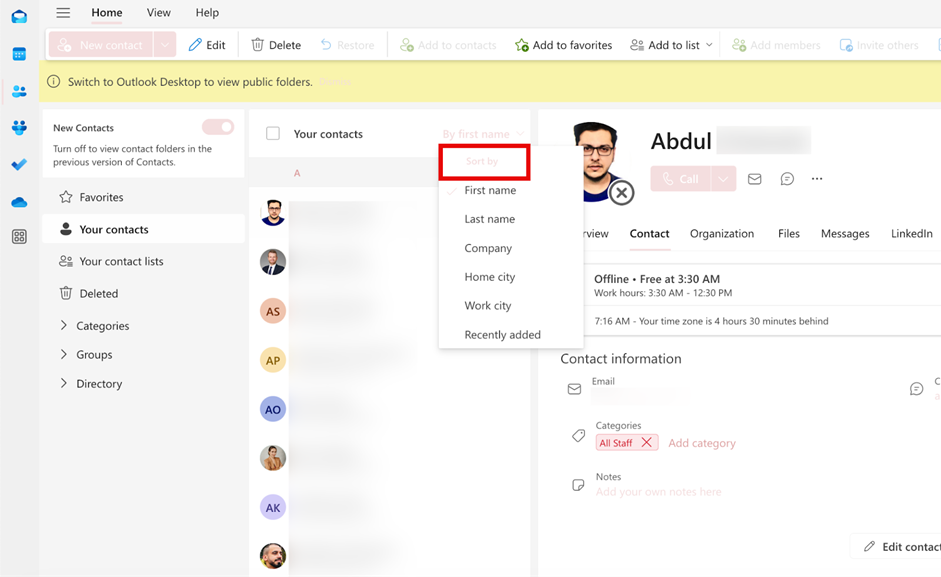
3. Click on the column header again to reverse the sort order.
You might also like: How to Share Outlook Contacts Folders in Outlook Desktop?
FAQ
Outlook doesn’t have a native feature to auto-create contacts from emails.
To organize contacts in Outlook efficiently, start by categorizing them into groups based on relevance, such as work, personal, or client-specific categories. You can also create and organize custom contact folders for different groups or projects.
1. Prepare your contact list in a CSV format (compatible with Outlook).
2. In Outlook, go to File > Open & Export > Import/Export.
3. Select Import from another program or file and click Next.
4. Choose Comma Separated Values (CSV) as the file type.
5. Browse for your CSV file and select it, then choose options for duplicate handling.
6. Map fields if necessary (match CSV columns to Outlook contact fields).
7. Complete the import by clicking Finish. Your contacts will now appear in Outlook’s Contacts folder.


