Outlook allows users to categorize contacts by creating contacts folders. This guide shows how to create contacts folders in the Outlook Desktop App and Outlook on the web and how to add contacts to the contacts folder.
key Takeaways:
- To create contact folders on Outlook desktop, click the ellipsis > Folders > Right-click the Contacts folder > New Folder > Name the folder > Ok.
- To create contact folders in Outlook on the Web, click the people icon > Folders > New Folder > Name the folder > Press the Enter key.
How to Create Contacts Folders in Outlook Desktop
- Launch Outlook Desktop.
- Click the ellipsis in the bottom-left corner of the navigation panel.
- Click Folders. (See figure below.)
Outlook will display in folder view.
- Right-click the Contacts folder.
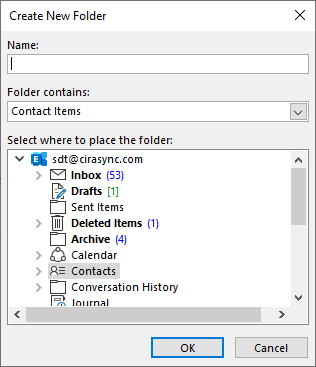
- Click New Folder. The Create New Folder Window will appear. (See figure below.)
- Name the folder.
- Click OK. NOTE: You may expand Contacts under Select where to place the folder if you would like to create a subfolder under another pre-existing contacts folder.
- Open the newly created contacts folder.
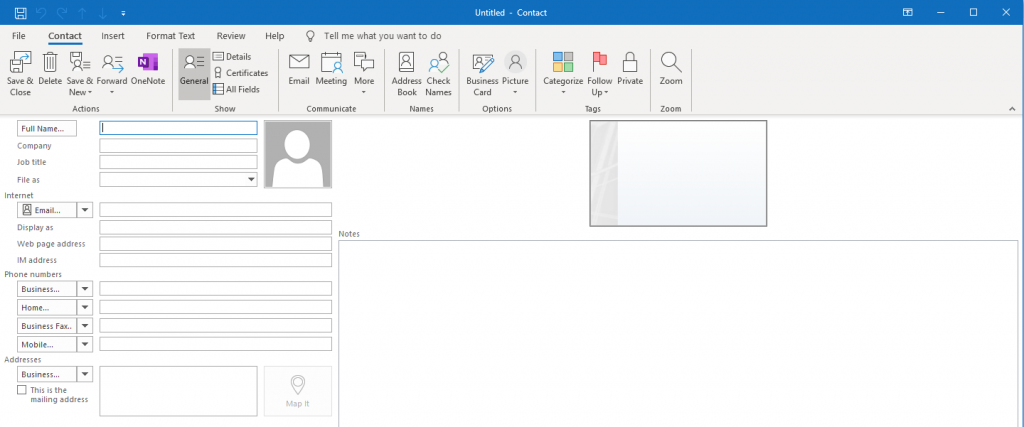
- Click New Contact to begin adding contacts to the contacts folder. A blank contact creation form will open. (See figure below.)NOTE: You may add a user group by clicking New Contact Group.
- Fill out the form
- Click Save & Close in the ribbon.
- Repeat Steps 9–11 to add more contacts to the folder.
You might also like: How to create a contact group in Outlook?
Create Contacts Folders in Outlook on the Web
- Launch Outlook on the web.
- Click the people icon in the bottom-left corner of the navigation panel. Outlook on the web will display in the People view.
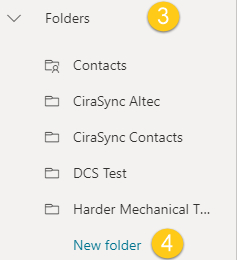
- Click Folders to expand the field.
- Click New folder. (See figure below.)
- Name the new contacts folder.
- Press the Enter key.
- Open the newly created contacts folder.
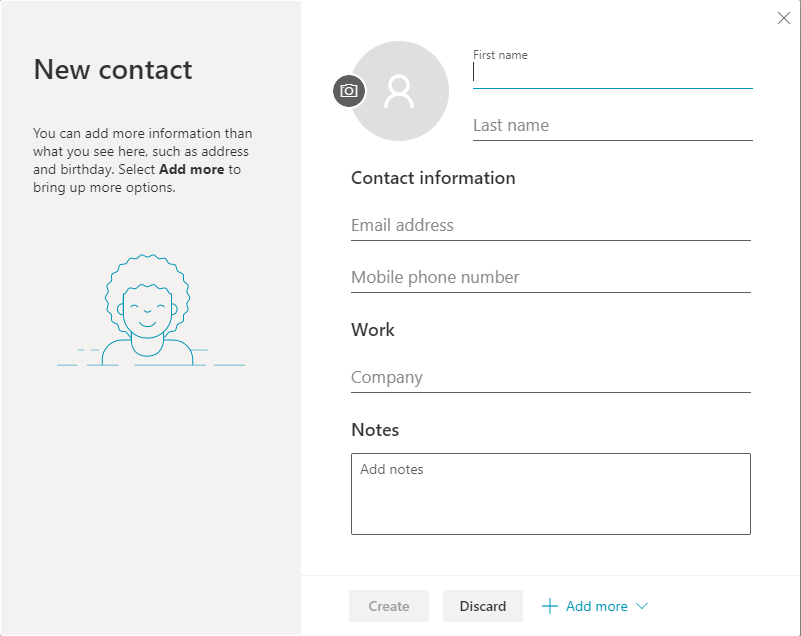
- Click the New Contact button in the ribbon that is above the navigation panel. A new contact form will open. (See figure below.)
- Fill out the form. NOTE: Click +Add more to add more fields to the contact form.
- Click Create.
- Repeat Steps 8–10 to add more contacts to the folder.

 Outlook will display in folder view.


