
In this article, we’ll show you how to create an Outlook calendar group. We will also see how to
- View a calendar group in Outlook
- Add a calendar to an existing calendar group
- Share a calendar group in Outlook
- And more.
Key Takeaways:
- To create a calendar group in Outlook, go to Calendar > right-click “My Calendars” > Select “New Calendar Group” > Name your Calendar Group > Right-click on the Calendar Group > Click “Add Calendar” > From Address Book or From Room List > Ok.
- To view an Outlook calendar group, go to your Calendar Groups listed under “My Calendars” > Click on the Calendar Group you want to view.
How to Create a Calendar Group in Outlook
Creating a Calendar Group in Outlook is a straightforward process. Here’s how you can do it: To efficiently create a new calendar group in Outlook, please follow these streamlined steps:
1. Launch Outlook on your computer.
2. Navigate to the Calendar view by clicking on the “Calendar” icon.
![]()
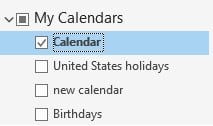
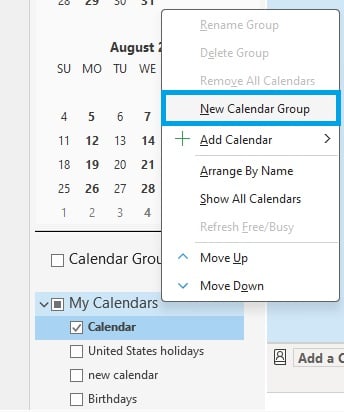
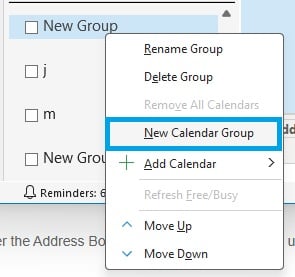
3. In the left navigation pane, right-click “My Calendars.”
4. Select “New Calendar Group.”
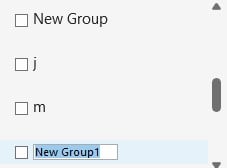
5. Name your Calendar Group and confirm by pressing Enter.
6. Right-click on the newly named Calendar Group to bring up additional options.
7. Click “Add Calendar” to add new calendars to your group.
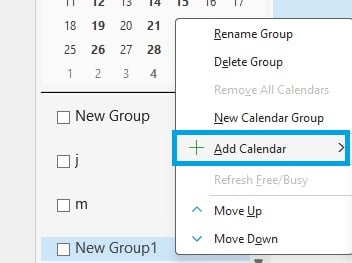
8. Select the source from which you wish to add a calendar.
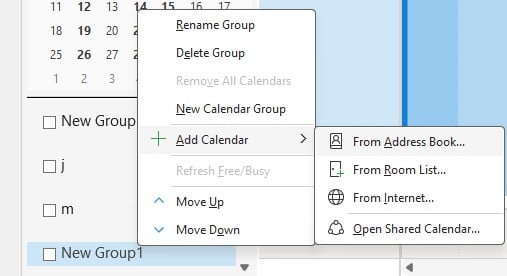
- If you opt for “From Address Book” or “From Room List”:
- Browse and select the desired calendar you wish to include in your group.
- Click “OK.”
- If you choose “From Internet”:
- Copy and paste the calendar’s URL into the provided field.
- Click “OK.”
Your selected calendars are now part of your new Calendar Group, ready for you to organize and view them.
How to Pick Members from an Address Book or Contacts List
To add members to your Calendar Group from your Address Book or Contacts list, follow the steps below:
1. Navigate to the Home tab.
2. Locate the “Manage Calendars” section.
3. Click “Calendar Groups” and select “Create New Calendar Group.”
4. Next, enter a name for your new calendar group and click “OK.”
How to Create a Calendar Group Based on the Calendars You Are Viewing
If you have multiple calendars open and want to group them, you can create a Calendar Group based on these.
To create a new calendar group in Calendar, follow the steps below:
1. Navigate to the Home tab.
2. In the “Manage Calendars” group, click “Calendar Groups,” then select “Save as New Calendar Group.”
3. Enter a name for the group in the provided field.
4. Click “OK.”
Note: You can repeat the above process for each calendar you want to include in your new group. After adding all your calendars, click “OK.”
How to View a Calendar Group in Outlook
Once you have created a Calendar Group, you can view it in the following steps:
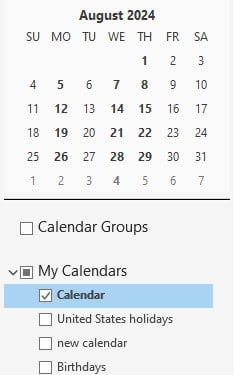
1. Go to the Calendar view in Outlook.
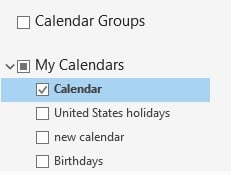
2. In the Calendar Navigation Pane on the left side, you will see your Calendar Groups listed under “My Calendars.”
3. Click on the Calendar Group you want to view, and all the calendars in the group will appear side by side in the main calendar viewing area.
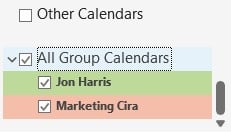
4. You can also check and uncheck individual calendars within the group to customize your view.
Add a Calendar to an Existing Calendar Group
Adding a calendar to an existing group in Outlook is simple and easy. If the calendar you wish to add is not present in your Navigation Pane, follow the steps below:
1. Go to the Calendar view, and on the Home tab, locate the Manage Calendars group. Here, click “Open Calendar” and select the specific type of calendar you need.
2. Use the Search box to find or type names indirectly. Click on a name and select “Calendar.”
Note: For each calendar you wish to add to the group, repeat this process and confirm by clicking “OK.” Newly added calendars will be visible in the Shared Calendars folder within the Navigation Pane.
3. If you are in Schedule View, click on the “Add a Calendar” field at the bottom of the screen and enter a name for your calendar. The calendar will be placed into the “Shared Calendars” folder in the Navigation Pane.
4. In the Navigation Pane, drag the calendar to your chosen calendar group from the Shared Calendars folder.
Note: Calendars can be reorganized among different groups as needed. To do this, drag the calendar within the Navigation Pane to the new group you prefer.
How to Share a Calendar Group in Outlook
Sharing a calendar group in Outlook allows others to view the calendars within the group. Here’s how to share a calendar group:
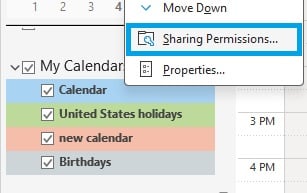
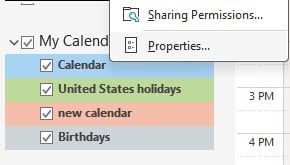
1. In the Calendar view, right-click on the calendar group you want to share.
2. Click Sharing Permissions.
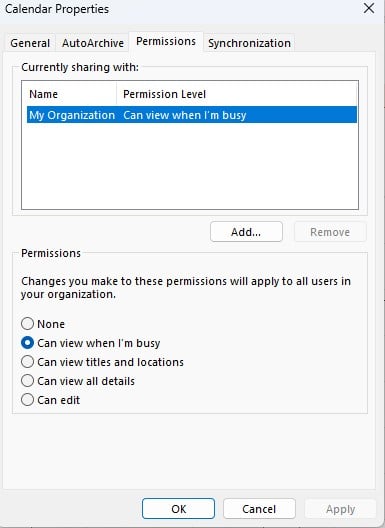
3. In the Calendar Properties dialog box, navigate to the “Permissions” tab.
4. Click “Add” to add the people you want to share the calendar group with.
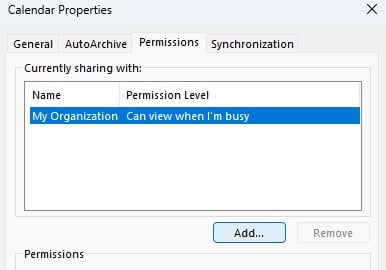
5. Enter the names of the individuals or select them from the address book, then click “Add” and “OK.”

6. Set the permission level for each individual. You can also customize permissions.
7. Click “OK” to apply the permissions.
The recipients will receive an email invite to view the calendar group. They will need to accept the invitation to see the calendars within the group.
How to Delete a Calendar Group
If you no longer need a calendar group, you can delete it using the following steps:
1. Go to the Calendar view in Outlook.
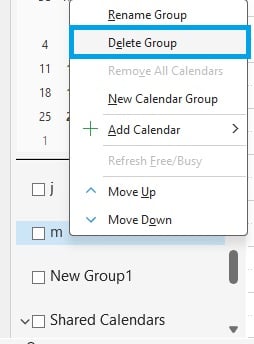
2. In the “My Calendars” section, right-click on the calendar group you wish to delete.
3. Select “Delete Group” from the menu.
4. Confirm the deletion when prompted.
Note: Deleting a calendar group does not delete the individual calendars within it. They will simply be ungrouped and remain in your Outlook Calendar view.
How do I create a shared calendar group in Outlook?
Creating a shared calendar group in Outlook is a straightforward process:
1. Launch Outlook and navigate to the Calendar tab on the left pane.
2. Right-click your newly created calendar.
3. From the menu, choose “Share,” then select “Calendar Permissions.”
4. Click the “Add” button to add another user.
5. Select the user(s) you want to grant access to your new calendar.
6. Click the “Add” button, then “OK.”
What is the difference between a shared calendar and a group calendar in Outlook?
An Outlook shared calendar is a calendar owned by one person that has been shared with other individuals, allowing them to view or edit events based on the permissions granted. On the other hand, a group calendar is a collection of calendars grouped to provide a unified view of all events and schedules.
A single person does not own a group calendar but can include shared calendars from multiple users. Typically, group calendars are intended to compare availability and scheduling for groups of people.
Outlook Group Calendar Permissions
Managing permissions is essential for maintaining the integrity and confidentiality of calendar events. Below are some steps for managing permissions for a group calendar:
1. Right-click on the group calendar and select “Properties.”
2. In the Properties dialog box, go to the “Permissions” tab.
3. Add or remove users and define their level of access, from being able only to view the calendar to complete control where they can create and edit events.
4. After setting permissions, click “Apply” and then “OK” to save the changes.
My Group calendars are not showing in Outlook. How do I Fix that?
If your group calendars are not showing in Outlook, you can do some troubleshooting to fix the issue. Try the following:
- Check Your Internet Connection: A stable internet connection is required to update the group calendars.
- Check Outlook’s Status: Sometimes, the issue might be with the Outlook service itself. Check the service status to see if there are any known issues.
- Update Outlook: Make sure you have the latest version of Outlook installed.
- Check Your Navigation Pane Settings: Ensure the calendar section in the navigation pane is not minimized or the group calendars are not unchecked.
- Review Your Group Membership: Verify that you are still a group member and the group still exists.
- Review Permissions: If you are not the calendar owner, check with the owner to ensure you have the necessary permissions to view the calendar.
- Re-add the Calendar: Sometimes, removing and re-adding the calendar can resolve the issue.
- Use Outlook Web App (OWA): If the issue persists, try accessing the group calendar from the Outlook Web App to see if it’s an issue with your desktop application.
- Contact Microsoft Support: If none of the above steps work, it may be time to contact Microsoft Support for further assistance.
Conclusion
Creating a calendar group in Microsoft Outlook is a useful way to organize multiple calendars under a single group, making it easier to view and manage different people’s schedules in one place. This feature can be particularly beneficial for teams and organizations coordinating meetings, events, or projects. We hope you found this article helpful.