


If you are a CiraSync Enterprise Edition user and have more than 1,000 user mailboxes in Exchange Online, you will notice that during a sync, four mailboxes get updated simultaneously. Normally, a single Service Account is configured for CiraSync, and it can take over one day to update 1,000 mailboxes. This process can be sped up by creating multiple Service Accounts. However, CiraSync’s default configuration does not automatically allow the use of multiple Service Accounts.
This guide shows how to set up the CiraSync configuration to use multiple Service Accounts.
NOTE: When enabling your Tenant to use multiple Service Accounts, please coordinate with our Customer Success Team by submitting a support ticket.
Instructions
Creating a Dedicated Service Account
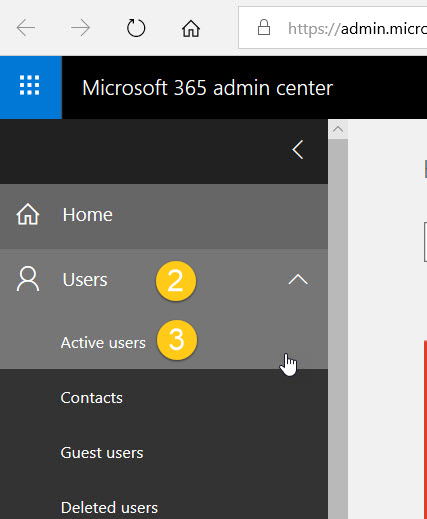
- Launch the Office 365 Admin Portal.
- Click Admin to go to the Office 365 Admin Center.
- Click on Users > Active Users (See figure below.)

- Click Add a User, and fill in the required fields.
- Set the account with the Global Administrator. If you are syncing Public Folders, assign a license to the Service Account.
Designating Multiple Dedicated Service Accounts to Use with CiraSync
- Contact our Customer Success Team – either by chat, phone, email – and request that this function is enabled from the backend.
- Open a new browser or incognito window when the account is created.
- Navigate to https://dashboard.cirasync.com.
- Log in to the portal with the newly created Service Account.
- Click Accept to allow CiraSync access to your Tenant.
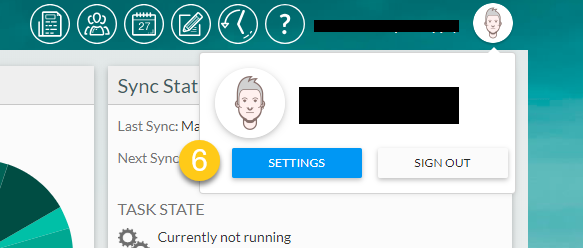
- Click on the account username on the upper-right corner of the CiraSync Dashboard.
- Click SETTINGS. (See figure below.)

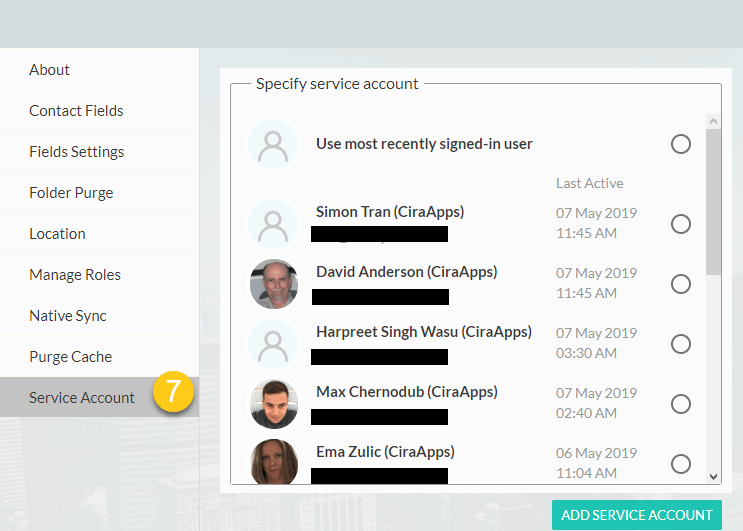
- Click Service Account in the navigation panel on the left. The window will list all the Office 365 accounts that have signed in to the CiraSync Dashboard. (See figure below.)

- Select the desired accounts to use as CiraSync Service Accounts.
- Click SAVE on the top-right corner of the dashboard.
If after following this procedure, you still notice a lag in CiraSync updates, please check out the other solutions listed in this FAQ.

