Cirsync offers two-way syncing between personal contact folders and Public Folders in Outlook and 170+ CRM and marketing applications. For Salesforce, CiraSync offers a native sync for automatically syncing CRM contacts to Outlook on smartphones. This guide shows how to setup automatic syncing of HubSpot contacts to an Office 365 tenant and business smartphones.
Before You Start
This guide is for CiraSync Enterprise Edition subscription users and CiraHub users who have at least bought the starter pack from CraHub. If both don’t apply to you, please follow the instructions on upgrading to CiraHub Enterprise Edition and signing up for the CiraHub starter pack listed below:
Instructions
Configuring CiraSync for HubSpot
- Log in to the CiraSync dashboard.
- Create a connection between Microsoft Outlook and HubSpot.
- Configure your sync.
- Personalize your sync settings.
- Establish the two-way connection between Microsoft Outlook and HubSpot. Now the HubSpot Contact List will appear in your Outlook Mailbox.
Configuring CiraSync for HubSpot
- Log in to the CiraSync tenant dashboard.
- Click the + in the Contact Lists (See figure below.)

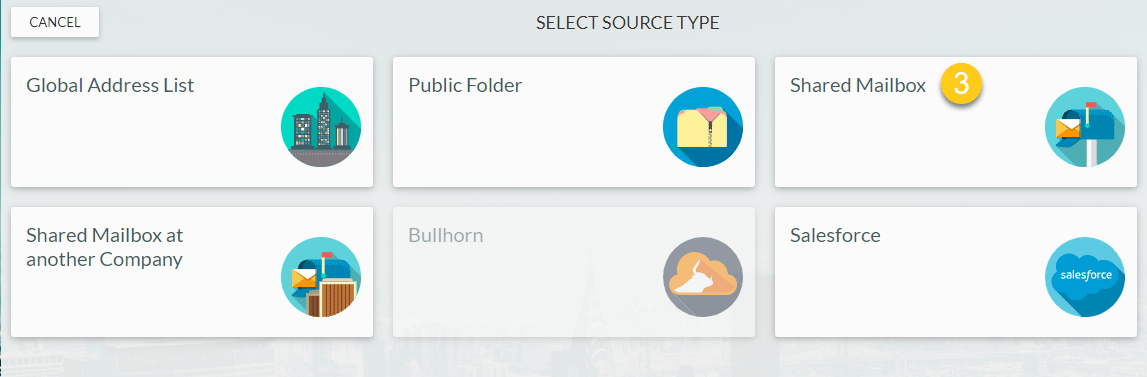
- Select Shared Mailbox as the contact source type. (See figure below.)
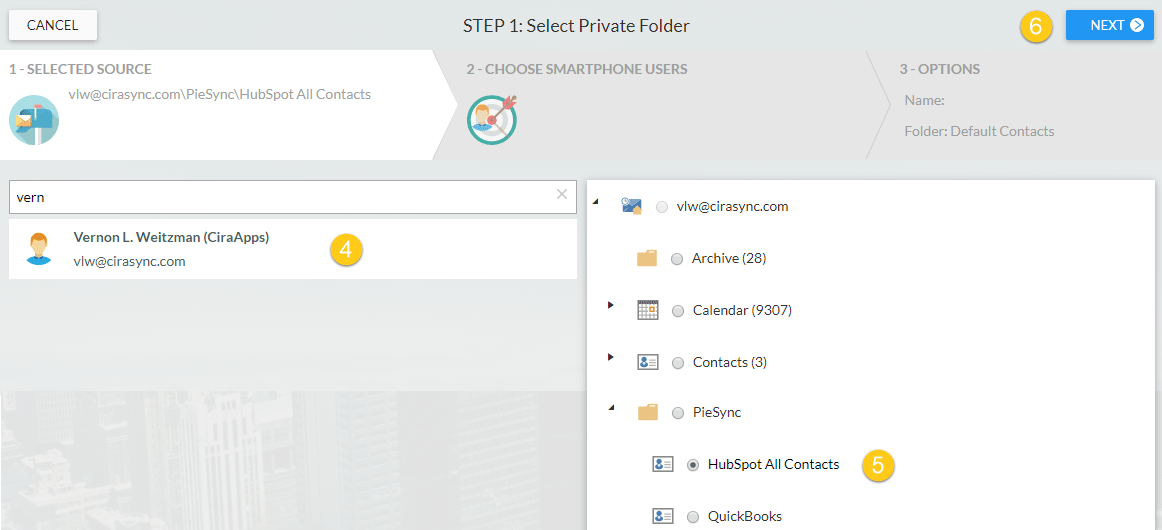
 You will be taken to STEP 1: Select Private Folder on the CiraSync dashboard. (See figure below.)
- Select the user with the HubSpot Contact List in their Office 365 account. You will see a hierarchy of folders in the user mailbox.
- Select the HubSpot Contact List.
- Click NEXT at the top-right corner of the dashboard. (See figure below.)
 You will be taken to STEP 2: Choose Target Mailboxes on the CiraSync dashboard. (See figure below.)
- Select All Mailboxes and All Contacts as the sync targets.
- Click NEXT at the top-right corner of the dashboard. (See figure below.) You will be taken to STEP 3: Specify contact list options. (See figure below.)

- Name the contact list in the Provide Contact List Name. The Contact List Name will be added as a category for each contact synced by CiraSync.
- Check Sync Contact Groups if you have groups in the contact list and would like to sync members of that group.
- Check Populate Outlook Auto-Complete List if you want these sync contacts appear in the Outlook Auto-Complete list.
- Click + next to Contacts if you would like to sync these contacts to a new subfolder.
- Enter the preferred name of your subfolder if you created a subfolder for the HubSpot contacts.
- Click SAVE. (See figure below.)
- Click the blue back arrow on the top-left corner of the sync summary dashboard to return to the tenant dashboard.
- Check the Update Cache box under the Sync Status pane in the top-right corner of the dashboard.
- Click SYNC NOW to run a manual sync. (See figure below.)


 You will be taken to STEP 1: Select Private Folder on the CiraSync dashboard. (See figure below.)
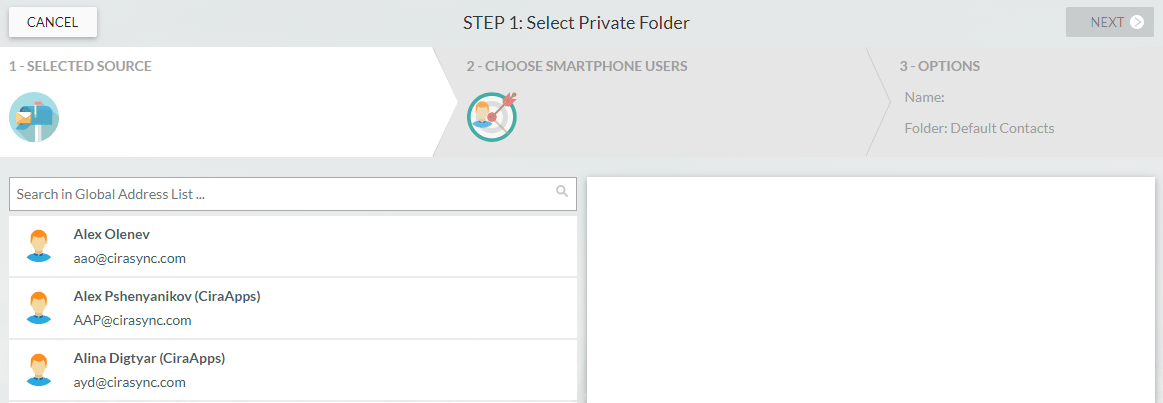
 You will be taken to STEP 2: Choose
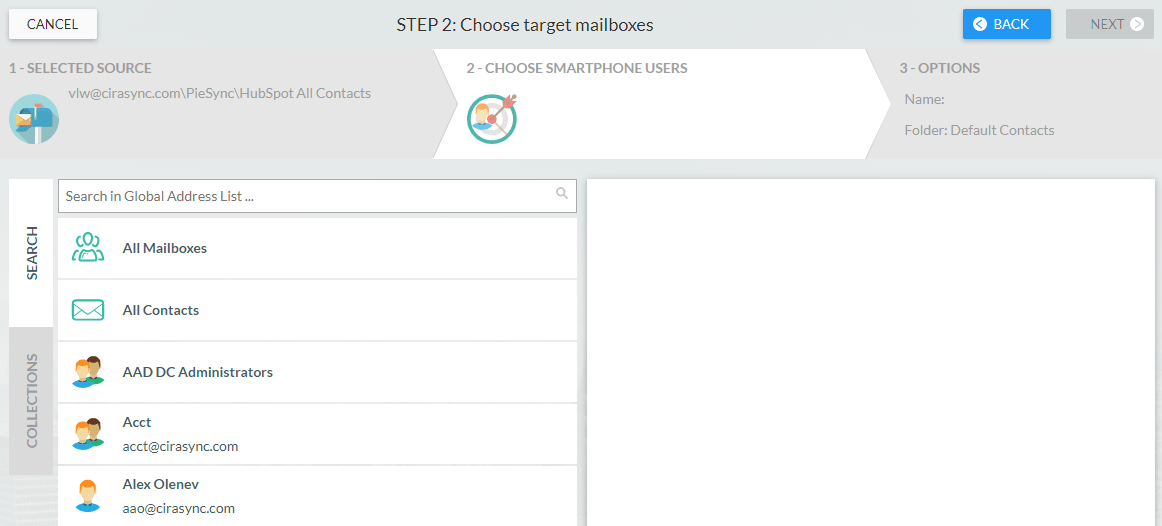
 You will be taken to STEP 3: Specify contact list options. (See figure below.)


Congratulations! You have just used CiraSync to sync your HubSpot contacts to all the mailboxes in your Office 365 tenant and business smartphones. Any changes made to the contact lists in HubSpot and Outlook will be detected and updated. CiraSync will then push these updates to user mailboxes in Outlook and business smartphones.

