


With CiraSync Enterprise Edition, sync an unlimited number of Contacts, Calendars, and Public Folders multiple times a day for an unlimited number of smartphone business users. Follow this guide to learn how to get started with CiraSync Enterprise Edition!
Before You Start
Below are CiraSync Enterprise Edition prerequisites. Please follow in the order they are listed before upgrading to CiraSync Enterprise Edition:
- Grant Application Consent Access to your Dedicated Service account.
- To sync Public Folders:
- Assign the Dedicated Service Account a Microsoft Exchange license (i.e. Exchange Kiosk or Exchange Online F1/Plan 1).
- Give the account the Reviewer permissions in the Public Folders.
- Note: You may need a Dedicated Service Account for specific configurations, such as:
- Sourcing a Public Folder
- Sourcing Outlook Contact Groups
- Sourcing Dynamic Distribution Lists (requires an Exchange Online license)
- Managing large volumes of data that may require multiple Service Accounts.
Instructions
Upgrading from CiraSync Personal Edition
- Log in to CiraSync Personal Edition Dashboard.
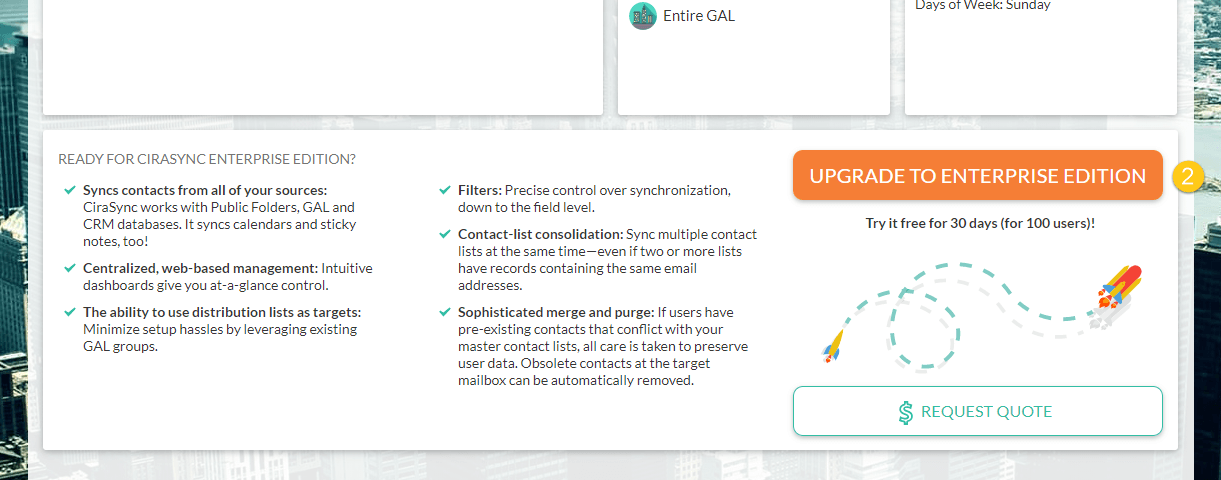
- Click UPGRADE TO ENTERPRISE EDITION at the bottom-right corner of the Dashboard. (See figure below.)

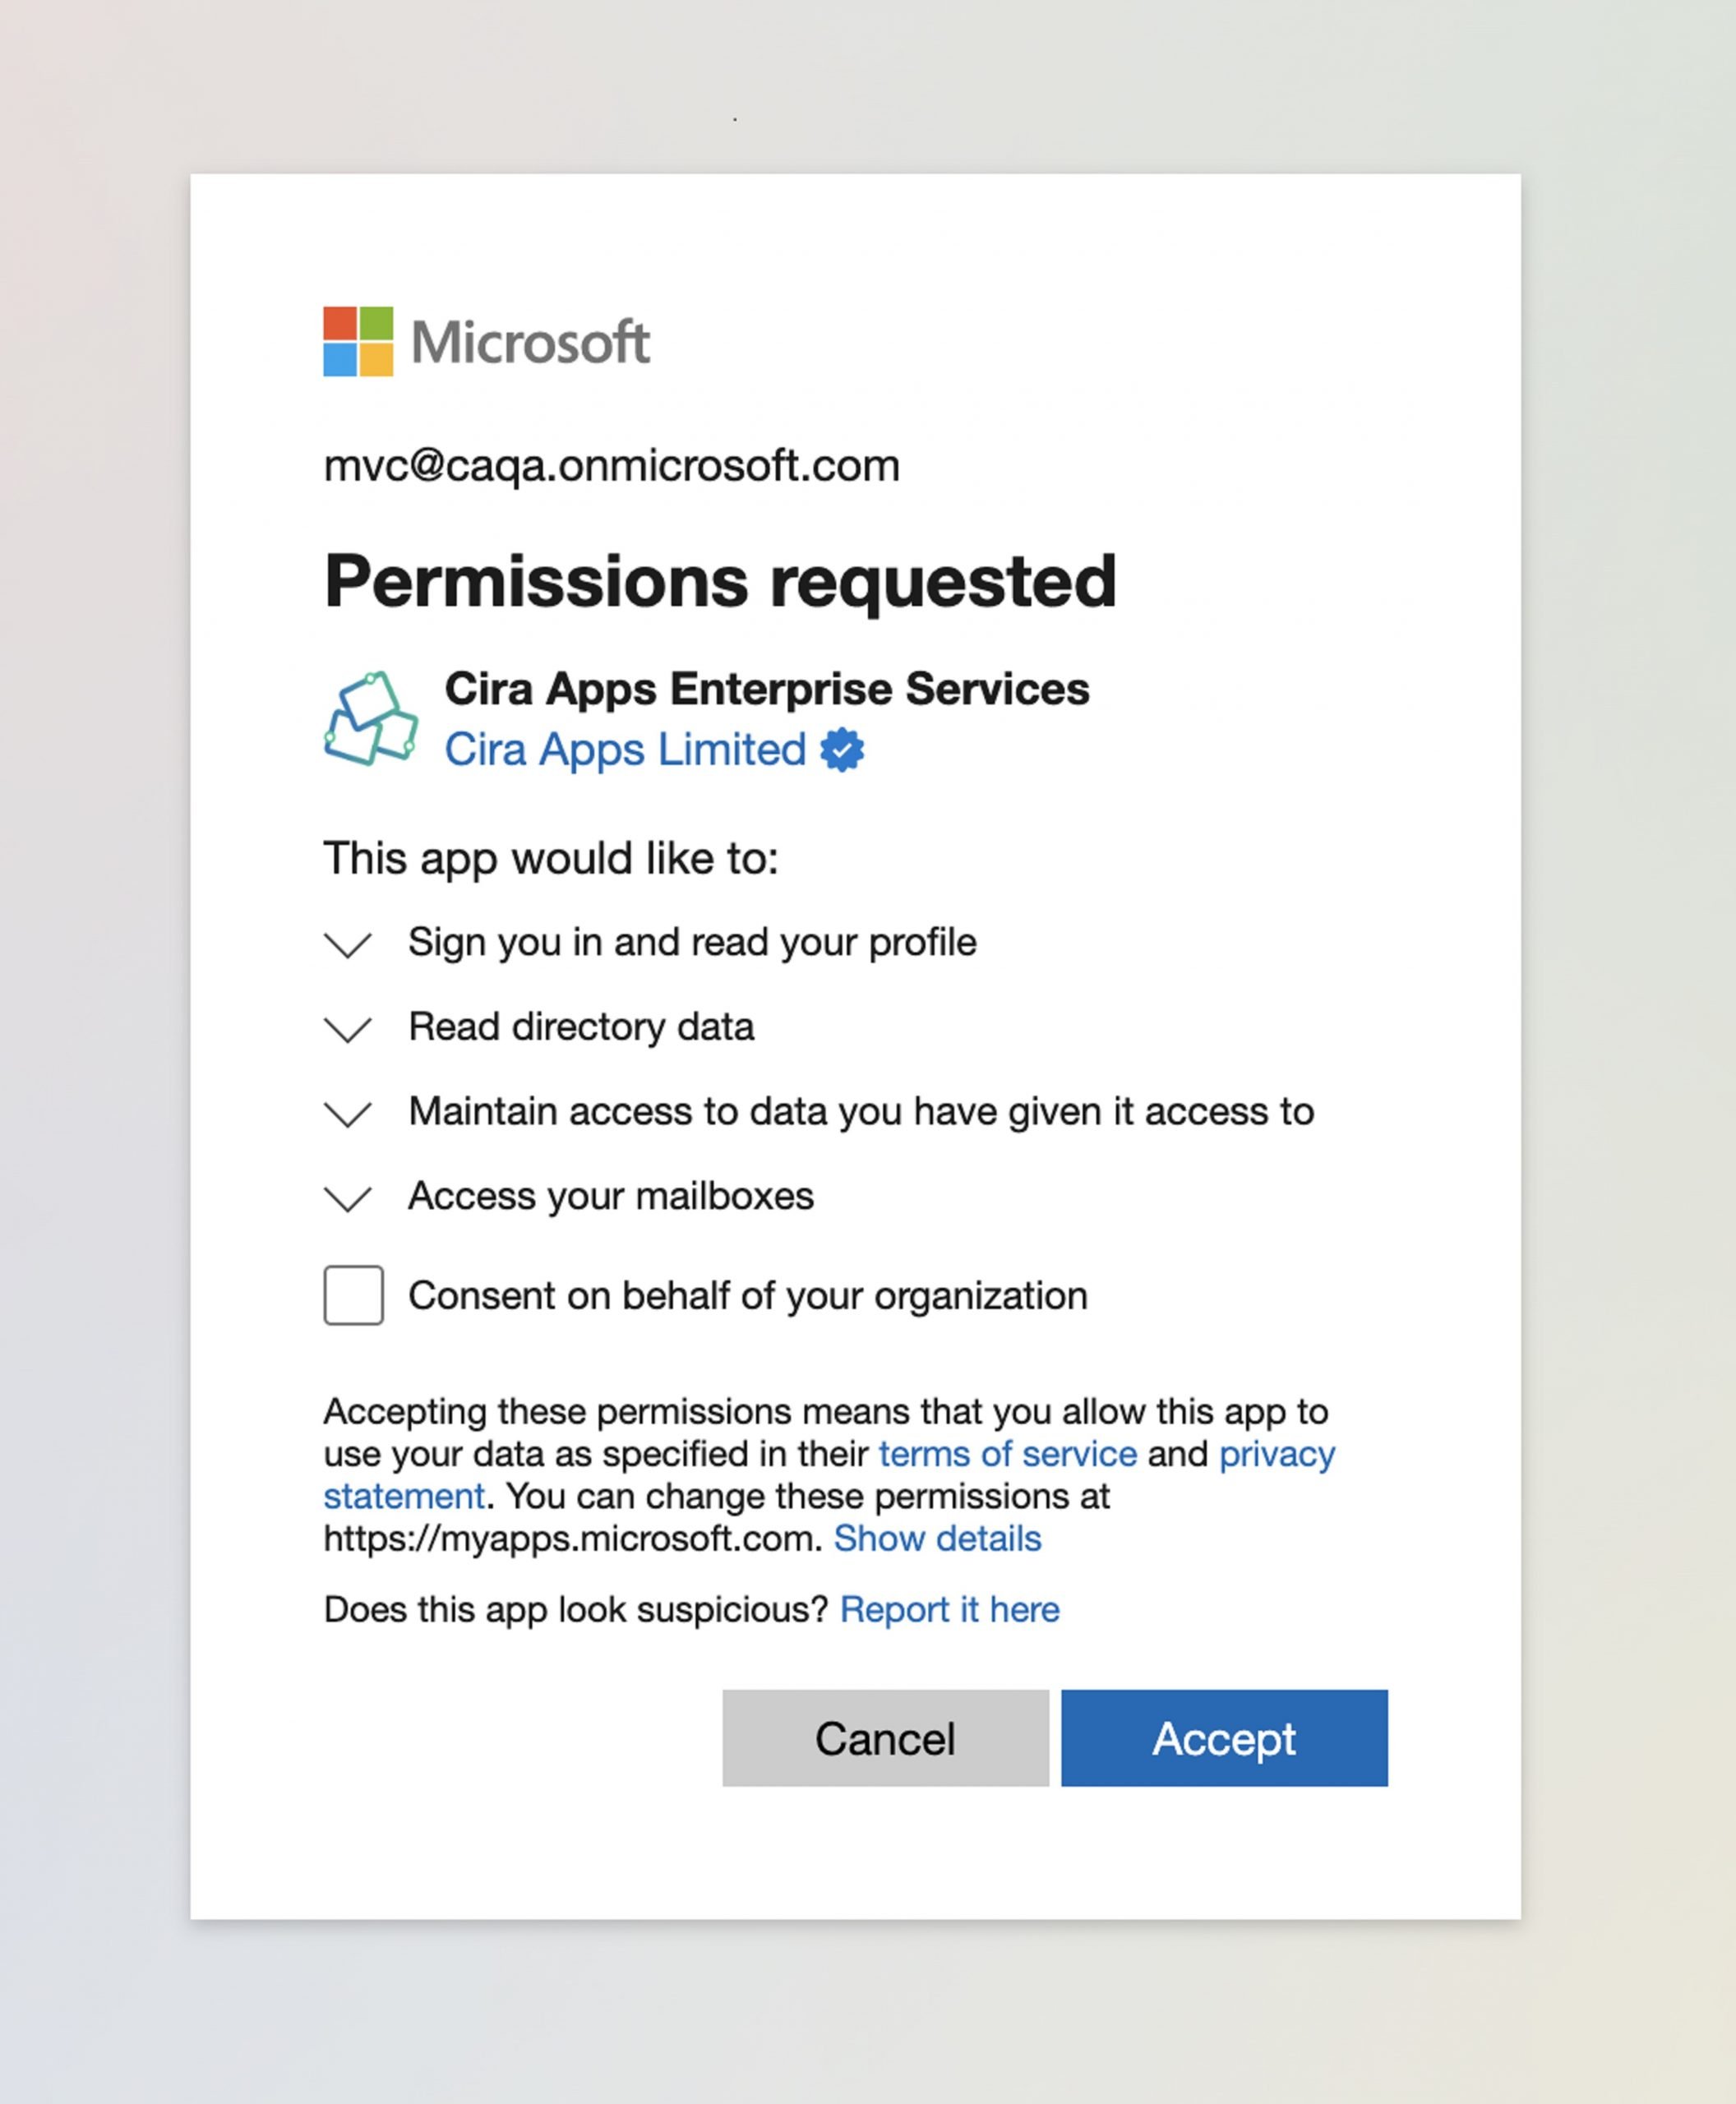
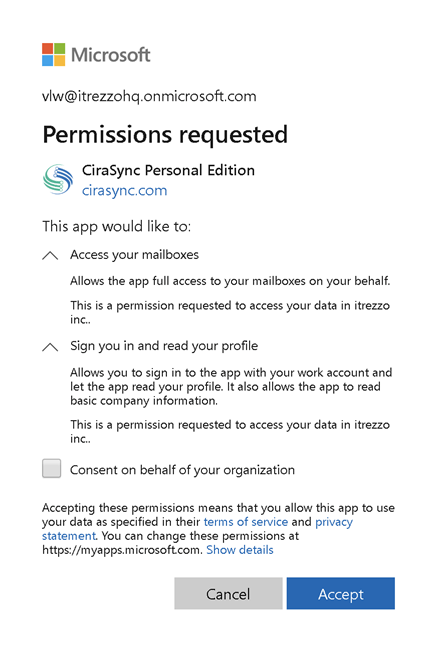
- Sign in using the Global Administrator Account/Dedicated Service Account you set up in the Before You Start section above. CiraSync will ask for additional permissions to use Enterprise Edition. (See figure below.) IMPORTANT: Do not check the box Consent on behalf of your organization

- Click Accept to grant the additional consent required to use CiraSync Enterprise Edition. NOTE: Do not check the Consent on behalf of your organization box.
Starting the Enterprise Edition Trial
CiraSync Enterprise Edition offers a 10-user, 15-day free trial. Use the following procedure to start your own CiraSync Enterprise Edition free trial.
NOTE: The following instructions are for users who want to immediately start with the CiraSync Enterprise Edition Trial and not use Personal Edition.
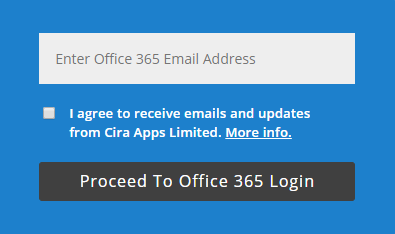
- Go to https://cirasync.com/get-cirasync-enterprise-edition-now/.
- Enter your Office 365 Tenant email address in the blue dialog box on the right side of the box. NOTE: This email address must be set to the Global Administrator role to sign up for the CiraSync Enterprise Edition trial.
- Check I agree to receive emails and updates from Cira Apps Limited.
- Click Proceed to Office 365 Login to go to the Microsoft sign-in page. (See figure below.)

- Enter the password to the Exchange email address, and click Sign in. CiraSync will then ask for permission to access your Office 365 account. (See figure below.)NOTE: CiraSync does not store or requests passwords. Any customer data is passed through the Microsoft Azure network—not the internet.

- Click Accept. NOTE: DO NOT check the Consent on behalf of your organization box.
- Select the timezone and location of your company to set CiraSync data residency settings.
- Click the pen icon to choose a Point of Contact.
- NOTE: It is recommended to use a Contact with an email and phone number defined by Azure Active Directory just in case issues are encountered.
- Click OK.
Customizing the Sync Schedule
- If the source is a Public Folder or a User/Shared Mailbox, then click the slider next to Stream changes from Public Folders and User Mailboxes to have the sync frequency set to every 15 – 60 minutes.
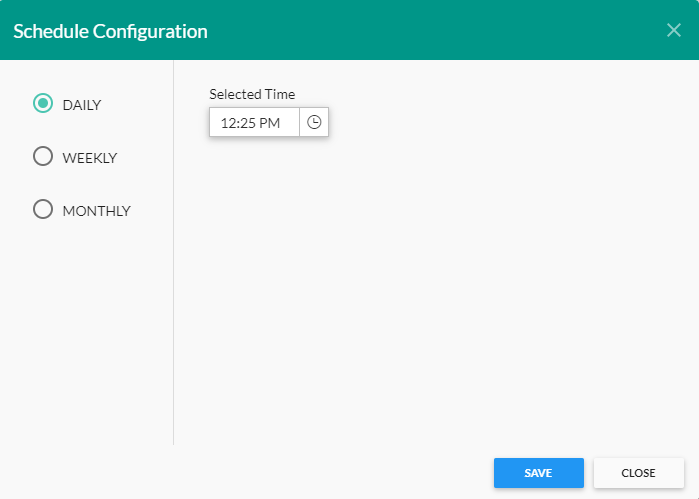
- Click EDIT in the Schedule pane to open the Schedule Configuration window.
- Choose the time and frequency of the scheduled sync task to further customize the sync schedule. (See figure below.)

- Click SAVE.
Setting up Auto-Licensing for Users
- Click the + in the Contact Collections pane to create a Contact Collection.
- Add users you want to license to this Collection. NOTE: You can click All Mailboxes to add every mailbox in your tenant. This will include the Service Account, which can be removed from the Collection once you expand All Mailboxes. You can also create a Contact Collection from an Office 365 Dynamic Distribution Group. Check out how to do that here.
- Click SAVE.
- Return to the CiraSync home Dashboard.
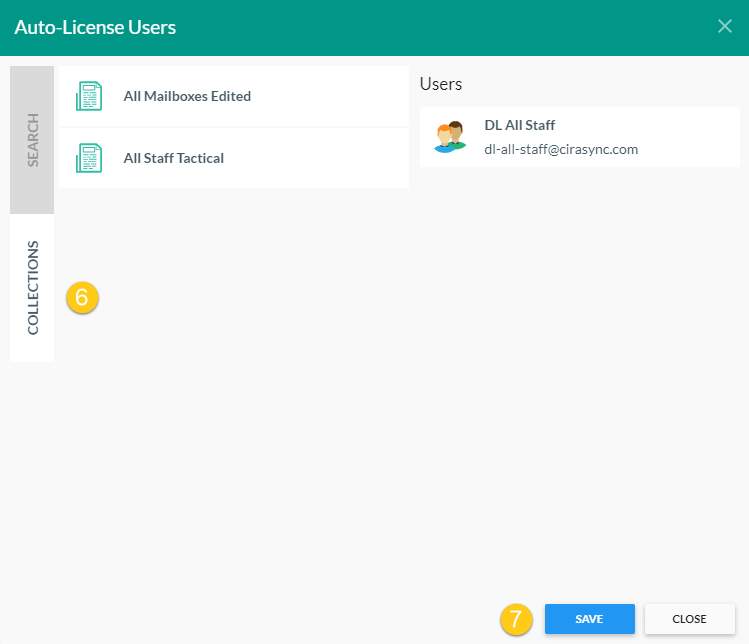
- Click EDIT under the Auto-License pane to open the Auto-License Users window.
- Click COLLECTIONS and add the Contact Collection created previously to the Auto-License Users window.
- Click SAVE. (See figure below.)

- Click the Enabled slider under the Auto-License pane.
- Click RUN in the Auto-License pane. Now, every user in your Contact Collection will automatically have a license to CiraSync without having to manually assign it. NOTE: When assigning a license to a new user, simply edit the Contact Collection from the Contact Collections pane and click RUN in the Auto-License pane.
Next article: Making CiraSync Use a Specific Office 365 Service Account

