


In Microsoft Outlook, it is easy to share Contacts in a mailbox; however, it is not so easy to share that contact folder with smartphones. With CiraSync Enterprise Edition, you can sync Contacts and Calendars from a User/Shared Mailbox to any number of users in your Office 365 tenant.
This guide shows how CiraSync Enterprise Edition can sync Microsoft Exchange mailboxes to an entire Office 365 Tenant!
Before You Start
This guide assumes that a dedicated Service Account with Application Consent Access has been set for your Office 365 Tenant. Without an administrator account with the appropriate settings configured, CiraSync will be unable to push Contacts and Calendars updates to user mailboxes. Check out the following articles to learn how to set up a dedicated Service Account with the appropriate permissions for your Tenant and then return here to learn how to sync User/Shared Mailboxes with CiraSync Enterprise Edition:
- Setting up a Dedicated Service Account for CiraSync in Office 365
- Setting up Application Consent Settings
- Making CiraSync Use a Specific Office 365 Service Account
This guide also assumes that a Collection was created as a Target prior to creating a Contact List. Check out the following article to learn how to set up Collections:
Creating CiraSync Contact Collections
Instructions
1. Log in to the CiraSync Dashboard.
2. Click + in the Contact Lists (See figure below.)

3. Select Shared Mailbox as the Contact source type. (See figure below.) 
4. Select a Private Folder on the CiraSync Dashboard. Select the User/Shared Mailbox to use as the sync source. (See figure below.)

5. Click Contacts or the appropriate subfolder.

6. Click NEXT in the top-right corner of the Dashboard. (See figure below.)

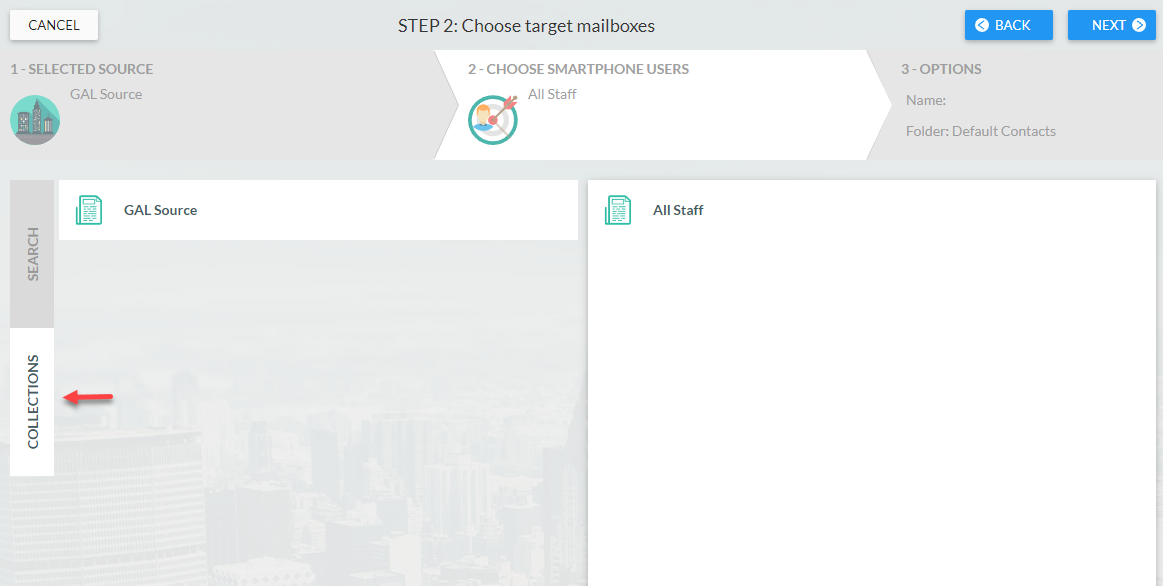
7. Select the User Contact that you would like to use as a Target. NOTE: If you would like to use a Contact Collection as a sync target, click the COLLECTIONS tab and select the Collection you would like to use as the sync target.

8. Click NEXT in the top-right corner of the Dashboard. (See figure below.)

9. Name the contact list in the box under Provide Contact List Name.

10.Click the + next to Contacts.

11. Enter the preferred name of your subfolder.

12. Check Sync Contact Groups if you have groups in the contact list and would like to sync members of that group. You can choose to exclude Group members from syncing.

13. Check Populate Outlook Auto-Complete List if you want these sync contacts appear in the Outlook Auto-Complete list.

14. By default, CiraSync will remove a Contact from the targeted mailbox if it is removed from the Source. In case you would like to allow Users to keep these obsolete items, check Retain obsolete items.

15. Click SAVE. (See figure below.)

16. You will be taken to the sync summary dashboard. (See figure below.)

17. Click the CiraSync icon in the top-left corner of the window to return to the CiraSync home dashboard.

18. Check the Update Cache box under the Sync Status pane in the top-right corner of the dashboard.

19. Click SYNC NOW to run a manual sync.

Next article: Syncing Shared Calendars to Smartphones with CiraSync Enterprise Edition