


Setting up a dedicated service account for CiraSync in Office 365 is only needed when:
- Sourcing a Public Folder
- Sourcing Outlook contact groups
- Sourcing Dynamic Distribution Lists (Exchange Online license required)
- Managing large volumes of data requiring multiple service accounts
Additionally, it is important to be aware of token expiration, which can often catch users off guard. Token expiration occurs when the authentication token, which grants CiraSync access to Office 365 data, becomes invalid. This can happen due to various reasons such as security policies or administrative changes, necessitating re-authentication to maintain seamless synchronization. This guide demonstrates how to set up and configure a dedicated Service Account for CiraSync within the Office 365 Admin Center.
Why Should I Create a Dedicated Service Account?
The dedicated Service Account comes with these benefits:
- The password expires periodically when using personal Office 365 credentials: the dedicated Service Account password can be set to never expire.
- A dedicated Service Account allows users to freely give and restrict access to specific accounts in the Office 365 Tenant.
- The dedicated Service Account can be disabled without affecting other accounts and functions of CiraSync.
- Access to this account can be given to other users without revealing the account’s password.
NOTES
- The Service Account needs Global Admin role only while logging into the Dashboard for the first time, in order to be able to accept permissions used by Microsoft to generate a Token. This Token is used by CiraSync to access Contacts, Calendars and Sticky Notes within the Tenant. After logging in, it can be downgraded to a User Mailbox.
- The Service Account can have MFA added to it, but we suggest that it is done before the initial login.
- If the source is a Public Folder, the Service Account needs a license in Office 365 – the least expensive one is sufficient – and to be added as a Reviewer to it.
- If the source is a User/Shared Mailbox, the Service Account needs a license in Office 365, the least expensive one is sufficient.
- If the source is a GAL, the Service Account does not need a license in Office 365. Regardless of the source type, it does not need a license in CiraSync.
- If the Source is Dynamic Distribution List the Service Account need a license in Office 365 – the least expensive one is sufficent.”
Instructions
Creating a Dedicated Service Account with the Old Admin Center
- Launch the Office 365 Admin Center.
- Click on Users > Active users on the left navigation panel. (See figure below.)

- Click the + Add a user button.
- Provide a Display Name and a Username for the Service Account.
- Click Contact Information and fill in the required fields.
- Click Password to a create a password for this new account.
- Click Roles, and then select Global Administrator.
- Click Product Licenses and assign license, if required.
- Click Add.
Creating a Dedicated Service Account with the New Admin Center
Microsoft recently put their new Admin Center on trial. The following instructions are for users who switched to the new Admin Center.
- Launch the Office 365 Admin Center.
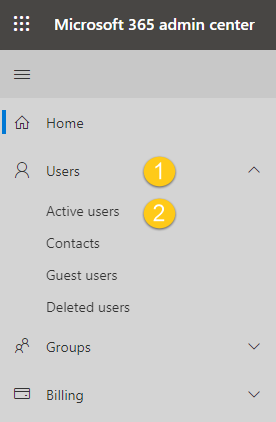
- Click on Users > Active Users in the left navigation panel. (See figure below.)
- Click the + Add a user button. The Add a User wizard will pop out on the right side of the window. (See figure below.)
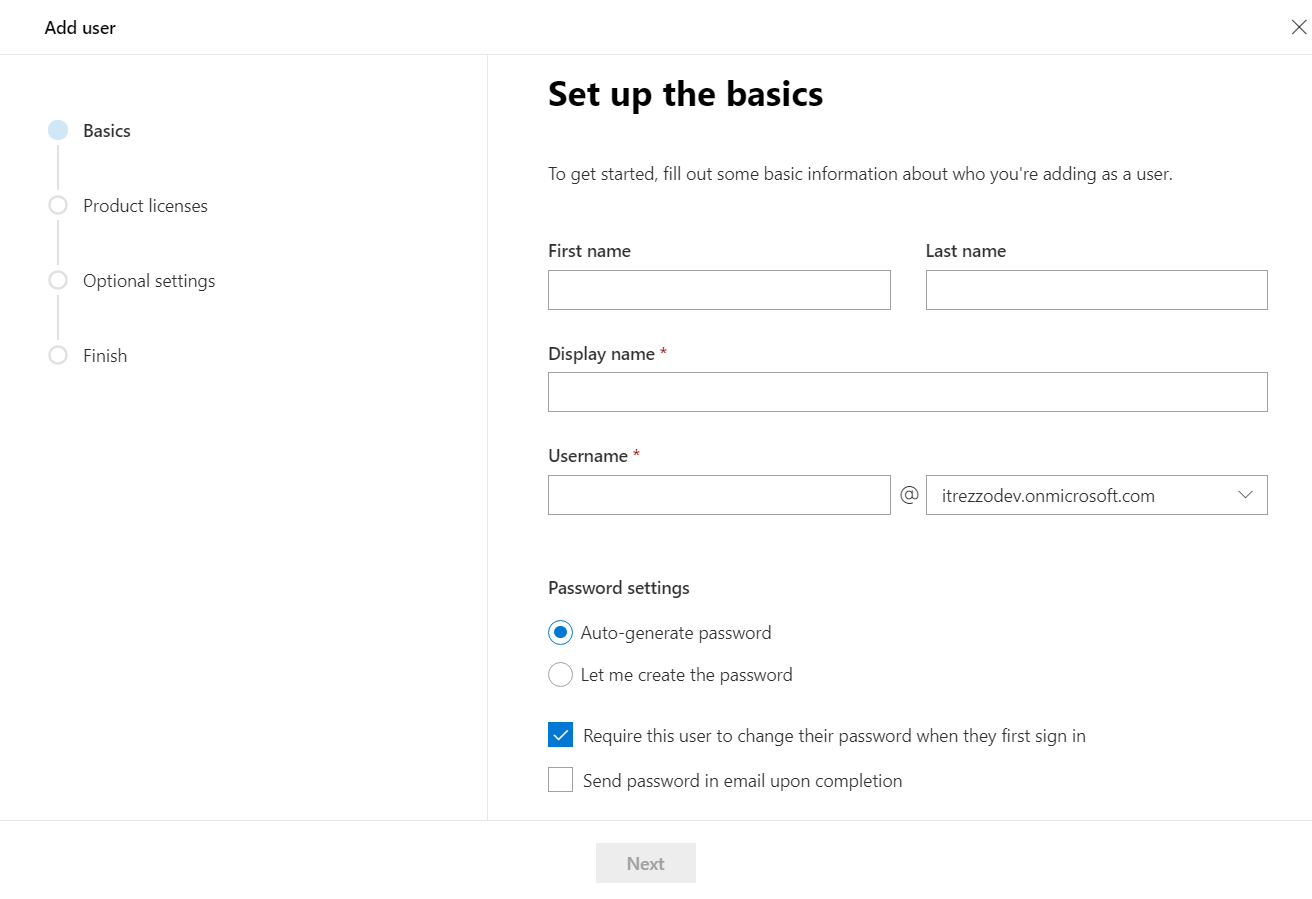
- Fill in the required fields.
- Click Let me create the password option under Password settings.
- Create a strong password for the account.
- Click Send password in email upon completion.
- Click Next. You will be taken to Assign product licenses portion of the wizard. (See figure below.)

- Select the location of the Service Account.
- Select an Exchange License or the Create user without product license option.
- Click Next. You will be taken to the Optional settings portion of the wizard. (See figure below.)
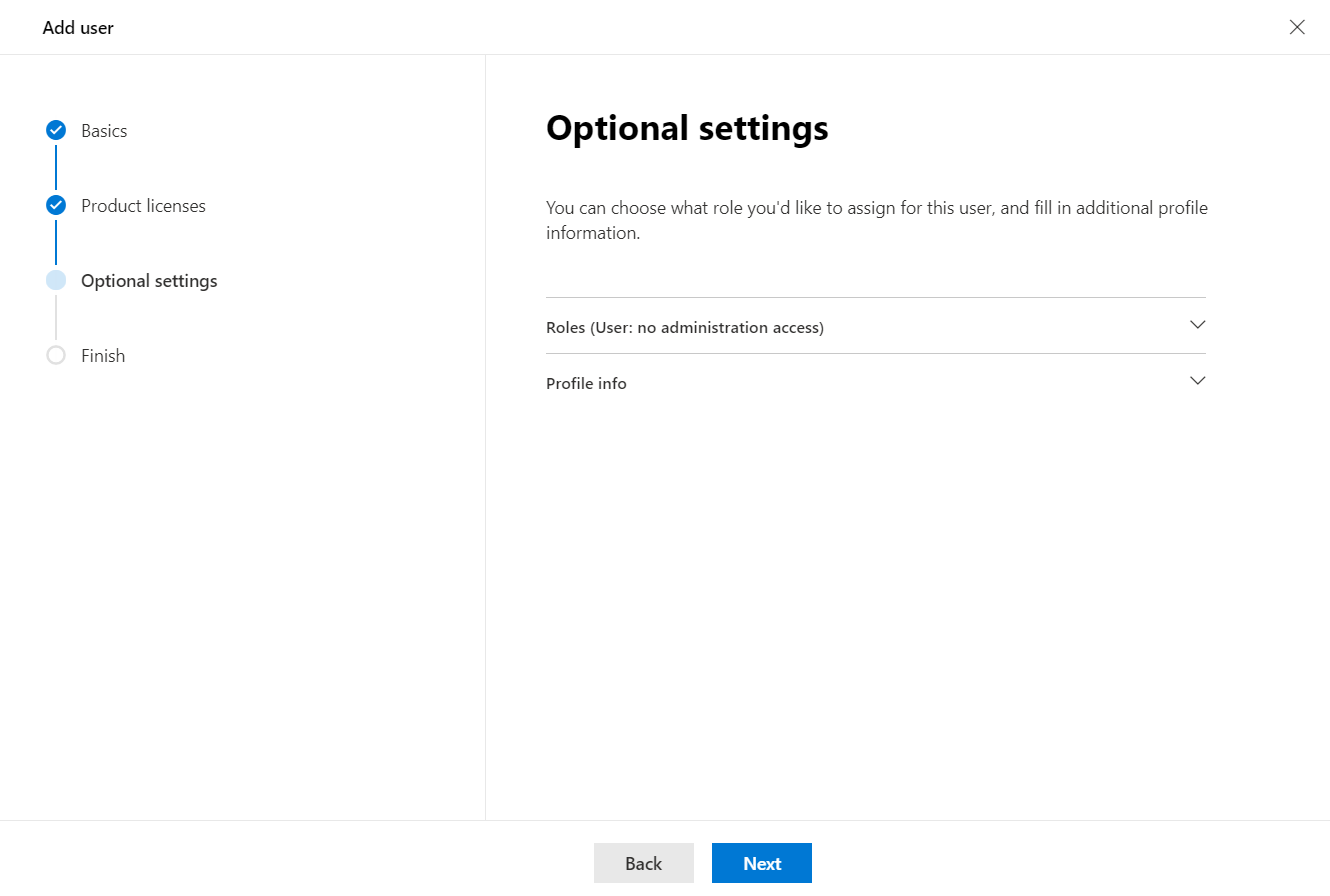
- Click Roles. This will expand the User Roles section of the wizard.
- Select Admin center access > Global admin.
- Click Next. You will be taken to the Review and finish adding portion of the wizard.
- Review all the information provided to the wizard > Click Finish adding.
Next Article: How to Set up Application Consent Settings in CiraSync

