


Read the instructions or check out the video below to learn how to sync Public Folder Contact Lists to users in your Office 365 tenant with CiraSync Enterprise Edition (EE):
Before You Start
This guide assumes you are a CiraSync EE user with a dedicated Service Account that has the following permissions: To sync Public Folders with CiraSync, an Exchange license must be assigned to the Service Account, and the Service Account must be given Reviewer permissions for the Public Folder. If you have yet to do either or both of these, please check out the articles below in the order they are listed and then return here to learn how to sync Public Folder Contact Lists with CiraSync EE:
- Setting up a Dedicated Service Account for CiraSync in Office 365
- Setting up Application Consent Settings
- Making CiraSync Use a Specific Office 365 Service Account
This guide also assumes that a Collection was created as a Target prior to creating a Contact List. Check out the following article to learn how to set up Collections:
Creating CiraSync Contact Collections
CiraSync
Instructions
- Log in to the CiraSync Dashboard.
- Click the + in the Contact Lists (See figure below.)

- Select Public Folder as the contact source. (See figure below.)
 You will be taken to STEP 1: Select Public Folder. (See figure below.)
- Select the Public Folder Contact List you want to sync to your users.
- Click NEXT. You will be taken to STEP 2: Choose target mailboxes. (See figure below.)

- Select the user mailboxes you would like to use as the target for the sync. NOTE: Contact Collections can also be used as a target of a sync task. Click the COLLECTIONS tab and select the Collection you would like as the sync target. If you would like to learn how to create a CiraSync Contact Collection, check out this article on How to Create a CiraSync Contact Collection.
- Click NEXT. (See figure below.)
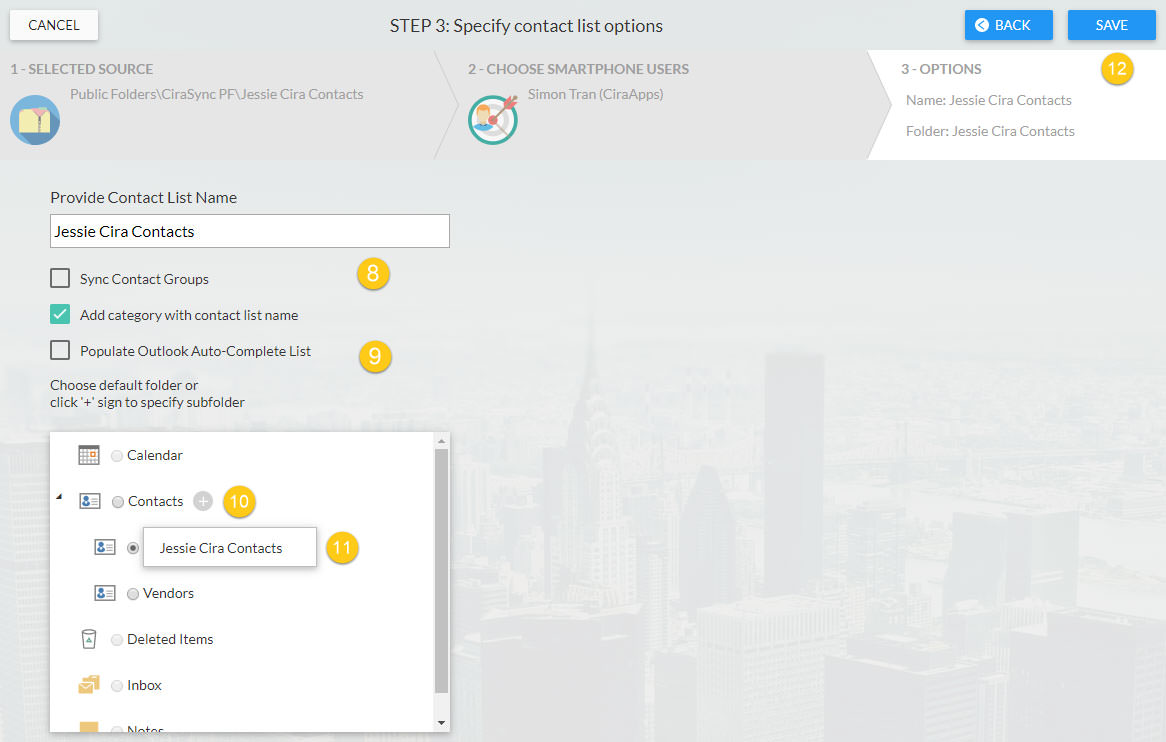
 You will be taken to STEP 3: Specify contact list options. (See figure below.)
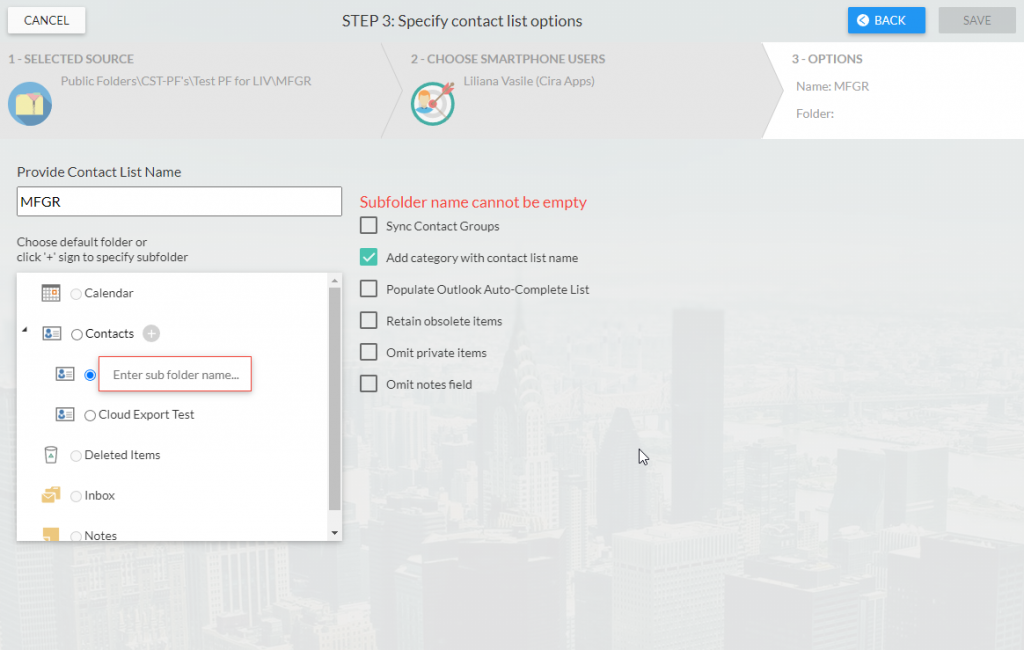
- Check Sync Contact Groups if you have groups in the Public Folder Contact List and would like to sync members of that group.
- When you are checking Add category with contact list name, the name of the Contact List will be added in the Category field of the Contact in the targeted mailboxes. This will not delete any other information added to that field prior to the sync, it will just add the name after any other category filled in.
- Check Populate Outlook Auto-Complete List if you want these sync Contacts to appear in the Outlook Auto-Complete list.
- By default, CiraSync will remove a Contact from the targeted mailbox if it is removed from the Source. In case you would like to allow users to keep these obsolete items, check Retain obsolete items.
- By default, private items from the Source will be synced to the targeted mailbox. Check Omit private items in order to exclude them from the syncing process.
- By default, the Notes field from the Source Contact will be synced to the targeted mailbox. Check Omit notes field if you would like to not sync that field.
- Click the + next to Contacts. NOTE: If you would like to sync these Contacts to the main Contacts folder, then skip to Step 16.
- Name the subfolder.
- Click SAVE. (See figure below.)
- You will be taken to the sync summary page. (See figure below.)

- Click the CiraSync logo to return to the CiraSync Dashboard.
- Check the Update Cache box under the Sync Status pane in the top-right corner of the Dashboard.
- Click SYNC NOW to run a manual sync. (See figure below.)

Next article: Syncing Public Folder Calendars to Smartphones with CiraSync Enterprise Edition

