Outlook Contacts Folders can be shared with other users in and outside your organization (depending on your tenant’s permissions). This is useful for tasks like on-boarding employees or cross-department collaboration. This guide shows how to share Outlook Contacts Folders in the Outlook Desktop App.
Share Outlook Contact Folders on Desktop: w/Read-Only Access
- Launch Outlook Desktop.
- Click the people icon in the bottom-left corner of the navigation panel. Outlook will display in people view.
- Select the desired contacts folder to share in the left-hand navigation panel.
- Click Share Contacts in the ribbon at the top of the window. A blank email invitation will open. (See figure below.)

- Define the recipient of the contacts folder in the To field. NOTE: Contact folder recipients can be a single user, users, or a user group.
- Click Send.

Share Outlook Contact Folders on Desktop: w/Delegated Permissions and Access
- Launch Outlook Desktop.
- Click the people icon in the bottom-left corner of the navigation panel. Outlook will display in people view.
- Right-click the desired contacts folder to share.
- Click Properties.
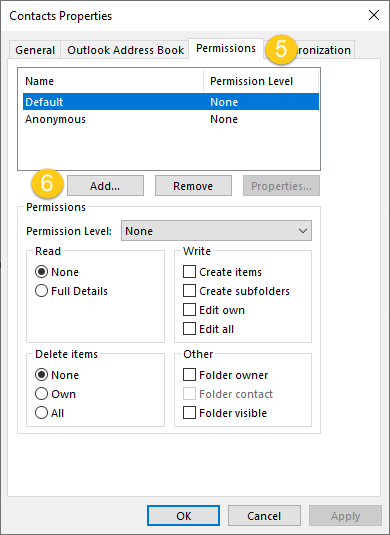
- Click the Permissions tab.
- Click Add. (See figure below.)

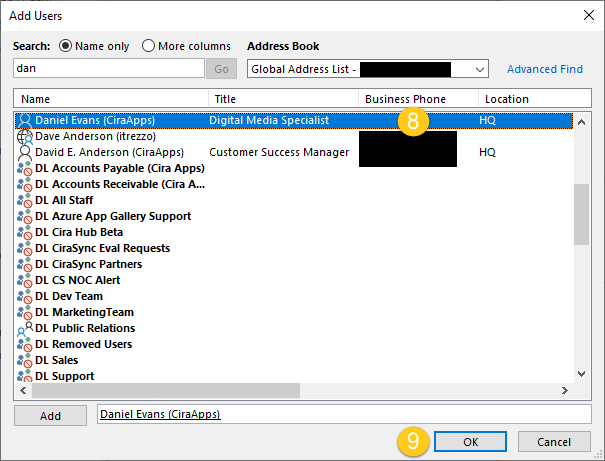
- Search for the user(s) or group(s) to share the contacts folder to.
- Double-click the username/group name to add.
- Click OK when all desired users have been added. (See figure below.)

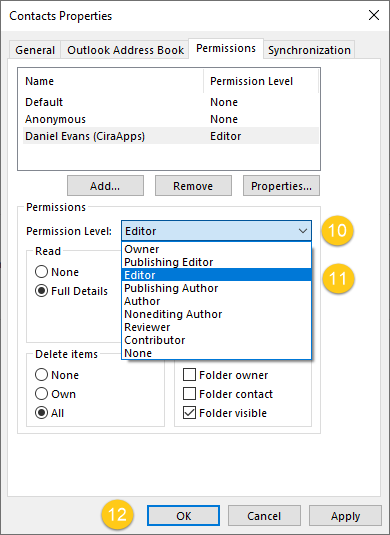
- Click the drop-down arrow in Permission Level.
- Choose the permission level to assign to the added user. In this example, the user is assigned the Editor permission level. NOTE: If sharing with multiple users, click the entry for each recipient to be able to delegate their viewing and editing permissions.
- Click OK. (See figure below.)