


When using CiraSync Enterprise Edition, you will need a Dedicated Service Account in Office 365 for CiraSync to manage the Global Address List (GAL), Public Folder, and User/Shared Mailbox sync for an entire Office 365 tenant. This guide shows how to create and set up a dedicated Service Account for CiraSync in both the old and new Office 365 Admin Center. Learn more about the requirements, here.
Why Should I Create a Dedicated Service Account?
The dedicated Service Account comes with these benefits:
- The password expires periodically when using personal Office 365 credentials: the dedicated Service Account password can be set to never expire.
- A dedicated Service Account allows users to freely give and restrict access to specific accounts in the Office 365 Tenant.
- The dedicated Service Account can be disabled without affecting other accounts and functions of CiraSync.
- Access to this account can be given to other users without revealing the account’s password.
NOTES
- The Service Account needs Global Admin role only while logging into the Dashboard for the first time, in order to be able to accept permissions used by Microsoft to generate a Token. This Token is used by CiraSync to access Contacts, Calendars and Sticky Notes within the Tenant. After logging in, it can be downgraded to a User Mailbox.
- The Service Account can have MFA added to it, but we suggest that it is done before the initial login.
- If the source is a Public Folder, the Service Account needs a license in Office 365 – the least expensive one is sufficient – and to be added as a Reviewer to it.
- If the source is a User/Shared Mailbox, the Service Account needs a license in Office 365, the least expensive one is sufficient.
- If the source is a GAL, the Service Account does not need a license in Office 365. Regardless of the source type, it does not need a license in CiraSync.
- If the Source is Dynamic Distribution List the Service Account need a license in Office 365 – the least expensive one is sufficent.”
Instructions
Creating a Dedicated Service Account with the Old Admin Center
- Launch the Office 365 Admin Center.
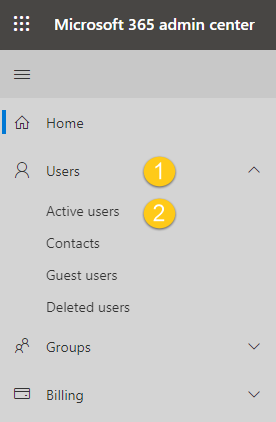
- Click on Users > Active users on the left navigation panel. (See figure below.)

- Click the + Add a user button.
- Provide a Display Name and a Username for the Service Account.
- Click Contact Information and fill in the required fields.
- Click Password to a create a password for this new account.
- Click Roles, and then select Global Administrator.
- Click Product Licenses and assign license, if required.
- Click Add.
Creating a Dedicated Service Account with the New Admin Center
Microsoft recently put their new Admin Center on trial. The following instructions are for users who switched to the new Admin Center.
- Launch the Office 365 Admin Center.
- Click on Users > Active Users in the left navigation panel. (See figure below.)
- Click the + Add a user button. The Add a User wizard will pop out on the right side of the window. (See figure below.)
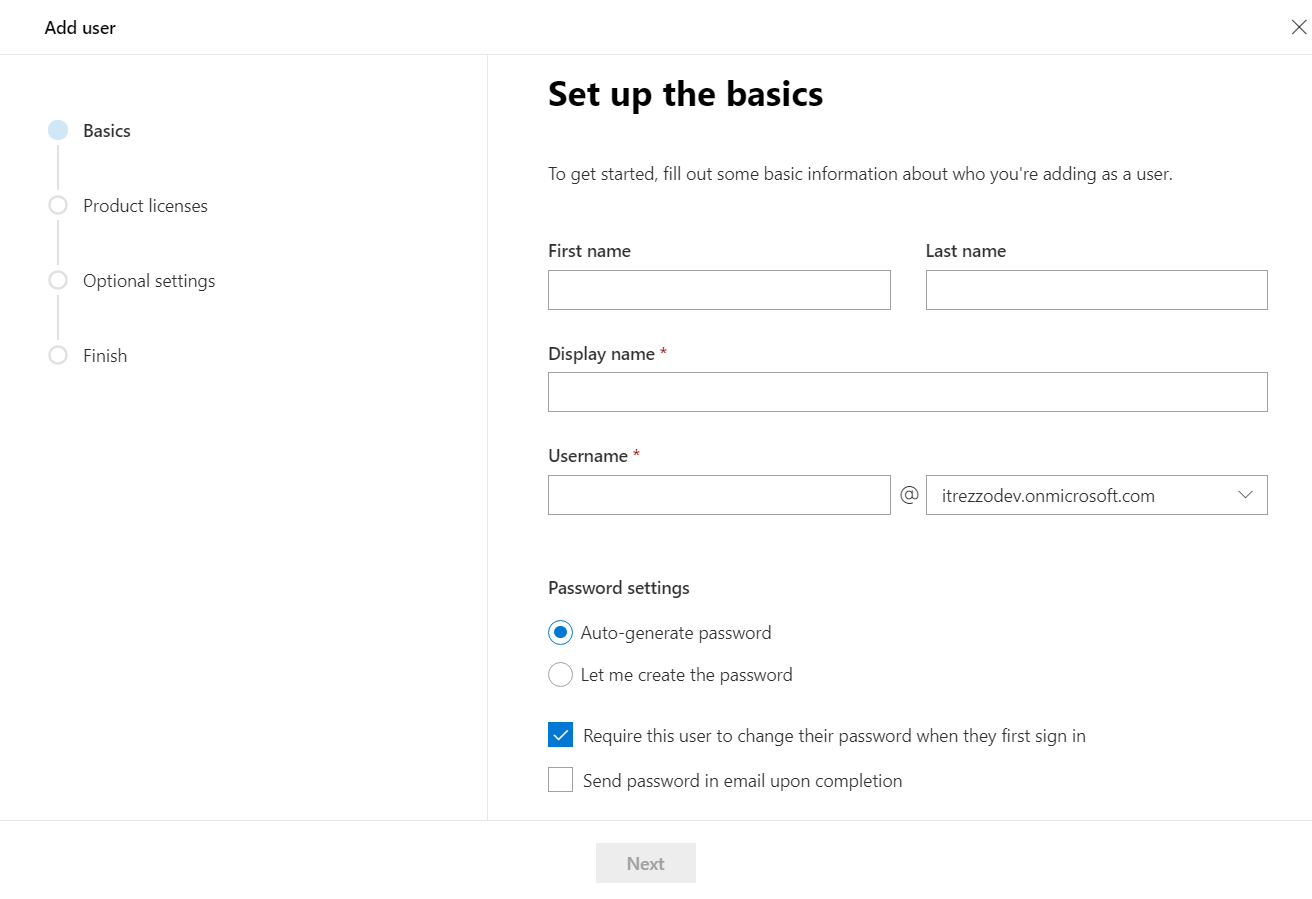
- Fill in the required fields.
- Click Let me create the password option under Password settings.
- Create a strong password for the account.
- Click Send password in email upon completion.
- Click Next. You will be taken to Assign product licenses portion of the wizard. (See figure below.)

- Select the location of the Service Account.
- Select an Exchange License or the Create user without product license option.
- Click Next. You will be taken to the Optional settings portion of the wizard. (See figure below.)
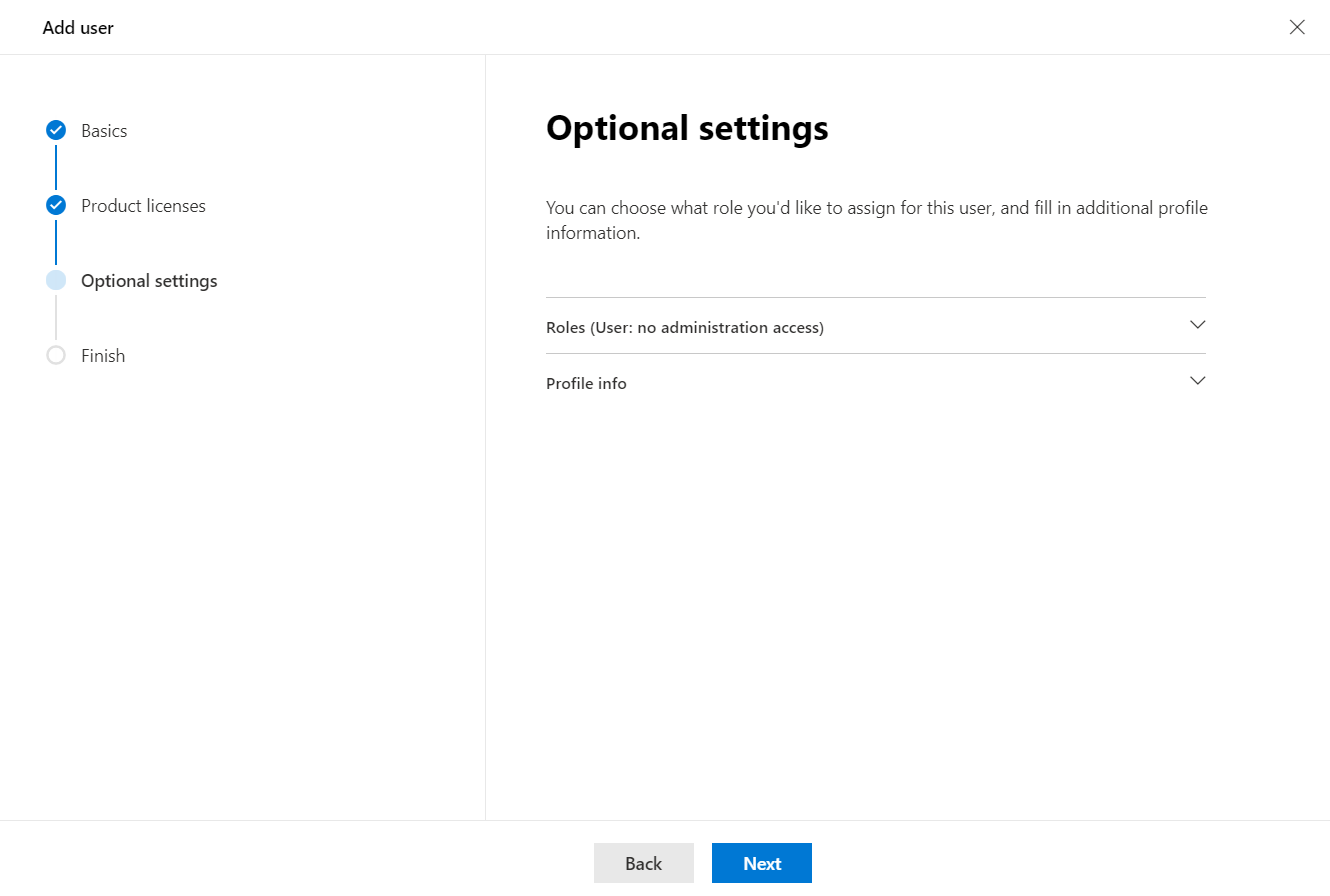
- Click Roles. This will expand the User Roles section of the wizard.
- Select Admin center access > Global admin.
- Click Next. You will be taken to the Review and finish adding portion of the wizard.
- Review all the information provided to the wizard > Click Finish adding.
Next Article: How to Set up Application Consent Settings in CiraSync