This article provides a step-by-step guide on how to configure Application Consent Settings in CiraSync, which is essential for ensuring a smooth integration with your organization’s Microsoft 365 environment. By setting up these permissions, you enable CiraSync to access and synchronize crucial information such as calendar and contact data while maintaining the security and compliance standards of your organization.
Setting up Application Consent in CiraSync
1: Start by launching your web browser and navigating to the CiraSync portal. Log in with your credentials to access the dashboard, the central hub for managing your synchronization settings.
2: On the CiraSync dashboard, which now features a newly added toolbar on the left side of the screen, click on the ‘Settings’ option. This section allows you to adjust your account settings and configure various integration aspects of CiraSync.
3: Navigate to the ‘Application Consent’ section within the CiraSync settings menu.
4: Proceed by clicking ‘Grant Access’ in the Application Consent section. Use an account with Global Admin privileges for this task to ensure CiraSync obtains the necessary permissions to perform its operations across your Microsoft 365 environment. Without this crucial step, CiraSync cannot access or sync data from Exchange Online, limiting its functionality.
5: After granting access, your CiraSync account will gain the appropriate permissions needed for effective data synchronization. This finalizes the setup, enabling CiraSync to securely and efficiently handle the synchronization of user mailbox data, calendars, and contacts.
Summary
Configuring the Application Consent Settings in CiraSync is a straightforward but essential process that directly impacts the efficiency and security of your data synchronization efforts. By following these steps, you ensure that CiraSync operates within the defined boundaries of access, maintaining the integrity and compliance of your organizational data.
CiraSync’s Granular Application Consent provides an efficient and secure way to manage permissions required for synchronization configurations. By giving only the permissions necessary for your specific configuration this helps minimize security risks. Here’s a breakdown of how it works and the steps involved in enabling it.
Set Up Granular Application Consent Settings
Granular Application Consent is a method of granting only the permissions essential for your synchronization setup in CiraSync. The permissions are automatically calculated based on the services you configure, ensuring your Azure Active Directory (AAD) environment is not over-permissioned.
Required Permissions
The permissions required for Granular Application Consent include both general and configuration-specific permissions:
- Read directory data – Allows access to Azure Active Directory to fetch directory information.
- Sign in and read user profile – Enables the application to authenticate and read basic user profiles.
- Read all users’ full profiles – Provides access to user details for synchronization purposes.
Configuration-Specific Permissions:
- Read and write calendars in all mailboxes – Required if calendar synchronization is enabled.
- Read all user mailbox settings – Ensures smooth integration with user mailboxes.
- Read and write contacts in all mailboxes – Needed if contact synchronization is configured.
- Use Exchange Web Services with full access to all mailboxes – Applies if the configuration involves Exchange Web Services (EWS).
These permissions adapt dynamically based on your sync configuration. If additional permissions are required in the future, CiraSync will prompt you to approve them.
How Granular Application Consent Works
CiraSync uses certificate-based authorization through an app registration in your Azure tenant. Here’s how it functions:
- App Registration: A registration named “CiraSync – certificate-based authorization” is created in your Azure tenant.
- Certificate Assignment: The app registration is assigned a certificate for authentication.
- Permission Acceptance: Required permissions are assigned and accepted, enabling resource access through the app registration.
How to Configure Granular Application Consent
CiraSync offers two ways to set up Granular Application Consent:
Automatic Configuration
1. Select settings from the newly added toolbar on the left side of the screen on the CiraSync dashboard.
2. Click on Application Consent to access the permissions settings.
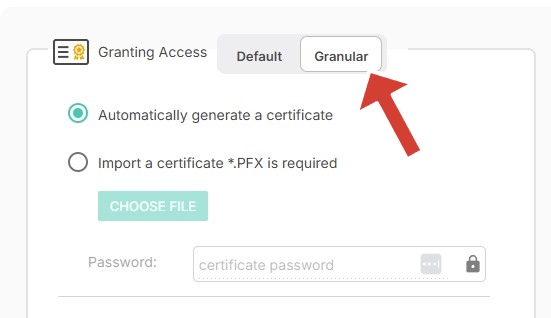
3. Select the Granular option under the Application Consent section.
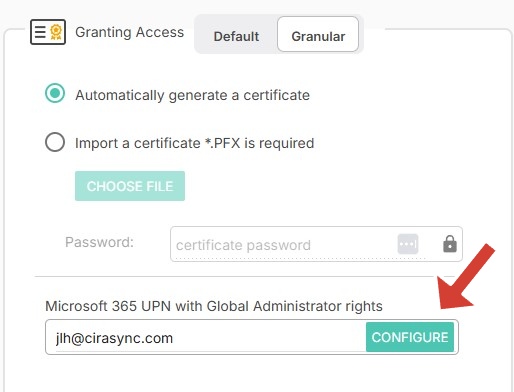
4. Click the Configure button to begin the setup process.
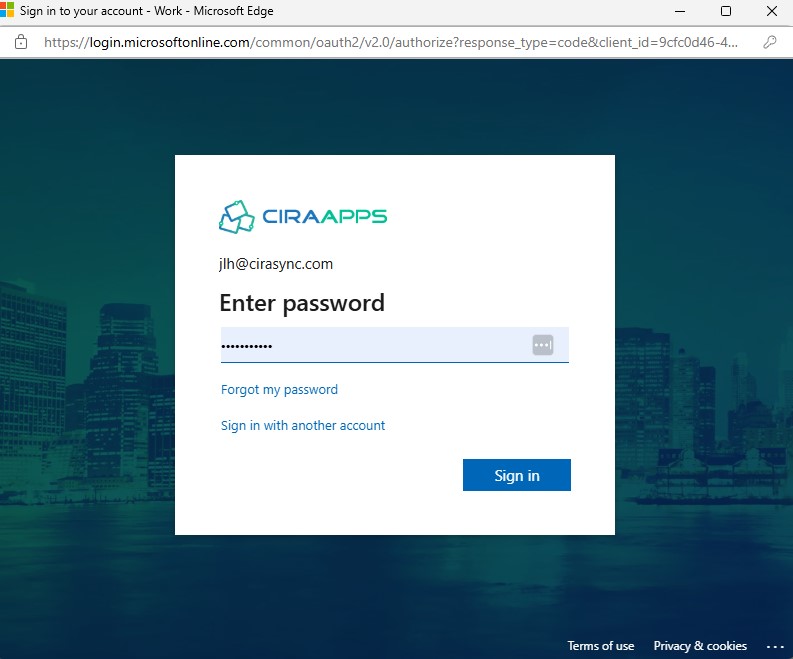
5. When you click Configure, you’ll be prompted to log in as a Global Administrator. (This one-time permission grants temporary rights to perform all required actions automatically. These permissions are not stored and are used only for the configuration process.)
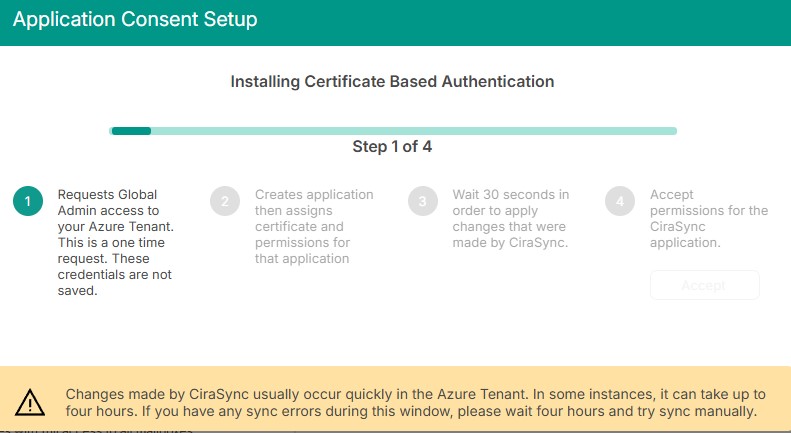
6. Wait for the process to complete and then accept the required permissions for the new application.
Manual Configuration
Follow these steps to manually configure CiraSync’s Granular Application Consent using a certificate:
1. Click on “Import a Certificate (.PFX)” and ensure the certificate format is correct.
2. Use the “Choose File” button to locate, select, and upload your .PFX certificate file.
3. Enter the password associated with the .PFX file to validate and decrypt the certificate.
4. Click “Configure” to complete the import process and bind the certificate to the application for secure resource access.
